- URA Hiroshi が作成し、2016/12/26 に Takeshi Nishimura が最終更新
Shibboleth IdP 3に関する情報をまとめているページです。
動作確認環境
| OS | Java | Servlet | IdP |
|---|---|---|---|
| CentOS 7.2 | OpenJDK 7 (CentOS 7.2付属) | Apache Tomcat 7.0.54 (CentOS 7.2付属) | Shibboleth IdP 3.2.1 |
| CentOS 6.5 | OpenJDK 7 (CentOS 6.5付属) | Apache Tomcat 7.0.62 | Shibboleth IdP 3.2.1 |
| CentOS 6.5 | OpenJDK 7 (CentOS 6.5付属) | Apache Tomcat 7.0.62 | Shibboleth IdP 3.1.2 |
| CentOS 6.5 | Oracle Java 8u45 + JCE Unlimited Strength Jurisdiction Policy Files | Apache Tomcat 8.0.23 | Shibboleth IdP 3.1.2 |
設定
メタデータ
学認メタデータ
学認メタデータの読み込みはconf/metadata-providers.xmlで設定します。
conf/metadata-providers.xml
ここをクリックすると展開されます...conf/metadata-providers.xml<!-- --> <MetadataProvider id="HTTPMetadata" xsi:type="FileBackedHTTPMetadataProvider" backingFile="%{idp.home}/metadata/gakunin-metadata-backing.xml" metadataURL="https://metadata.gakunin.nii.ac.jp/gakunin-metadata.xml"> <MetadataFilter xsi:type="SignatureValidation" requireSignedRoot="true" certificateFile="%{idp.home}/credentials/gakunin-signer-2010.cer"/> <MetadataFilter xsi:type="RequiredValidUntil" maxValidityInterval="P15D"/> <MetadataFilter xsi:type="EntityRoleWhiteList"> <RetainedRole>md:SPSSODescriptor</RetainedRole> </MetadataFilter> </MetadataProvider> <!-- -->差分- <!-- + <!-- --> <MetadataProvider id="HTTPMetadata" xsi:type="FileBackedHTTPMetadataProvider" - backingFile="%{idp.home}/metadata/localCopyFromXYZHTTP.xml" - metadataURL="http://WHATEVER"> + backingFile="%{idp.home}/metadata/gakunin-metadata-backing.xml" + metadataURL="https://metadata.gakunin.nii.ac.jp/gakunin-metadata.xml"> - <MetadataFilter xsi:type="SignatureValidation" requireSignedRoot="true"> - <PublicKey> - MIIBI..... - </PublicKey> - </MetadataFilter> - <MetadataFilter xsi:type="RequiredValidUntil" maxValidityInterval="P30D"/> + <MetadataFilter xsi:type="SignatureValidation" requireSignedRoot="true" + certificateFile="%{idp.home}/credentials/gakunin-signer-2010.cer"/> + <MetadataFilter xsi:type="RequiredValidUntil" maxValidityInterval="P15D"/> <MetadataFilter xsi:type="EntityRoleWhiteList"> <RetainedRole>md:SPSSODescriptor</RetainedRole> </MetadataFilter> </MetadataProvider> - --> + <!-- -->Shibboleth IdP 3.2からSignatureValidationFilterのrequireSignedMetadataがrequireSignedRootに変更となりました。requireSignedMetadataの場合、下記のwarningメッセージが表示されます。
2015-12-18 18:33:35,232 - WARN [net.shibboleth.idp.profile.spring.relyingparty.metadata.filter.impl.SignatureValidationParser:128] - file [/opt/shibboleth-idp/conf/metadata-providers.xml] Use of the attribute 'requireSignedMetadata' is deprecated, use 'requireSignedRoot' instead
Shibboleth IdP 3.1の情報
学認メタデータの読み込みはconf/metadata-providers.xmlで設定します。
conf/metadata-providers.xml
conf/metadata-providers.xml<MetadataProvider id="HTTPMetadata" xsi:type="FileBackedHTTPMetadataProvider" backingFile="%{idp.home}/metadata/gakunin-metadata-backing.xml" metadataURL="https://metadata.gakunin.nii.ac.jp/gakunin-metadata.xml"> <MetadataFilter xsi:type="RequiredValidUntil" maxValidityInterval="P15D" /> <MetadataFilter xsi:type="SignatureValidation" requireSignedMetadata="true" certificateFile="%{idp.home}/credentials/gakunin-signer-2010.cer"/> <MetadataFilter xsi:type="EntityRoleWhiteList"> <RetainedRole>md:SPSSODescriptor</RetainedRole> </MetadataFilter> </MetadataProvider>
ローカルSPメタデータ
ローカルSPのメタデータはmetadata以下に配置して、conf/metadata-providers.xmlで設定します。
conf/metadata-providers.xml
SP1のメタデータsp1-metadata.xmlとSP2のメタデータsp2-metadata.xmlをmetadata以下に配置して、conf/metadata-providers.xmlでそれぞれのメタデータを読み込む設定例を以下に示します。ここをクリックすると展開されます...conf/metadata-providers.xml<!-- Example file metadata provider. Use this if you want to load metadata from a local file. You might use this if you have some local SPs which are not "federated" but you wish to offer a service to. If you do not provide a SignatureValidation filter, then you have the responsibility to ensure that the contents are trustworthy. --> <!-- <MetadataProvider id="LocalMetadata" xsi:type="FilesystemMetadataProvider" metadataFile="PATH_TO_YOUR_METADATA"/> --> <MetadataProvider id="LocalMetadataForSP1" xsi:type="FilesystemMetadataProvider" metadataFile="%{idp.home}/metadata/sp1-metadata.xml"/> <MetadataProvider id="LocalMetadataForSP2" xsi:type="FilesystemMetadataProvider" metadataFile="%{idp.home}/metadata/sp2-metadata.xml"/>差分<!-- Example file metadata provider. Use this if you want to load metadata from a local file. You might use this if you have some local SPs which are not "federated" but you wish to offer a service to. If you do not provide a SignatureValidation filter, then you have the responsibility to ensure that the contents are trustworthy. --> <!-- <MetadataProvider id="LocalMetadata" xsi:type="FilesystemMetadataProvider" metadataFile="PATH_TO_YOUR_METADATA"/> --> + <MetadataProvider id="LocalMetadataForExampleSP1" xsi:type="FilesystemMetadataProvider" metadataFile="%{idp.home}/metadata/examplesp1-metadata.xml"/> + <MetadataProvider id="LocalMetadataForExampleSP2" xsi:type="FilesystemMetadataProvider" metadataFile="%{idp.home}/metadata/examplesp2-metadata.xml"/>
認証
Shibboleth IdP 3からは、LDAPモジュールを用いたJAASによるパスワード認証に加えて、直接LDAPを参照するパスワード認証が追加されました。 デフォルトは直接LDAPを参照するパスワード認証です。 conf/authn/password-authn-config.xml conf/authn/jaas.config 参照するLDAPにあわせて、 CentOS 6 標準のopenldap-serversパッケージでLDAPサーバを構築した環境において、IdPからLDAPサーバにStartTLSで接続する設定について記載します。 LDAPサーバはホスト名 上記資料はCentOS 5系で記載されたものであるため、利用するバージョンに合わせて適宜読み替える必要があります。 IdPでは IdPバージョン2向けの LDAP Data Connectorでは、 ここでは2つの方法をご紹介します。 複数台のLDAPサーバ向けにLDAPプロキシサーバを設置し、IdPにはLDAPプロキシサーバを参照させます。 プロキシサーバを構築する際、ログイン画面で入力するID(Shibboleth内部ではprincipalと表現されます)について、同一のIDが複数のLDAPツリー上に存在しないことを確認してください。同一のIDが存在する場合には、属性取得で問題が発生します。uidがこの条件を満たさない場合は、メールアドレスや学籍番号・教職員番号等、他のLDAP属性を使うことを検討してください。 IdPの設定で複数のLDAPツリー或いは複数のLDAPサーバを参照する例がShibboleth Wiki:LDAPAuthnConfigurationの"DNResolution"の項にあります。最初の例("Single Directory with multiple branches"の"Extensible Matching")はLDAPサーバが一台のみで検索すべき複数のLDAPツリーがサブツリーの関係にある環境向けで、 LDAPサーバが一台であり複数のLDAPツリーがサブツリーの関係にある場合の例 次の2つの例("Single Directory with multiple branches - Aggregate DN Resolver"および"Multiple Directories")は複数のLDAPツリーがサブツリーとして扱えない環境、或いはLDAPサーバが複数の環境向けで、 LDAPサーバが一台であり複数のLDAPツリーがサブツリーとして扱えない場合の例 LDAPサーバが複数である場合の例 attribute-filter.xmlの変更はDataConnector "myLDAP" にデータが見つからない場合エラーとして扱うようにし、フェイルオーバー処理としてDataConnector "myLDAP2" から改めてデータを検索する設定になります。 1つ目の方法と同様、同一のIDが複数のLDAPツリー上に存在すると問題になりますので、uidがこの条件を満たさない場合は他のLDAP属性をID(principal)として使うようにしてください。 以下でご紹介しているExtendedフローはdeprecatedとなりShibboleth IdPバージョン5で削除される予定です。現行バージョンで当該機能を使っている方はMFAへの移行をご検討ください。 以下で4.1でもまだ有効な簡便な方法を説明していますが、3.3以降であればより汎用的で複雑な挙動が実現できるMFAによる方法もご参照ください。 Shibboleth IdP 3以降の高度な認証設定についてのドキュメントです。4.1以降で書式が大幅に変更になりましたのでそれに特化した記述になっております。本ドキュメントはSAML 2.0で認証の切り替えを行うことを目的としており、SAML1は対象外です(LevelXを用いた認証要求はできません)。 SAML1を使うことにより本設定の制約を迂回できることを避けるため、SPにおいてはshibboleth2.xmlにてSAML1の機能を無効化することをお勧めします。 本ドキュメントで使用する認証コンテクストと認証フローの関係を下記に示します。 ここでRemoteUserはパスワード認証とクライアント証明書認証の中間の強度の認証の例として挙げております。実際に運用する場合は別途用意した認証フローで置き換えてください。また、レベルとの対応付けも本ドキュメント独自のもので、例示として使用しています。 この認証コンテクストとは別に、PasswordやX509は固有の認証コンテクストを持っていますが、ここでは使用しません。 挙動の説明で使用するSPについて下記に示します。 既に認証済みの認証フローを優先するために、 各認証フローの 必要であればRelyingPartyOverridesのほうのSAML2.SSOにも同様の設定を追加してください。 認証フローの階層化の設定を行ってください。 Shibboleth IdP 4.1および4.2にはバグがありますので手動でaddDefaultPrincipalsをfalseにしてください。 Shibboleth IdP 4.0.0および4.0.1をお使いの場合および以降のバージョンでも以前のバージョンからアップデートしている場合は、login.vmにバグがあり追加のボタンが表示されませんので、以下の修正を行ってください。 各SPからIdPにリダイレクトされた時に表示されるPassword認証フローのログインページを下記に示します。 SPaおよびSPbからの場合 「Login」とボタンの形状が同じで紛らわしいですが、Extendedフローを利用する場合は上部のフォーム(「Username」と「Passowrd」)の入力は不要です。 高度な認証フローを設定する上で、参考になるドキュメントを下記に示します。 Shibboleth IdP 3.3より導入されたMultiFactor認証フロー(MFA)の認証設定についてのドキュメントです。本ドキュメントはSAML 2.0で認証の切り替えを行うことを目的としており、SAML1は対象外です(LevelXを用いた認証要求はできません)。 SAML1を使うことにより本設定の制約を迂回できることを避けるため、SPにおいてはshibboleth2.xmlにてSAML1の機能を無効化することをお勧めします。 MultiFactor認証フローは、シンプルないし複雑な認証シーケンスを作るために複数の認証フローを組み合わせるスクリプト記述可能な方法を提供します。 MultiFactor認証フローの設定は、 また、 もっと簡単なルールは、最初の認証フローが成功した場合に、次に実行する認証フローを指定します。 下記の例は、最初にPassword認証フローによる認証を行い、Password認証フローの認証が成功した場合にX509認証フローの認証が行われます。X509認証フローの認証が成功すると認証成功となります。 より複雑なルールを実現するには、Script、Spring Expression、もしくはJavaで記述した関数を実行します。 下記の例は、以下の認証シーケンスを実現しています。 なお、 最も複雑なルールを実現するために、Spring WebFlowイベントに基づいて完全に遷移を制御できます。 下記の例ではShibboleth IdPバージョン2向けにNIIと金沢大学で共同開発したGUARDプラグインと同様な認証シーケンスを実現します。GUARDプラグインについては、2015年2月に金沢大学の松平様が発表された『大学統合認証基盤における多要素認証について』の12ページをご参照ください。下記の例での認証コンテクストと認証フローの関係を以下に示します。 (機関内) パスワード OR RemoteUser OR X509 (機関外) RemoteUser OR X509 Level2, Level3で異なる認証フローを使用したい場合は16行目から23行目、および31行目の 下記ファイルをダウンロードして配置します。 Level2, Level3で異なる認証フローを使用したい場合は、 Level1のパスワード認証を用意します。 Level3のRemoteUser認証を用意します。 Shibboleth IdP 3の高度な認証設定に従い、 Level2のPassword認証フローに機関のIPアドレスレンジ(下記例では203.0.113.0/24)を設定します。 LDAPを用いたパスワード認証
直接LDAPを参照するパスワード認証
conf/ldap.properties
参照するLDAPにあわせて、Connection properties, SSL configuration, Search DN resolutionのプロパティを設定します。## Connection properties ##
idp.authn.LDAP.ldapURL = ldap://localhost:389
idp.authn.LDAP.useStartTLS = false
#idp.authn.LDAP.useSSL = false
#idp.authn.LDAP.connectTimeout = 3000
# Search DN resolution, used by anonSearchAuthenticator, bindSearchAuthenticator
# for AD: CN=Users,DC=example,DC=org
idp.authn.LDAP.baseDN = ou=people,dc=example,dc=ac,dc=jp
idp.authn.LDAP.subtreeSearch = true
idp.authn.LDAP.userFilter = (uid={user})
# bind search configuration
# for AD: idp.authn.LDAP.bindDN=adminuser@domain.com
idp.authn.LDAP.bindDN =
idp.authn.LDAP.bindDNCredential =
 ## Connection properties ##
-idp.authn.LDAP.ldapURL                          = ldap://localhost:10389
-#idp.authn.LDAP.useStartTLS                     = true
+idp.authn.LDAP.ldapURL                          = ldap://localhost:389
+idp.authn.LDAP.useStartTLS                      = false
 #idp.authn.LDAP.useSSL                          = false
 #idp.authn.LDAP.connectTimeout                  = 3000


 # Search DN resolution, used by anonSearchAuthenticator, bindSearchAuthenticator
 # for AD: CN=Users,DC=example,DC=org
-idp.authn.LDAP.baseDN                           = ou=people,dc=example,dc=org
-#idp.authn.LDAP.subtreeSearch                   = false
+idp.authn.LDAP.baseDN                           = ou=people,dc=example,dc=ac,dc=jp
+idp.authn.LDAP.subtreeSearch                    = true
 idp.authn.LDAP.userFilter                       = (uid={user})
 # bind search configuration
 # for AD: idp.authn.LDAP.bindDN=adminuser@domain.com
-idp.authn.LDAP.bindDN                           = uid=myservice,ou=system
-idp.authn.LDAP.bindDNCredential                 = myServicePassword
+idp.authn.LDAP.bindDN                           =
+idp.authn.LDAP.bindDNCredential                 =
JAASによるパスワード認証
<import resource="jaas-authn-config.xml" />の行をアンコメントして、<import resource="ldap-authn-config.xml" />の行をコメントアウトします。<!-- Choose an import based on the back-end you want to use. -->
<import resource="jaas-authn-config.xml" />
<!-- <import resource="krb5-authn-config.xml" /> -->
<!-- <import resource="ldap-authn-config.xml" /> -->
org.ldaptive.jaas.LdapLoginModule required以降の行を設定します。ShibUserPassAuth {
/*
com.sun.security.auth.module.Krb5LoginModule required;
*/
org.ldaptive.jaas.LdapLoginModule required
ldapUrl="ldap://localhost"
baseDn="ou=people,dc=example,dc=ac,dc=jp"
ssl="false"
userFilter="uid={user}"
subtreeSearch="true"
;
};
LDAPサーバにStartTLSで接続する方法(LDAPサーバがCentOS 6の場合)
ldaptest1.gakunin.nii.ac.jp として説明します。 LDAPプロキシサーバ : 複数台LDAPサーバ向けのLDAPプロキシサーバ設定方法 の「LDAPサーバ設定(ldaptest1)」を参考に OpenLDAP の設定を行ってください。この説明で利用する証明書の情報は「LDAPサーバ設定(ldaptest1)」の設定に準じます。ldap.properties, attribute-resolver.xml に下記の設定を行います。例としてLDAPサーバのCA証明書は /etc/pki/tls/certs/gakuninca.pem として配置しています。(省略)## Connection properties ##idp.authn.LDAP.ldapURL = ldap://ldaptest1.gakunin.nii.ac.jpidp.authn.LDAP.useStartTLS = true#idp.authn.LDAP.useSSL = false#idp.authn.LDAP.connectTimeout = 3000## SSL configuration, either jvmTrust, certificateTrust, or keyStoreTrustidp.authn.LDAP.sslConfig = certificateTrust ← アンコメント## If using certificateTrust above, set to the trusted certificate's pathidp.authn.LDAP.trustCertificates = /etc/pki/tls/certs/gakuninca.pem## If using keyStoreTrust above, set to the truststore pathidp.authn.LDAP.trustStore = %{idp.home}/credentials/ldap-server.truststore(省略) <DataConnector id="myLDAP" xsi:type="LDAPDirectory"
ldapURL="%{idp.attribute.resolver.LDAP.ldapURL}"
baseDN="%{idp.attribute.resolver.LDAP.baseDN}"
principal="%{idp.attribute.resolver.LDAP.bindDN}"
principalCredential="%{idp.attribute.resolver.LDAP.bindDNCredential}"
useStartTLS="%{idp.attribute.resolver.LDAP.useStartTLS:true}"
connectTimeout="%{idp.attribute.resolver.LDAP.connectTimeout}"
responseTimeout="%{idp.attribute.resolver.LDAP.responseTimeout}"
noResultIsError="%{idp.attribute.resolver.LDAP.noResultIsError:true}"
trustFile="%{idp.attribute.resolver.LDAP.trustCertificates}"> ↑上記のように > の直前に挿入してください <resolver:DataConnector id="myLDAP" xsi:type="dc:LDAPDirectory"(省略)↓以下の3行を
</resolver:DataConnector>の直前に挿入してください <dc:StartTLSTrustCredential id="LDAPtoIdPCredential" xsi:type="sec:X509ResourceBacked">
<sec:Certificate>%{idp.attribute.resolver.LDAP.trustCertificates}</sec:Certificate>
</dc:StartTLSTrustCredential>
</resolver:DataConnector>attribute-resolver.xmlはldap.propertiesを参照しないため齟齬が発生する恐れがあります。最新のattribute-resolverテンプレートを使用するようにしてください。idp.authn.LDAP.sslConfigはcertificateTrustのみ使用可能です。複数台のLDAPサーバを参照するための方法
1. 複数台LDAPサーバ向けのLDAPプロキシサーバを使用する
使用するLDAPプロキシサーバの設定方法について、まとめられた資料があります。資料はCentOS 5系で記載されたものであるため、利用するバージョンに合わせて適宜読み替える必要があります。2. IdPの設定ファイルで複数台LDAPサーバを指定する
ldap.propertiesのみの変更で対応が可能です。idp.authn.LDAP.baseDNのサブツリーを検索するようidp.authn.LDAP.subtreeSearchとidp.authn.LDAP.userFilterを設定します。# Search DN resolution, used by anonSearchAuthenticator, bindSearchAuthenticator# for AD: CN=Users,DC=example,DC=orgidp.authn.LDAP.baseDN = o=test_o,dc=ac,c=JPidp.authn.LDAP.subtreeSearch = true ← trueを設定
idp.authn.LDAP.userFilter = (&(|(ou:dn:=Test Unit1)(ou:dn:=technology))(uid={user})) ← o=test_o,dc=ac,c=JPのサブツリー、ou=Test Unit1とou=technologyを検索するよう設定ldap.propertiesとldap-authn-config.xmlを変更します。
LDAPサーバ/LDAPツリーの数に応じて、ldap.properties内の項目を追加してauthn-ldap-config.xmlでそれらを参照するようにします。
また、これらの例は認証処理のための設定なので、SPへ送出する属性をLDAPから取得している場合はattribute-resolver.xmlを変更し、ldap.propertiesに追加した項目を参照するLDAP DataConnectorを追加します。 <bean name="aggregateAuthenticator" class="org.ldaptive.auth.Authenticator"> <constructor-arg index="0" ref="aggregateDnResolver" /> <constructor-arg index="1" ref="aggregateAuthHandler" /> </bean> <bean id="aggregateDnResolver" class="org.ldaptive.auth.AggregateDnResolver"> <constructor-arg index="0" ref="dnResolvers" /> </bean> <bean id="aggregateAuthHandler" class="org.ldaptive.auth.AggregateDnResolver$AuthenticationHandler" p:authenticationHandlers-ref="authHandlers" /> <util:map id="dnResolvers"> <entry key="filter1" value-ref="dnResolver1" /> <entry key="filter2" value-ref="dnResolver2" /> </util:map> <!-- Define two DN resolvers that use anonymous search against the same directory --> <bean id="dnResolver1" class="org.ldaptive.auth.PooledSearchDnResolver" p:baseDn="%{idp.authn.LDAP.baseDN}" p:subtreeSearch="%{idp.authn.LDAP.subtreeSearch:false}" p:userFilter="%{idp.authn.LDAP.userFilter}" p:connectionFactory-ref="anonSearchPooledConnectionFactory" /> <bean id="dnResolver2" class="org.ldaptive.auth.PooledSearchDnResolver" p:baseDn="%{idp.authn.LDAP.baseDN2}" p:subtreeSearch="%{idp.authn.LDAP.subtreeSearch:false}" p:userFilter="%{idp.authn.LDAP.userFilter2}" p:connectionFactory-ref="anonSearchPooledConnectionFactory" /> <!-- Use the same authentication handler for both DN resolvers --> <util:map id="authHandlers"> <entry key="filter1" value-ref="authHandler" /> <entry key="filter2" value-ref="authHandler" /> </util:map> ← </beans>の前に追加</beans> idp.authn.LDAP.authenticator = aggregateAuthenticator ← ldap-authn-config.xmlに追加したclass="org.ldaptive.auth.Authenticator"のbeanのnameに変更(省略)# Search DN resolution, used by anonSearchAuthenticator, bindSearchAuthenticator# for AD: CN=Users,DC=example,DC=orgidp.authn.LDAP.baseDN = LDAPツリー1のBaseDN ← 変更idp.authn.LDAP.baseDN2 = LDAPツリー2のBaseDN ← 追加idp.authn.LDAP.subtreeSearch = trueidp.authn.LDAP.userFilter = (LDAPツリー1の検索キー={user}) ← 変更idp.authn.LDAP.userFilter2 = (LDAPツリー2の検索キー={user}) ← 追加(省略)# LDAP attribute configuration, see attribute-resolver.xml# Note, this likely won't apply to the use of legacy V2 resolver configurationsidp.attribute.resolver.LDAP.ldapURL = %{idp.authn.LDAP.ldapURL}idp.attribute.resolver.LDAP.baseDN = %{idp.authn.LDAP.baseDN:undefined}idp.attribute.resolver.LDAP.baseDN2 = %{idp.authn.LDAP.baseDN2:undefined} ← 追加idp.attribute.resolver.LDAP.bindDN = %{idp.authn.LDAP.bindDN:undefined} <resolver:DataConnector id="myLDAP" xsi:type="dc:LDAPDirectory"
ldapURL="%{idp.attribute.resolver.LDAP.ldapURL}"
baseDN="%{idp.attribute.resolver.LDAP.baseDN}"
principal="%{idp.attribute.resolver.LDAP.bindDN}"
principalCredential="%{idp.attribute.resolver.LDAP.bindDNCredential}"
noResultIsError="True" ← 追加
useStartTLS="%{idp.attribute.resolver.LDAP.useStartTLS:true}">
<resolver:FailoverDataConnector ref="myLDAP2" /> ← 追加(dcより前に追加する必要があります)
<dc:FilterTemplate>
<![CDATA[
%{idp.attribute.resolver.LDAP.searchFilter}
]]>
</dc:FilterTemplate>
        <dc:StartTLSTrustCredential id="LDAPtoIdPCredential" xsi:type="sec:X509ResourceBacked">
            <sec:Certificate>%{idp.attribute.resolver.LDAP.trustCertificates}</sec:Certificate>
        </dc:StartTLSTrustCredential>
   </resolver:DataConnector>
↓以下の行を追加
<resolver:DataConnector id="myLDAP2" xsi:type="dc:LDAPDirectory"
ldapURL="%{idp.attribute.resolver.LDAP.ldapURL}"
baseDN="%{idp.attribute.resolver.LDAP.baseDN2}"
principal="%{idp.attribute.resolver.LDAP.bindDN}"
principalCredential="%{idp.attribute.resolver.LDAP.bindDNCredential}"
noResultIsError="True"
useStartTLS="%{idp.attribute.resolver.LDAP.useStartTLS:true}">
<dc:FilterTemplate>
<![CDATA[
%{idp.attribute.resolver.LDAP.searchFilter}
]]>
</dc:FilterTemplate>
<dc:StartTLSTrustCredential id="LDAPtoIdPCredential" xsi:type="sec:X509ResourceBacked">
<sec:Certificate>%{idp.attribute.resolver.LDAP.trustCertificates}</sec:Certificate>
</dc:StartTLSTrustCredential>
</resolver:DataConnector> <alias name="%{idp.authn.LDAP.sslConfig2:certificateTrust2}" alias="sslConfig2" /> <bean id="certificateTrust2" class="org.ldaptive.ssl.SslConfig"> <property name="credentialConfig"> <bean parent="shibboleth.X509ResourceCredentialConfig" p:trustCertificates="%{idp.authn.LDAP.trustCertificates2:undefined}" /> </property> </bean> <bean id="keyStoreTrust2" class="org.ldaptive.ssl.SslConfig"> <property name="credentialConfig"> <bean parent="shibboleth.KeystoreResourceCredentialConfig" p:truststore="%{idp.authn.LDAP.trustStore2:undefined}" /> </property> </bean> <bean name="aggregateAuthenticator" class="org.ldaptive.auth.Authenticator" c:resolver-ref="aggregateDnResolver" c:handler-ref="aggregateAuthHandler" />
<!-- Aggregate DN resolution --> <bean id="aggregateDnResolver" class="org.ldaptive.auth.AggregateDnResolver" c:resolvers-ref="dnResolvers" p:allowMultipleDns="true" /> <util:map id="dnResolvers"> <entry key="directory1" value-ref="bindSearchDnResolver1" /> <entry key="directory2" value-ref="bindSearchDnResolver2" /> </util:map>
<!-- DN resolver 1 --> <bean id="bindSearchDnResolver1" class="org.ldaptive.auth.PooledSearchDnResolver" p:baseDn="#{'%{idp.authn.LDAP.baseDN:undefined}'.trim()}" p:subtreeSearch="%{idp.authn.LDAP.subtreeSearch:false}" p:userFilter="#{'%{idp.authn.LDAP.userFilter:undefined}'.trim()}" p:connectionFactory-ref="bindSearchPooledConnectionFactory" /> <bean id="bindSearchPooledConnectionFactory1" class="org.ldaptive.pool.PooledConnectionFactory" p:connectionPool-ref="bindSearchConnectionPool1" /> <bean id="bindSearchConnectionPool1" class="org.ldaptive.pool.BlockingConnectionPool" parent="connectionPool" p:connectionFactory-ref="bindSearchConnectionFactory1" p:name="search-pool1" /> <bean id="bindSearchConnectionFactory1" class="org.ldaptive.DefaultConnectionFactory" p:connectionConfig-ref="bindSearchConnectionConfig1" /> <bean id="bindSearchConnectionConfig1" parent="connectionConfig" p:connectionInitializer-ref="bindConnectionInitializer1" p:ldapUrl="%{idp.authn.LDAP.ldapURL}" /> <bean id="bindConnectionInitializer1" class="org.ldaptive.BindConnectionInitializer" p:bindDn="#{'%{idp.authn.LDAP.bindDN:undefined}'.trim()}"> <property name="bindCredential"> <bean class="org.ldaptive.Credential" c:password="%{idp.authn.LDAP.bindDNCredential:undefined}" /> </property> </bean> <!-- DN resolver 2 --> <bean id="bindSearchDnResolver2" class="org.ldaptive.auth.PooledSearchDnResolver" p:baseDn="#{'%{idp.authn.LDAP.baseDN2:undefined}'.trim()}" p:subtreeSearch="%{idp.authn.LDAP.subtreeSearch:false}" p:userFilter="#{'%{idp.authn.LDAP.userFilter2:undefined}'.trim()}" p:connectionFactory-ref="bindSearchPooledConnectionFactory" /> <bean id="bindSearchPooledConnectionFactory2" class="org.ldaptive.pool.PooledConnectionFactory" p:connectionPool-ref="bindSearchConnectionPool2" /> <bean id="bindSearchConnectionPool2" class="org.ldaptive.pool.BlockingConnectionPool" parent="connectionPool" p:connectionFactory-ref="bindSearchConnectionFactory2" p:name="search-pool2" /> <bean id="bindSearchConnectionFactory2" class="org.ldaptive.DefaultConnectionFactory" p:connectionConfig-ref="bindSearchConnectionConfig2" /> <bean id="bindSearchConnectionConfig2" parent="connectionConfig" p:connectionInitializer-ref="bindConnectionInitializer2" p:ldapUrl="%{idp.authn.LDAP.ldapURL2}" p:useStartTLS="%{idp.authn.LDAP.useStartTLS2:true}" p:useSSL="%{idp.authn.LDAP.useSSL2:false}" p:connectTimeout="%{idp.authn.LDAP.connectTimeout2:3000}" p:sslConfig-ref="sslConfig2" /> <bean id="bindConnectionInitializer2" class="org.ldaptive.BindConnectionInitializer" p:bindDn="#{'%{idp.authn.LDAP.bindDN2:undefined}'.trim()}"> <property name="bindCredential"> <bean class="org.ldaptive.Credential" c:password="%{idp.authn.LDAP.bindDNCredential2:undefined}" /> </property> </bean> <!-- Aggregate authentication --> <bean id="aggregateAuthHandler" class="org.ldaptive.auth.AggregateDnResolver$AuthenticationHandler" p:authenticationHandlers-ref="authHandlers" /> <util:map id="authHandlers"> <entry key="directory1" value-ref="authHandler1" /> <entry key="directory2" value-ref="authHandler2" /> </util:map> <!-- Authentication handler 1 --> <bean id="authHandler1" class="org.ldaptive.auth.PooledBindAuthenticationHandler" p:connectionFactory-ref="bindPooledConnectionFactory1" /> <bean id="bindPooledConnectionFactory1" class="org.ldaptive.pool.PooledConnectionFactory" p:connectionPool-ref="bindConnectionPool1" /> <bean id="bindConnectionPool1" class="org.ldaptive.pool.BlockingConnectionPool" parent="connectionPool" p:connectionFactory-ref="bindConnectionFactory1" p:name="bind-pool1" /> <bean id="bindConnectionFactory1" class="org.ldaptive.DefaultConnectionFactory" p:connectionConfig-ref="bindConnectionConfig1" /> <bean id="bindConnectionConfig1" parent="connectionConfig" p:ldapUrl="%{idp.authn.LDAP.ldapURL}" /> <!-- Authentication handler 2 --> <bean id="authHandler2" class="org.ldaptive.auth.PooledBindAuthenticationHandler" p:connectionFactory-ref="bindPooledConnectionFactory2" /> <bean id="bindPooledConnectionFactory2" class="org.ldaptive.pool.PooledConnectionFactory" p:connectionPool-ref="bindConnectionPool2" /> <bean id="bindConnectionPool2" class="org.ldaptive.pool.BlockingConnectionPool" parent="connectionPool" p:connectionFactory-ref="bindConnectionFactory2" p:name="bind-pool2" /> <bean id="bindConnectionFactory2" class="org.ldaptive.DefaultConnectionFactory" p:connectionConfig-ref="bindConnectionConfig2" /> <bean id="bindConnectionConfig2" parent="connectionConfig" p:ldapUrl="%{idp.authn.LDAP.ldapURL2}" p:useStartTLS="%{idp.authn.LDAP.useStartTLS2:true}" p:useSSL="%{idp.authn.LDAP.useSSL2:false}" p:connectTimeout="%{idp.authn.LDAP.connectTimeout2:3000}" p:sslConfig-ref="sslConfig2" /> ← </beans>の前に追加
</beans>idp.authn.LDAP.authenticator = aggregateAuthenticator ← ldap-authn-config.xmlに追加したclass="org.ldaptive.auth.Authenticator"のbeanのnameに変更## Connection properties ##idp.authn.LDAP.ldapURL = LDAPサーバ1のURL ← 変更idp.authn.LDAP.ldapURL2 = LDAPサーバ2のURL ← 追加idp.authn.LDAP.useStartTLS = trueidp.authn.LDAP.useStartTLS2 = true#idp.authn.LDAP.useSSL = false#idp.authn.LDAP.connectTimeout = 3000
## SSL configuration, either jvmTrust, certificateTrust, or keyStoreTrustidp.authn.LDAP.sslConfig = certificateTrust
↓ 追加(certificateTrustかkeyStoreTrustを指定する際はldap-authn-config.xmlに追加したLDAPサーバ2用のclass="org.ldaptive.ssl.SslConfig"のbeanのidを指定)idp.authn.LDAP.sslConfig2 = certificateTrust2 ← 追加## If using certificateTrust above, set to the trusted certificate's pathidp.authn.LDAP.trustCertificates = LDAPサーバ1の証明書 ← 変更idp.authn.LDAP.trustCertificates2 = LDAPサーバ2の証明書 ← 追加## If using keyStoreTrust above, set to the truststore pathidp.authn.LDAP.trustStore = LDAPサーバ1のキーストア ← 変更idp.authn.LDAP.trustStore2 = LDAPサーバ2のキーストア ← 追加
(省略)
# Search DN resolution, used by anonSearchAuthenticator, bindSearchAuthenticator
# for AD: CN=Users,DC=example,DC=org
idp.authn.LDAP.baseDN = LDAPサーバ1のBaseDN ← 変更
idp.authn.LDAP.baseDN2 = LDAPサーバ2のBaseDN ← 追加
idp.authn.LDAP.subtreeSearch = true
idp.authn.LDAP.userFilter = (LDAPサーバ1の検索キー={user}) ← 変更
idp.authn.LDAP.userFilter2 = (LDAPサーバ2の検索キー={user}) ← 追加
# bind search configuration
# for AD: idp.authn.LDAP.bindDN=adminuser@domain.com
idp.authn.LDAP.bindDN = LDAPサーバ1のBindDN ← 変更
idp.authn.LDAP.bindDN2 = LDAPサーバ2のBindDN ← 追加
idp.authn.LDAP.bindDNCredential = LDAPサーバ1のBindDNパスワード ← 変更
idp.authn.LDAP.bindDNCredential2 = LDAPサーバ2のBindDNパスワード ← 追加
(省略)
# LDAP attribute configuration, see attribute-resolver.xml
# Note, this likely won't apply to the use of legacy V2 resolver configurations
idp.attribute.resolver.LDAP.ldapURL = %{idp.authn.LDAP.ldapURL}
idp.attribute.resolver.LDAP.ldapURL2 = %{idp.authn.LDAP.ldapURL2} ← 追加
idp.attribute.resolver.LDAP.baseDN = %{idp.authn.LDAP.baseDN:undefined}
idp.attribute.resolver.LDAP.baseDN2 = %{idp.authn.LDAP.baseDN2:undefined} ← 追加
idp.attribute.resolver.LDAP.bindDN = %{idp.authn.LDAP.bindDN:undefined}
idp.attribute.resolver.LDAP.bindDN2 = %{idp.authn.LDAP.bindDN2:undefined} ← 追加
idp.attribute.resolver.LDAP.bindDNCredential = %{idp.authn.LDAP.bindDNCredential:undefined}
idp.attribute.resolver.LDAP.bindDNCredential2 = %{idp.authn.LDAP.bindDNCredential2:undefined} ← 追加
idp.attribute.resolver.LDAP.useStartTLS = %{idp.authn.LDAP.useStartTLS:true}
idp.attribute.resolver.LDAP.useStartTLS2 = %{idp.authn.LDAP.useStartTLS2:true} ← 追加
idp.attribute.resolver.LDAP.trustCertificates = %{idp.authn.LDAP.trustCertificates:undefined}
idp.attribute.resolver.LDAP.trustCertificates2 = %{idp.authn.LDAP.trustCertificates2:undefined} ← 追加
idp.attribute.resolver.LDAP.searchFilter = (LDAPサーバ1の検索キー=$resolutionContext.principal) ← 変更
idp.attribute.resolver.LDAP.searchFilter2 = (LDAPサーバ2の検索キー=$resolutionContext.principal) ← 追加
idp.attribute.resolver.LDAP.returnAttributes = cn,homephone,mail <resolver:DataConnector id="myLDAP" xsi:type="dc:LDAPDirectory"
ldapURL="%{idp.attribute.resolver.LDAP.ldapURL}"
baseDN="%{idp.attribute.resolver.LDAP.baseDN}"
principal="%{idp.attribute.resolver.LDAP.bindDN}"
principalCredential="%{idp.attribute.resolver.LDAP.bindDNCredential}"
noResultIsError="True" ← 追加
useStartTLS="%{idp.attribute.resolver.LDAP.useStartTLS:true}">
<resolver:FailoverDataConnector ref="myLDAP2" /> ← 追加(dcより前に追加する必要があります)
<dc:FilterTemplate>
<![CDATA[
%{idp.attribute.resolver.LDAP.searchFilter}
]]>
</dc:FilterTemplate>
<dc:StartTLSTrustCredential id="LDAPtoIdPCredential" xsi:type="sec:X509ResourceBacked">
<sec:Certificate>%{idp.attribute.resolver.LDAP.trustCertificates}</sec:Certificate>
</dc:StartTLSTrustCredential>
</resolver:DataConnector>
↓以下の行を追加
<resolver:DataConnector id="myLDAP2" xsi:type="dc:LDAPDirectory"
ldapURL="%{idp.attribute.resolver.LDAP.ldapURL2}"
baseDN="%{idp.attribute.resolver.LDAP.baseDN2}"
principal="%{idp.attribute.resolver.LDAP.bindDN2}"
principalCredential="%{idp.attribute.resolver.LDAP.bindDNCredential2}"
noResultIsError="True"
useStartTLS="%{idp.attribute.resolver.LDAP.useStartTLS2:true}">
<dc:FilterTemplate>
<![CDATA[
%{idp.attribute.resolver.LDAP.searchFilter2}
]]>
</dc:FilterTemplate>
<dc:StartTLSTrustCredential id="LDAPtoIdPCredential" xsi:type="sec:X509ResourceBacked">
<sec:Certificate>%{idp.attribute.resolver.LDAP.trustCertificates2}</sec:Certificate>
</dc:StartTLSTrustCredential>
</resolver:DataConnector>Shibboleth IdP 3の高度な認証設定
認証コンテクスト 略称 認証フロー urn:mace:gakunin.jp:idprivacy:ac:classes:Level1Level1Passwordurn:mace:gakunin.jp:idprivacy:ac:classes:Level2Level2RemoteUserurn:mace:gakunin.jp:idprivacy:ac:classes:Level3Level3X509 SP 要求する認証 SPa なしSPb urn:mace:gakunin.jp:idprivacy:ac:classes:Level1SPc urn:mace:gakunin.jp:idprivacy:ac:classes:Level2SPd urn:mace:gakunin.jp:idprivacy:ac:classes:Level3 認証フローの階層化
設定
conf/authn/authn.propertiesのidp.authn.favorSSOをアンコメントしtrueに設定します。 # Whether to prioritize "active" results when an SP requests more than
# one possible matching login method (V2 behavior was to favor them)
-#idp.authn.favorSSO = false
+idp.authn.favorSSO = true
supportedPrincipalsプロパティに下記を追加します。認証フロー supportedPrincipalsプロパティPassword継承元の shibboleth.AuthenticationFlowで定義されているsupportedPrincipals, Level1RemoteUserLevel2, Level1X509Level3, Level2, Level1@@ -56,10 +56,11 @@
# Unset if using customized Principals per validator
#idp.authn.Password.addDefaultPrincipals = true
# The Principal collection below is the typical default if not otherwise noted.
-#idp.authn.Password.supportedPrincipals = \
-# saml2/urn:oasis:names:tc:SAML:2.0:ac:classes:PasswordProtectedTransport, \
-# saml2/urn:oasis:names:tc:SAML:2.0:ac:classes:Password, \
-# saml1/urn:oasis:names:tc:SAML:1.0:am:password
+idp.authn.Password.supportedPrincipals = \
+ saml2/urn:oasis:names:tc:SAML:2.0:ac:classes:PasswordProtectedTransport, \
+ saml2/urn:oasis:names:tc:SAML:2.0:ac:classes:Password, \
+ saml1/urn:oasis:names:tc:SAML:1.0:am:password, \
+ saml2/urn:mace:gakunin.jp:idprivacy:ac:classes:Level1
# Validators are controlled in password-authn-config.xml
#### Password Backends ####
@@ -97,7 +98,9 @@
idp.authn.RemoteUser.supportedPrincipals = \
saml2/urn:oasis:names:tc:SAML:2.0:ac:classes:X509, \
saml2/urn:oasis:names:tc:SAML:2.0:ac:classes:TLSClient, \
- saml1/urn:ietf:rfc:2246
+ saml1/urn:ietf:rfc:2246, \
+ saml2/urn:mace:gakunin.jp:idprivacy:ac:classes:Level2, \
+ saml2/urn:mace:gakunin.jp:idprivacy:ac:classes:Level1
#### RemoteUserInternal ####
@@ -137,7 +140,10 @@
idp.authn.X509.supportedPrincipals = \
saml2/urn:oasis:names:tc:SAML:2.0:ac:classes:X509, \
saml2/urn:oasis:names:tc:SAML:2.0:ac:classes:TLSClient, \
- saml1/urn:ietf:rfc:2246
+ saml1/urn:ietf:rfc:2246, \
+ saml2/urn:mace:gakunin.jp:idprivacy:ac:classes:Level3, \
+ saml2/urn:mace:gakunin.jp:idprivacy:ac:classes:Level2, \
+ saml2/urn:mace:gakunin.jp:idprivacy:ac:classes:Level1
#### X509Internal ####
conf/relying-party.xmlのshibboleth.DefaultRelyingParty内のSAML2.SSOにdefaultAuthenticationMethodsプロパティを設定します。 <bean id="shibboleth.DefaultRelyingParty" parent="RelyingParty">
<property name="profileConfigurations">
<list>
<bean parent="Shibboleth.SSO" p:postAuthenticationFlows="attribute-release" />
<ref bean="SAML1.AttributeQuery" />
<ref bean="SAML1.ArtifactResolution" />
- <bean parent="SAML2.SSO" p:postAuthenticationFlows="attribute-release" />
+ <bean parent="SAML2.SSO" p:postAuthenticationFlows="attribute-release">
+ <property name="defaultAuthenticationMethods">
+ <list>
+ <bean parent="shibboleth.SAML2AuthnContextClassRef"
+ c:classRef="urn:mace:gakunin.jp:idprivacy:ac:classes:Level1" />
+ </list>
+ </property>
+ </bean>
<ref bean="SAML2.ECP" />
<ref bean="SAML2.Logout" />
<ref bean="SAML2.AttributeQuery" />
<ref bean="SAML2.ArtifactResolution" />
<ref bean="Liberty.SSOS" />
</list>
</property>
</bean>
挙動
未認証の場合
Level1のPassword認証フローのログインページが表示されます。Level2のRemoteUser認証フローのためのログインページやダイアログが表示されます。Level3のX509認証フローのログインページが表示されます。Level1が認証済みの場合Level1のPassword認証フローが認証済みのためユーザ同意画面もしくは認証後のSPの画面が表示されます。Level2のRemoteUser認証フローのためのログインページやダイアログが表示されます。Level3のX509認証フローのログインページが表示されます。Level2が認証済みの場合Level2のRemoteUser認証フローが認証済みのためユーザ同意画面もしくは認証後のSPの画面が表示されます。Level2のRemoteUser認証フローが認証済みのためユーザ同意画面もしくはSPの画面が表示されます。Level3のX509認証フローのログインページが表示されます。Level3が認証済みの場合Level3のX509認証フローが認証済みのためユーザ同意画面もしくは認証後のSPの画面が表示されます。Level3のX509認証フローが認証済みのためユーザ同意画面もしくは認証後のSPの画面が表示されます。Level3のX509認証フローが認証済みのためユーザ同意画面もしくは認証後のSPの画面が表示されます。Password認証フローのExtendedフロー
設定
conf/authn/authn.properties のauthn/PasswordにExtendedフローで利用するLevel2, Level3を追加します。 saml2/urn:oasis:names:tc:SAML:2.0:ac:classes:PasswordProtectedTransport, \
saml2/urn:oasis:names:tc:SAML:2.0:ac:classes:Password, \
saml1/urn:oasis:names:tc:SAML:1.0:am:password, \
- saml2/urn:mace:gakunin.jp:idprivacy:ac:classes:Level1
+ saml2/urn:mace:gakunin.jp:idprivacy:ac:classes:Level1, \
+ saml2/urn:mace:gakunin.jp:idprivacy:ac:classes:Level2, \
+ saml2/urn:mace:gakunin.jp:idprivacy:ac:classes:Level3
# Validators are controlled in password-authn-config.xml
conf/authn/password-authn-config.xmlでExtendedフローのbeanをアンコメントし、下記の設定を行います。もし当該ファイルにこの部分が存在しなければ、最終行の1つ上にこの部分を挿入してください。shibboleth.authn.Password.ExtendedFlowsのc:_0に、ExtendedフローとするRemoteUserとX509を設定します。shibboleth.authn.Password.PrincipalOverrideに、Password認証フローで認証するLevel1を追加します。Level2やLevel3を除いているところがポイントです。 <!--
Configuration of "extended" login methods to offer in the password login form.
The String bean is a regular expression identifying the flows to offer. These flows
must also be enabled at the "top" level to be available for use.
The ExtendedFlowParameters bean can be used to transfer custom parameters from the
login form into the context tree for use later by other flows.
The last bean provides the set of custom Principals to use for results produced by the
Password flow itself. You would use this if you need the Password flow to run as a shell
to run the "extended" login methods, but want to limit its own results more narrowly.
-->
- <!--
- <bean id="shibboleth.authn.Password.ExtendedFlows" class="java.lang.String" c:_0="" />
+ <bean id="shibboleth.authn.Password.ExtendedFlows" class="java.lang.String" c:_0="RemoteUser|X509" />
<util:list id="shibboleth.authn.Password.ExtendedFlowParameters">
</util:list>
<util:list id="shibboleth.authn.Password.PrincipalOverride">
<bean parent="shibboleth.SAML2AuthnContextClassRef"
c:classRef="urn:oasis:names:tc:SAML:2.0:ac:classes:PasswordProtectedTransport" />
<bean parent="shibboleth.SAML2AuthnContextClassRef"
c:classRef="urn:oasis:names:tc:SAML:2.0:ac:classes:Password" />
<bean parent="shibboleth.SAML1AuthenticationMethod"
c:method="urn:oasis:names:tc:SAML:1.0:am:password" />
+ <!-- -->
+ <bean parent="shibboleth.SAML2AuthnContextClassRef"
+ c:classRef="urn:mace:gakunin.jp:idprivacy:ac:classes:Level1" />
</util:list>
- -->
 # Unset if using customized Principals per validator
-#idp.authn.Password.addDefaultPrincipals = true
+idp.authn.Password.addDefaultPrincipals = false
 # The Principal collection below is the typical default if not otherwise noted.
             #end

             #foreach ($extFlow in $extendedAuthenticationFlows)
-              #if ($authenticationContext.isAcceptable($extFlow) and $extFlow.apply(profileRequestContext))
+              #if ($authenticationContext.isAcceptable($extFlow) and $extFlow.test(profileRequestContext))
                 <div class="form-element-wrapper">
                   <button class="form-element form-button" type="submit" name="_eventId_$extFlow.getId()">
                     #springMessageText("idp.login.$extFlow.getId().replace('authn/','')", $extFlow.getId().replace('authn/',''))
挙動
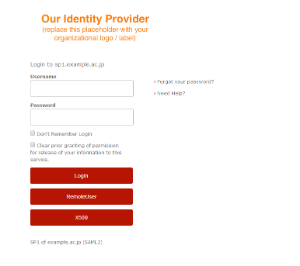
Password認証フローのための「Username」と「Passowrd」のフォームと「Login」ボタン、およびExtendedフローであるRemoteUser認証フローとX509認証フローのためのボタン「RemoteUser」と「X509」が表示されます。
図1. SPaおよびSPbからの場合
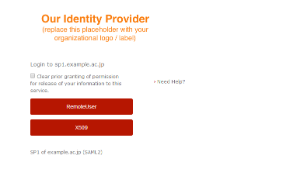
ExtendedフローであるRemoteUser認証フローとX509認証フローのためのボタン「RemoteUser」と「X509」が表示されます。Level1のPassword認証フローは表示されません。
図2. SPcからの場合
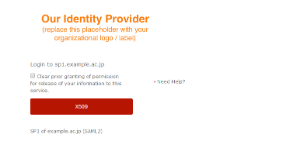
ExtendedフローのうちLevel3以上であるX509認証フローのためのボタン「X509」が表示されます。Level1のPassword認証フロー、およびLevel2のX509認証フローは表示されません。
図3. SPdからの場合
参考
の"Extended Flows"
(リンク先にsystem/以下のファイルを編集している箇所がありますが推奨されていません)
[Shibboleth wiki] MultiFactorAuthnConfigurationMultiFactor認証フロー(MFA)を用いた認証設定
共通設定 (General Configuration)
conf/authn/mfa-authn-config.xmlで行います。conf/idp.propertiesのidp.authn.flowsでMultiFactor認証フローを有効にします。注意すべき点として、MultiFactor認証フローからルールやスクリプトを介して呼び出される認証フローについては、意図していない方法で当該認証フローが実行されるかもしれないため、idp.authn.flowsでは有効にすべきではないとされています。 # Regular expression matching login flows to enable, e.g. IPAddress|Password
-idp.authn.flows= Password
+idp.authn.flows= MFA
直接的なフロー選択 (Directly Selecting Flows)
<util:map id="shibboleth.authn.MFA.TransitionMap">
    <!-- Run authn/Password first. -->
    <entry key="">
        <bean parent="shibboleth.authn.MFA.Transition" p:nextFlow="authn/Password" />
    </entry>

    <!-- If that returns "proceed", run authn/X509 next. -->
    <entry key="authn/Password">
        <bean parent="shibboleth.authn.MFA.Transition" p:nextFlow="authn/X509" />
    </entry>

    <!-- An implicit final rule will return whatever the second flow returns. -->
</util:map>
プログラムでのフロー選択 (Programmatically Selecting Flows)
allowedLoginMethodsを取得します。allowedLoginMethodsが存在し、かつ属性値にPasswordが含まれていれば、Password認証フローのみで認証成功になります。そうでなければステップ5に遷移します。conf/attribute-resolver.xmlに属性allowedLoginMethodsを追加する必要があります。<util:map id="shibboleth.authn.MFA.TransitionMap">
<!-- Run authn/Password first. -->
<entry key="">
<bean parent="shibboleth.authn.MFA.Transition" p:nextFlow="authn/Password" />
</entry>
<!--
Second rule runs a function if authn/Password succeeds, to determine whether an additional
factor is required.
-->
<entry key="authn/Password">
<bean parent="shibboleth.authn.MFA.Transition" p:nextFlowStrategy-ref="checkSecondFactor" />
</entry>
<!-- An implicit final rule will return whatever the second flow returns. -->
</util:map>
<!-- Example script to see if second factor is required. -->
<bean id="checkSecondFactor" parent="shibboleth.ContextFunctions.Scripted" factory-method="inlineScript"
p:customObject-ref="shibboleth.AttributeResolverService">
<constructor-arg>
<value>
<![CDATA[
nextFlow = "authn/X509";
// Go straight to second factor if we have to, or set up for an attribute lookup first.
authCtx = input.getSubcontext("net.shibboleth.idp.authn.context.AuthenticationContext");
mfaCtx = authCtx.getSubcontext("net.shibboleth.idp.authn.context.MultiFactorAuthenticationContext");
if (mfaCtx.isAcceptable()) {
// Attribute check is required to decide if first factor alone is enough.
resCtx = input.getSubcontext(
"net.shibboleth.idp.attribute.resolver.context.AttributeResolutionContext", true);
// Look up the username
usernameLookupStrategyClass = Java.type("net.shibboleth.idp.session.context.navigate.CanonicalUsernameLookupStrategy");
usernameLookupStrategy = new usernameLookupStrategyClass();
resCtx.setPrincipal(usernameLookupStrategy.apply(input));
// resolve the attribute to determine if a first factor is sufficient
resCtx.getRequestedIdPAttributeNames().add("allowedLoginMethods");
resCtx.resolveAttributes(custom);
// Check for an attribute value that authorizes use of first factor.
attribute = resCtx.getResolvedIdPAttributes().get("allowedLoginMethods");
valueType = Java.type("net.shibboleth.idp.attribute.StringAttributeValue");
if (attribute != null && attribute.getValues().contains(new valueType("Password"))) {
nextFlow = null;
}
input.removeSubcontext(resCtx); // cleanup
}
nextFlow; // pass control to second factor or end with the first
]]>
</value>
</constructor-arg>
</bean>
遷移の完全なコントロール (Full Control Over Transitions)
認証コンテクスト 略称 認証フロー urn:mace:gakunin.jp:idprivacy:ac:classes:Level1Level1パスワード urn:mace:gakunin.jp:idprivacy:ac:classes:Level2Level2urn:mace:gakunin.jp:idprivacy:ac:classes:Level3Level3RemoteUser AND X509 制限事項
設定
conf/authn/mfa-authn-config.xmlで各Levelに応じた認証設定を行います。<util:map id="shibboleth.authn.MFA.TransitionMap">
<!-- First rule calls a flow to display a view to select a method to run. -->
<entry key="">
<bean parent="shibboleth.authn.MFA.Transition" p:nextFlow="custom/methodChooser" />
</entry>
<!-- Second rule decides what to call based on event signaled by the view. -->
<entry key="custom/methodChooser">
<bean parent="shibboleth.authn.MFA.Transition">
<property name="nextFlowStrategyMap">
<map>
<!-- Maps event to a flow -->
<!-- Level1 -->
<entry key="ChooseLevel1" value="authn/Level1" />
<!-- Level2 -->
<entry key="ChoosePassword" value="authn/Password" />
<entry key="ChooseRemoteUser" value="authn/RemoteUser" />
<entry key="ChooseX509" value="authn/X509" />
<!-- Level3 -->
<entry key="ChooseLevel3" value="authn/RemoteUser4Level3" />
</map>
</property>
</bean>
</entry>
<!-- Level3 -->
<entry key="authn/RemoteUser4Level3">
<bean parent="shibboleth.authn.MFA.Transition" p:nextFlow="authn/X509" />
</entry>
<!-- An implicit final rule will return whatever the final flow returns. -->
</util:map>
<entry>を変更します。ファイル名 配置先ディレクトリ methodChooser-flow.xml flow/custom/methodChooser/chooser.vm views/methodChooser-flow.xmlの30行目の Password|RemoteUser|X509 の部分と、37行目から40行目の<transition>、および47行目から49行目の<end-state>を変更します。 <view-state id="DisplayChooserWebViewForLevel2" view="chooser">
<on-render>
<evaluate expression="environment" result="viewScope.environment" />
<evaluate expression="opensamlProfileRequestContext" result="viewScope.profileRequestContext" />
<evaluate expression="opensamlProfileRequestContext.getSubcontext(T(net.shibboleth.idp.authn.context.AuthenticationContext))" result="viewScope.authenticationContext" />
<evaluate expression="authenticationContext.getAvailableFlows().values().?[id matches 'authn/(Password|RemoteUser|X509)']" result="viewScope.availableAuthenticationFlows" />
<evaluate expression="authenticationContext.getSubcontext(T(net.shibboleth.idp.ui.context.RelyingPartyUIContext))" result="viewScope.rpUIContext" />
<evaluate expression="T(net.shibboleth.utilities.java.support.codec.HTMLEncoder)" result="viewScope.encoder" />
<evaluate expression="flowRequestContext.getExternalContext().getNativeRequest()" result="viewScope.request" />
<evaluate expression="flowRequestContext.getExternalContext().getNativeResponse()" result="viewScope.response" />
<evaluate expression="flowRequestContext.getActiveFlow().getApplicationContext().containsBean('shibboleth.CustomViewContext') ? flowRequestContext.getActiveFlow().getApplicationContext().getBean('shibboleth.CustomViewContext') : null" result="viewScope.custom" />
</on-render>
<transition on="ChoosePassword" to="ChoosePassword" />
<transition on="ChooseRemoteUser" to="ChooseRemoteUser" />
<transition on="ChooseX509" to="ChooseX509" />
</view-state>
<!-- Level1 -->
<end-state id="ChooseLevel1" />
<!-- Level2 -->
<end-state id="ChoosePassword" />
<end-state id="ChooseRemoteUser" />
<end-state id="ChooseX509" />
<!-- Level3 -->
<end-state id="ChooseLevel3" />
# mkdir -p flows/authn/Level1
# cp system/flows/authn/password-authn-flow.xml Level1-flow.xml
# cp system/flows/authn/password-authn-beans.xml Level1-beans.xml
# sed -i 's/password-authn-beans.xml/Level1-beans.xml/' Level1-flow.xml
# mkdir -p flows/authn/RemoteUser4Level3
# cp system/flows/authn/remoteuser-authn-flow.xml flows/authn/RemoteUser4Level3/RemoteUser4Level3-flow.xml
# cp system/flows/authn/remoteuser-authn-beans.xml flows/authn/RemoteUser4Level3/RemoteUser4Level3-beans.xml
# sed -i 's/remoteuser-authn-beans.xml/RemoteUser4Level3-beans.xml/' flows/authn/RemoteUser4Level3/RemoteUser4Level3-flow.xml
# sed -i 's/remoteuser-authn-config.xml/RemoteUser4Level3-config.xml/' flows/authn/RemoteUser4Level3/RemoteUser4Level3-beans.xml

# cp conf/authn/remoteuser-authn-config.xml conf/authn/RemoteUser4Level3-config.xml
# sed -i 's,Authn/RemoteUser,Authn/RemoteUser4Level3,' conf/authn/remoteuser-authn-config.xml

# cp webapp/WEB-INF/web.xml edit-webapp/WEB-INF/web.xml
 @@ -113,4 +113,15 @@
     </servlet-mapping>

+    <!-- Servlet protected by container used for RemoteUser authentication (Level3) -->
+    <servlet>
+        <servlet-name>RemoteUser4Level3AuthHandler</servlet-name>
+        <servlet-class>net.shibboleth.idp.authn.impl.RemoteUserAuthServlet</servlet-class>
+        <load-on-startup>2</load-on-startup>
+    </servlet>
+    <servlet-mapping>
+        <servlet-name>RemoteUser4Level3AuthHandler</servlet-name>
+        <url-pattern>/Authn/RemoteUser4Level3</url-pattern>
+    </servlet-mapping>
+
     <!-- Servlet protected by container used for X.509 authentication -->
     <servlet>
# bin/build.sh
conf/authn/general-authn.xmlの設定をします。@@ -54,21 +54,89 @@
<bean id="authn/External" parent="shibboleth.AuthenticationFlow"
p:nonBrowserSupported="false" />
+ <bean id="authn/Level1" parent="shibboleth.AuthenticationFlow">
+ <property name="supportedPrincipals">
+ <list>
+ <bean parent="shibboleth.SAML2AuthnContextClassRef"
+ c:classRef="urn:mace:gakunin.jp:idprivacy:ac:classes:Level1" />
+ </list>
+ </property>
+ </bean>
+
+ <bean id="authn/Level2" parent="shibboleth.AuthenticationFlow">
+ <property name="supportedPrincipals">
+ <list>
+ <bean parent="shibboleth.SAML2AuthnContextClassRef"
+ c:classRef="urn:mace:gakunin.jp:idprivacy:ac:classes:Level2" />
+ <bean parent="shibboleth.SAML2AuthnContextClassRef"
+ c:classRef="urn:mace:gakunin.jp:idprivacy:ac:classes:Level1" />
+ </list>
+ </property>
+ </bean>
+
+ <bean id="authn/Level3" parent="shibboleth.AuthenticationFlow">
+ <property name="supportedPrincipals">
+ <list>
+ <bean parent="shibboleth.SAML2AuthnContextClassRef"
+ c:classRef="urn:mace:gakunin.jp:idprivacy:ac:classes:Level3" />
+ <bean parent="shibboleth.SAML2AuthnContextClassRef"
+ c:classRef="urn:mace:gakunin.jp:idprivacy:ac:classes:Level2" />
+ <bean parent="shibboleth.SAML2AuthnContextClassRef"
+ c:classRef="urn:mace:gakunin.jp:idprivacy:ac:classes:Level1" />
+ </list>
+ </property>
+ </bean>
+
+ <bean id="authn/Password" parent="shibboleth.AuthenticationFlow"
+ p:passiveAuthenticationSupported="true"
+ p:forcedAuthenticationSupported="true">
+ <property name="supportedPrincipals">
+ <list>
+ <bean parent="shibboleth.SAML2AuthnContextClassRef"
+ c:classRef="urn:oasis:names:tc:SAML:2.0:ac:classes:PasswordProtectedTransport" />
+ <bean parent="shibboleth.SAML2AuthnContextClassRef"
+ c:classRef="urn:oasis:names:tc:SAML:2.0:ac:classes:Password" />
+ <bean parent="shibboleth.SAML1AuthenticationMethod"
+ c:method="urn:oasis:names:tc:SAML:1.0:am:password" />
+ <!-- GUARD -->
+ <bean parent="shibboleth.SAML2AuthnContextClassRef"
+ c:classRef="urn:mace:gakunin.jp:idprivacy:ac:classes:Level2" />
+ <bean parent="shibboleth.SAML2AuthnContextClassRef"
+ c:classRef="urn:mace:gakunin.jp:idprivacy:ac:classes:Level1" />
+ </list>
+ </property>
+ </bean>
+
<bean id="authn/RemoteUser" parent="shibboleth.AuthenticationFlow"
- p:nonBrowserSupported="false" />
+ p:nonBrowserSupported="false">
+ <property name="supportedPrincipals">
+ <list>
+ <!-- GUARD -->
+ <bean parent="shibboleth.SAML2AuthnContextClassRef"
+ c:classRef="urn:mace:gakunin.jp:idprivacy:ac:classes:Level2" />
+ <bean parent="shibboleth.SAML2AuthnContextClassRef"
+ c:classRef="urn:mace:gakunin.jp:idprivacy:ac:classes:Level1" />
+ </list>
+ </property>
+ </bean>
<bean id="authn/RemoteUserInternal" parent="shibboleth.AuthenticationFlow" />
<bean id="authn/X509" parent="shibboleth.AuthenticationFlow"
p:nonBrowserSupported="false">
<property name="supportedPrincipals">
<list>
<bean parent="shibboleth.SAML2AuthnContextClassRef"
c:classRef="urn:oasis:names:tc:SAML:2.0:ac:classes:X509" />
<bean parent="shibboleth.SAML2AuthnContextClassRef"
c:classRef="urn:oasis:names:tc:SAML:2.0:ac:classes:TLSClient" />
<bean parent="shibboleth.SAML1AuthenticationMethod"
c:method="urn:ietf:rfc:2246" />
+ <!-- GUARD -->
+ <bean parent="shibboleth.SAML2AuthnContextClassRef"
+ c:classRef="urn:mace:gakunin.jp:idprivacy:ac:classes:Level2" />
+ <bean parent="shibboleth.SAML2AuthnContextClassRef"
+ c:classRef="urn:mace:gakunin.jp:idprivacy:ac:classes:Level1" />
</list>
</property>
</bean>
@@ -89,3 +157,14 @@
- <bean id="authn/Password" parent="shibboleth.AuthenticationFlow"
- p:passiveAuthenticationSupported="true"
- p:forcedAuthenticationSupported="true" />
+ <bean id="authn/RemoteUser4Level3" parent="shibboleth.AuthenticationFlow"
+ p:nonBrowserSupported="false">
+ <property name="supportedPrincipals">
+ <list>
+ <!-- GUARD -->
+ <bean parent="shibboleth.SAML2AuthnContextClassRef"
+ c:classRef="urn:mace:gakunin.jp:idprivacy:ac:classes:Level3" />
+ <bean parent="shibboleth.SAML2AuthnContextClassRef"
+ c:classRef="urn:mace:gakunin.jp:idprivacy:ac:classes:Level2" />
+ <bean parent="shibboleth.SAML2AuthnContextClassRef"
+ c:classRef="urn:mace:gakunin.jp:idprivacy:ac:classes:Level1" />
+ </list>
+ </property>
+ </bean>
@@ -112,22 +191,29 @@
<bean id="authn/MFA" parent="shibboleth.AuthenticationFlow"
p:passiveAuthenticationSupported="true"
p:forcedAuthenticationSupported="true">
<!--
The list below almost certainly requires changes, and should generally be the
union of any of the separate factors you combine in your particular MFA flow
rules. The example corresponds to the example in mfa-authn-config.xml that
combines IPAddress with Password.
-->
<property name="supportedPrincipals">
<list>
<bean parent="shibboleth.SAML2AuthnContextClassRef"
c:classRef="urn:oasis:names:tc:SAML:2.0:ac:classes:InternetProtocol" />
<bean parent="shibboleth.SAML2AuthnContextClassRef"
c:classRef="urn:oasis:names:tc:SAML:2.0:ac:classes:PasswordProtectedTransport" />
<bean parent="shibboleth.SAML2AuthnContextClassRef"
c:classRef="urn:oasis:names:tc:SAML:2.0:ac:classes:Password" />
<bean parent="shibboleth.SAML1AuthenticationMethod"
c:method="urn:oasis:names:tc:SAML:1.0:am:password" />
+ <!-- GUARD -->
+ <bean parent="shibboleth.SAML2AuthnContextClassRef"
+ c:classRef="urn:mace:gakunin.jp:idprivacy:ac:classes:Level1" />
+ <bean parent="shibboleth.SAML2AuthnContextClassRef"
+ c:classRef="urn:mace:gakunin.jp:idprivacy:ac:classes:Level2" />
+ <bean parent="shibboleth.SAML2AuthnContextClassRef"
+ c:classRef="urn:mace:gakunin.jp:idprivacy:ac:classes:Level3" />
</list>
</property>
</bean>
@@ -90,3 +90,4 @@
         <bean id="authn/Password" parent="shibboleth.AuthenticationFlow"
+                p:activationCondition-ref="authn.PasswordActivationCondition"
                 p:passiveAuthenticationSupported="true"
                 p:forcedAuthenticationSupported="true">
@@ -241,1 +242,9 @@
+
+    <!--
+    Activation Condition
+    -->
+    <bean id="authn.PasswordActivationCondition" class="org.opensaml.profile.logic.IPRangePredicate"
+            p:httpServletRequest-ref="shibboleth.HttpServletRequest"
+            p:ranges="#{ '203.0.113.0/24' }" >
+    </bean>
 </beans>
参考
属性・NameID
SPに対してどのような属性が送出されるか確認する方法
以下の個別ページを参照してください。
⇒SPに対してどのような属性が送出されるか確認する方法
NameID
NameID設定を参照してください。
eduPersonTargetedID属性の送信
NameIDとは別に//saml2:AttributeStatement/saml2:Attribute[@FriendlyName="eduPersonTargetedID"]としてeduPersonTargetedID属性を送信する設定は下記の通りです。
なお、この機能はShibboleth IdP 3ではDeprecated Featuresとなっています。
computedId
computedIdでの設定を下記に示します。Shibboleth IdP 2と同じ設定で送信可能です。
conf/attribute-resolver.xmlここをクリックすると展開されます...conf/attribute-resolver.xml<!-- ========================================== --> <!-- Attribute Definitions --> <!-- ========================================== --> <!-- Schema: eduPerson attributes --> <!-- Attribute Definition for eduPersonTargetedID --> <resolver:AttributeDefinition id="eduPersonTargetedID" xsi:type="SAML2NameID" xmlns="urn:mace:shibboleth:2.0:resolver:ad" nameIdFormat="urn:oasis:names:tc:SAML:2.0:nameid-format:persistent" sourceAttributeID="computedID"> <resolver:Dependency ref="computedID" /> <resolver:AttributeEncoder xsi:type="SAML1XMLObject" xmlns="urn:mace:shibboleth:2.0:attribute:encoder" name="urn:oid:1.3.6.1.4.1.5923.1.1.1.10" /> <resolver:AttributeEncoder xsi:type="SAML2XMLObject" xmlns="urn:mace:shibboleth:2.0:attribute:encoder" name="urn:oid:1.3.6.1.4.1.5923.1.1.1.10" friendlyName="eduPersonTargetedID" /> </resolver:AttributeDefinition> <!-- ========================================== --> <!-- Data Connectors --> <!-- ========================================== --> <!-- Computed targeted ID connector --> <resolver:DataConnector xsi:type="ComputedId" xmlns="urn:mace:shibboleth:2.0:resolver:dc" id="computedID" generatedAttributeID="computedID" sourceAttributeID="uid" salt="changethistosomethingrandom"> <resolver:Dependency ref="myLDAP" /> </resolver:DataConnector>conf/attribute-filter.xmlの例ここをクリックすると展開されます...conf/attribute-filter.xml<!-- Release to sp.example.jp --> <afp:AttributeFilterPolicy id="PolicyforSP1ExampleJP"> <afp:PolicyRequirementRule xsi:type="basic:AttributeRequesterString" value="https://sp.example.jp/shibboleth-sp" /> <afp:AttributeRule attributeID="eduPersonTargetedID"> <afp:PermitValueRule xsi:type="basic:ANY" /> </afp:AttributeRule> </afp:AttributeFilterPolicy>
conf/attribute-resolver.xmlのComputedIdConnectorはShibboleth IdP 3の機能を用いて、persistent-idの設定で定義したconf/saml-nameid.propertiesのプロパティを使って書くこともできます。
conf/attribute-resolver.xml
ここをクリックすると展開されます...conf/attribute-resolver.xml<!-- ========================================== --> <!-- Data Connectors --> <!-- ========================================== --> <!-- Computed targeted ID connector --> <resolver:DataConnector xsi:type="ComputedId" xmlns="urn:mace:shibboleth:2.0:resolver:dc" id="computedID" generatedAttributeID="computedID" sourceAttributeID="%{idp.persistentId.sourceAttribute}" salt="%{idp.persistentId.salt}"> <resolver:Dependency ref="%{idp.persistentId.sourceAttribute}" /> </resolver:DataConnector>Shibboleth IdP 3.1.2では、
salt属性は%{idp.persistentId.salt}で置き換えられませんので、ご注意ください。[IDP-771]
storedId
storedIdでの設定を下記に示します。Shibboleth IdP 2と同じ設定で送信可能です。
conf/attribute-resolver.xmlここをクリックすると展開されます...conf/attribute-resolver.xml<!-- ========================================== --> <!-- Attribute Definitions --> <!-- ========================================== --> <!-- Schema: eduPerson attributes --> <!-- Attribute Definition for eduPersonTargetedID --> <resolver:AttributeDefinition id="eduPersonTargetedID" xsi:type="SAML2NameID" xmlns="urn:mace:shibboleth:2.0:resolver:ad" nameIdFormat="urn:oasis:names:tc:SAML:2.0:nameid-format:persistent" sourceAttributeID="storedID"> <resolver:Dependency ref="storedID" /> <resolver:AttributeEncoder xsi:type="SAML1XMLObject" xmlns="urn:mace:shibboleth:2.0:attribute:encoder" name="urn:oid:1.3.6.1.4.1.5923.1.1.1.10" /> <resolver:AttributeEncoder xsi:type="SAML2XMLObject" xmlns="urn:mace:shibboleth:2.0:attribute:encoder" name="urn:oid:1.3.6.1.4.1.5923.1.1.1.10" friendlyName="eduPersonTargetedID" /> </resolver:AttributeDefinition> <!-- ========================================== --> <!-- Data Connectors --> <!-- ========================================== --> <!-- Stored targeted ID connector --> <resolver:DataConnector xsi:type="StoredId" xmlns="urn:mace:shibboleth:2.0:resolver:dc" id="storedID" generatedAttributeID="storedID" sourceAttributeID="uid" salt="changethistosomethingrandom"> <resolver:Dependency ref="myLDAP" /> <ApplicationManagedConnection jdbcDriver="com.mysql.jdbc.Driver" jdbcURL="jdbc:mysql://localhost:3306/shibboleth?autoReconnect=true" jdbcUserName="username" jdbcPassword="password" /> </resolver:DataConnector>conf/attribute-filter.xmlの例ここをクリックすると展開されます...conf/attribute-filter.xml<!-- Release to sp.example.jp --> <afp:AttributeFilterPolicy id="PolicyforSP1ExampleJP"> <afp:PolicyRequirementRule xsi:type="basic:AttributeRequesterString" value="https://sp.example.jp/shibboleth-sp" /> <afp:AttributeRule attributeID="eduPersonTargetedID"> <afp:PermitValueRule xsi:type="basic:ANY" /> </afp:AttributeRule> </afp:AttributeFilterPolicy>
conf/attribute-resolver.xmlのStoredIdConnectorはShibboleth IdP 3の機能を用いて、persistent-idの設定で定義したconf/global.xmlのbean MyDataSourceとconf/saml-nameid.propertiesのプロパティを使って書くこともできます。
conf/attribute-resolver.xmlここをクリックすると展開されます...conf/attribute-resolver.xml<!-- ========================================== --> <!-- Data Connectors --> <!-- ========================================== --> <!-- Stored targeted ID connector --> <resolver:DataConnector xsi:type="StoredId" xmlns="urn:mace:shibboleth:2.0:resolver:dc" id="storedID" generatedAttributeID="storedID" sourceAttributeID="%{idp.persistentId.sourceAttribute}" salt="%{idp.persistentId.salt}"> <resolver:Dependency ref="%{idp.persistentId.sourceAttribute}" /> <BeanManagedConnection>MyDataSource</BeanManagedConnection> </resolver:DataConnector>Shibboleth IdP 3.1.2では、
salt属性は%{idp.persistentId.salt}で置き換えられませんので、ご注意ください。[IDP-771]
同じ値が再割り当てされないeduPersonTargetedIDの生成方法
以下の個別ページを参照してください。
⇒同じ値が再割り当てされないeduPersonTargetedIDの生成方法
Attribute Query
SAML 2 persistent IDでのAttribute Queryの許可
この機能はcomputedIdを使っている場合は使用できません。まずstoredIdを使うように設定変更してください。
conf/c14n/subject-c14n.xml
conf/c14n/subject-c14n.xmlの<ref bean="c14n/SAML2Persistent" />をアンコメントします。ここをクリックすると展開されます...conf/c14n/subject-c14n.xml<!-- Handle a SAML 2 persistent ID, provided a stored strategy is in use. --> <ref bean="c14n/SAML2Persistent" />
差分<!-- Handle a SAML 2 persistent ID, provided a stored strategy is in use. --> - <!-- <ref bean="c14n/SAML2Persistent" /> --> + <ref bean="c14n/SAML2Persistent" />
RelyingPartyの設定
SAML1でフロントチャネルにAttributeStatementを含める設定
conf/relying-party.xmlbean[@parent="Shibboleth.SSO"]にp:includeAttributeStatement="true"を追加します。ここをクリックすると展開されます...conf/relying-party.xml<bean id="shibboleth.DefaultRelyingParty" parent="RelyingParty"> <property name="profileConfigurations"> <list> <bean parent="Shibboleth.SSO" p:postAuthenticationFlows="attribute-release" p:includeAttributeStatement="true" /> <ref bean="SAML1.AttributeQuery" /> <ref bean="SAML1.ArtifactResolution" /> <bean parent="SAML2.SSO" p:postAuthenticationFlows="attribute-release" /> <ref bean="SAML2.ECP" /> <ref bean="SAML2.Logout" /> <ref bean="SAML2.AttributeQuery" /> <ref bean="SAML2.ArtifactResolution" /> <ref bean="Liberty.SSOS" /> </list> </property> </bean>差分<bean id="shibboleth.DefaultRelyingParty" parent="RelyingParty"> <property name="profileConfigurations"> <list> - <bean parent="Shibboleth.SSO" p:postAuthenticationFlows="attribute-release" /> + <bean parent="Shibboleth.SSO" p:postAuthenticationFlows="attribute-release" p:includeAttributeStatement="true" /> <ref bean="SAML1.AttributeQuery" /> <ref bean="SAML1.ArtifactResolution" /> <bean parent="SAML2.SSO" p:postAuthenticationFlows="attribute-release" /> <ref bean="SAML2.ECP" /> <ref bean="SAML2.Logout" /> <ref bean="SAML2.AttributeQuery" /> <ref bean="SAML2.ArtifactResolution" /> <ref bean="Liberty.SSOS" /> </list> </property> </bean>
画面のカスタマイズ
ロゴをデフォルトのOur Identity Providerから機関のロゴに変更する手順は下記の通りです。 ロゴファイル messages/以下のファイルは更新したら、Tomcatの再起動等を行わなくても、しばらくすれば反映されます。 日本語を含む英語以外のメッセージファイルは下記ページからダウンロードできます。 ダウンロードしたメッセージファイルを messages/(およびsystem/messages/)以下のファイルは更新したら、Tomcatの再起動等行わなくても、しばらくすれば反映されます。 3.2.1およびそれ以前と3.3.0およびそれ以降で配置ファイルおよび配置方法が変更になっています。3.3.0およびそれ以降にアップデートした場合は、新たに上記ページから対応するファイルをダウンロードし conf/services.xmlを3.3.0以降の版に更新したら、旧来のmessages/以下の3ファイルは削除可能になります。(逆に言うと、services.xmlを更新しない限り旧来のメッセージファイルが参照されていますので削除すると日本語にならなくなります。) 上記URLで提供している日本語メッセージファイルについての注意点 表示されるメッセージの優先順位は下記の通りです。messages/以下およびsystem/messages/以下のファイルが候補になります。 Javaのシステムプロパティの優先順位は下記の通りです。 ブラウザの使用言語によらずある言語を強制する方法は以下のページに説明があります。 3.3以降で、表示するメッセージを英語から日本語などに変更する場合は、下記のメッセージファイルを用意します。文字コードはUTF-8である必要があります。 日本語の場合の例を下記に示します。 イギリス英語の例を下記に示します。 以下の手順でlogin.vmの代わりにlogin.jspを使って、正常時の挙動は確認できましたが、パスワード不一致時の挙動等さらに修正すべきところがあると思われますので、お勧めできません。 login.jspについて、" login.vm等にはVelocity templateに従った書式を含めることができます。その部分をデバッグするときは、logback.xmlに以下のような行を挿入してください。ロゴの変更
organization-logo.pngをedit-webapp/images/以下に配置します。 $ ls edit-webapp/images/
dummylogo-mobile.png dummylogo.png organization-logo.png
bin/build.shを実行して、war/idp.warを作り直します。$ sudo bin/build.sh
Installation Directory: [/opt/shibboleth-idp]
Rebuilding /opt/shibboleth-idp/war/idp.war ...
...done
BUILD SUCCESSFUL
Total time: 16 seconds
messages/messages.propertiesのidp.logoに上記1.で配置したファイル名を設定します。 なお、ファイル名は/images/から始めます。また、 idp.logo.alt-textを設定します。# You can define message properties here to override messages defined in
# system/messages/ or to add your own messages.
idp.logo = /images/organization-logo.png
idp.logo.alt-text = Organization logo
 # You can define message properties here to override messages defined in
 # system/messages/ or to add your own messages.
+idp.logo = /images/organization-logo.png
+idp.logo.alt-text = Organization logo
メッセージの多言語化
messages/ディレクトリ配下にコピーすることで、ブラウザに表示されるメッセージを英語以外に変更できます。
以下に記載の通り既存のmessages.propertiesよりも配置したmessages_ja.properties等が優先することになりますので、ロゴの指定等messages.propertiesに記述があればそれをmessages_ja.properties等にも記述することを忘れないでください。
これはconf/services.propertiesの idp.message.cacheSeconds で制御されており、デフォルトは300で、300秒(5分)以内に反映されます。system/messages/ディレクトリに配置してください。(system/以下ですが、一度配置すれば、以降のアップデートで削除されることはありません。)としておりましたが、3.3.1へのアップデートで削除されるようですので、ひとまずmessages/ディレクトリに配置するのがよいです。idp.login.login)は、Password認証フローのExtendedフローを使用した際に他の認証と合わせてアルファベットが並ぶように「Login」と英語のままです。bad-username.message)とパスワードが間違った場合のエラーメッセージ(bad-password.message)は、どちらも「ユーザ名かパスワードが違います。」と同じメッセージです。(英語では、「The username you entered cannot be identified.」と「The password you entered was incorrect.」と異なります)Accept-Languageヘッダーの一番目に一致するmessages_言語_国.propertiesAccept-Languageヘッダーの一番目に一致するmessages_言語.propertiesmessages_言語_国.propertiesmessages_言語.propertiesmessages.propertiesuser.languageとuser.countryLC_MESSAGESLANG
https://wiki.shibboleth.net/confluence/display/IDP30/Switching+locale+on+the+login+page多言語化の方法
system/system/system/どうしてもlogin.jspを使い回したいのですが
actionUrl"となっている部分を"flowExecutionUrl"に修正し、さらにsubmitボタンに name="_eventId_proceed" を付与する。@@ -17,8 +17,8 @@
<div class="content">
<div class="column one">
- <% if(request.getAttribute("actionUrl") != null){ %>
- <form id="login" action="<%=request.getAttribute("actionUrl")%>" method="post">
+ <% if(request.getAttribute("flowExecutionUrl") != null){ %>
+ <form id="login" action="<%=request.getAttribute("flowExecutionUrl")%>" method="post">
<% }else{ %>
<form id="login" action="j_security_check" method="post">
<% } %>
@@ -44,7 +44,7 @@
</section>
<section>
- <button class="form-element form-button" type="submit" onClick="this.childNodes[0].nodeValue='Logging in, please wait...'">Login</button>
+ <button class="form-element form-button" type="submit" name="_eventId_proceed" onClick="this.childNodes[0].nodeValue='Logging in, please wait...'">Login</button>
</section>
</form>
/opt/shibboleth-idp/views/login.vm を login.vm.dist 等にリネームした上で、上記login.jspを /opt/shibboleth-idp/edit-webapp/WEB-INF/jsp/ に配置し、build.shを実行する。/opt/shibboleth-idp/war/idp.war を /usr/java/tomcat/webapps/ に配置する。)login.vm等のデバッグ
<logger name="org.apache.velocity" level="DEBUG"/>
ユーザ同意機能
Shibboleth IdP 3には、uApprove相当のユーザ同意機能があります。uApprove JPとの違いはShibboleth IdP 3のユーザ同意機能とuApprove JPとの相違点を参照してください。
ユーザ同意の情報をMySQLに保存する設定
MySQL上にデータベース shibboleth が存在することを前提としております。また、MySQL Connector/J (mysql-connector-java-5.1.xx-bin.jar)をインストールしておいてください。
StorageRecordsテーブルの作成
StorageRecordsテーブルを作成します。ここをクリックすると展開されます...MySQLCREATE TABLE `StorageRecords` ( `context` varchar(255) NOT NULL, `id` varchar(255) NOT NULL, `expires` bigint(20) DEFAULT NULL, `value` longtext NOT NULL, `version` bigint(20) NOT NULL, PRIMARY KEY (`context`,`id`) ) ENGINE=InnoDB DEFAULT CHARSET=utf8;
conf/global.xml
shibboleth.JPAStorageServiceを定義します。persistent-idの設定(storedId)が設定済みの場合、最後のMyDataSourceの定義は重複となるため不要です。ここをクリックすると展開されます...conf/global.xml (Tomcat7の場合)<!-- Use this file to define any custom beans needed globally. --> <bean id="shibboleth.JPAStorageService" class="org.opensaml.storage.impl.JPAStorageService" p:cleanupInterval="%{idp.storage.cleanupInterval:PT10M}" c:factory-ref="shibboleth.JPAStorageService.entityManagerFactory" /> <bean id="shibboleth.JPAStorageService.entityManagerFactory" class="org.springframework.orm.jpa.LocalContainerEntityManagerFactoryBean"> <property name="packagesToScan" value="org.opensaml.storage.impl" /> <property name="dataSource" ref="MyDataSource" /> <property name="jpaVendorAdapter" ref="shibboleth.JPAStorageService.JPAVendorAdapter" /> <property name="jpaDialect"> <bean class="org.springframework.orm.jpa.vendor.HibernateJpaDialect" /> </property> </bean> <bean id="shibboleth.JPAStorageService.JPAVendorAdapter" class="org.springframework.orm.jpa.vendor.HibernateJpaVendorAdapter" p:database="MYSQL" /> <!-- A DataSource bean suitable for use in the idp.persistentId.dataSource property. --> <bean id="MyDataSource" class="org.apache.tomcat.dbcp.dbcp.BasicDataSource" p:driverClassName="com.mysql.jdbc.Driver" p:url="jdbc:mysql://localhost:3306/shibboleth" p:username="username" p:password="password" p:maxActive="10" p:maxIdle="5" p:maxWait="15000" p:testOnBorrow="true" p:validationQuery="select 1" p:validationQueryTimeout="5" />Tomcat8を使用している場合は、下記のShibbolethIdP3.1の情報を参考にしてください。
conf/idp.propertiesidp.consent.StorageServiceをconf/global.xmlで定義したshibboleth.JPAStorageServiceに変更します。ここをクリックすると展開されます...conf/idp.properties# Set to "shibboleth.StorageService" or custom bean for alternate storage of consent idp.consent.StorageService = shibboleth.JPAStorageService
差分# Set to "shibboleth.StorageService" or custom bean for alternate storage of consent -#idp.consent.StorageService = shibboleth.ClientPersistentStorageService +idp.consent.StorageService = shibboleth.JPAStorageService
Shibboleth IdP 3.1の情報
StorageRecordsテーブルの作成
StorageRecordsテーブルを作成します。MySQLCREATE TABLE `StorageRecords` ( `context` varchar(255) NOT NULL, `id` varchar(255) NOT NULL, `expires` bigint(20) DEFAULT NULL, `value` longtext NOT NULL, `version` bigint(20) NOT NULL, PRIMARY KEY (`context`,`id`) ) ENGINE=InnoDB DEFAULT CHARSET=utf8;
conf/global.xmlshibboleth.JPAStorageServiceを定義します。 persistent-idの設定(storedId)が設定済みの場合、最後のMyDataSourceの定義は重複となるため不要です。conf/global.xml (Tomcat7の場合)<!-- Use this file to define any custom beans needed globally. --> <bean id="shibboleth.JPAStorageService" class="org.opensaml.storage.impl.JPAStorageService" p:cleanupInterval="%{idp.storage.cleanupInterval:PT10M}" c:factory-ref="shibboleth.JPAStorageService.entityManagerFactory" /> <bean id="shibboleth.JPAStorageService.entityManagerFactory" class="org.springframework.orm.jpa.LocalContainerEntityManagerFactoryBean"> <property name="packagesToScan" value="org.opensaml.storage.impl" /> <property name="dataSource" ref="MyDataSource" /> <property name="jpaVendorAdapter" ref="shibboleth.JPAStorageService.JPAVendorAdapter" /> <property name="jpaDialect"> <bean class="org.springframework.orm.jpa.vendor.HibernateJpaDialect" /> </property> </bean> <bean id="shibboleth.JPAStorageService.JPAVendorAdapter" class="org.springframework.orm.jpa.vendor.HibernateJpaVendorAdapter" p:database="MYSQL" /> <bean id="MyDataSource" class="org.apache.tomcat.dbcp.dbcp.BasicDataSource" p:driverClassName="com.mysql.jdbc.Driver" p:url="jdbc:mysql://localhost:3306/shibboleth" p:username="username" p:password="password" p:maxActive="10" p:maxIdle="5" p:maxWait="15000" p:testOnBorrow="true" p:validationQuery="select 1" p:validationQueryTimeout="5" />conf/global.xml (Tomcat8の場合)<!-- Use this file to define any custom beans needed globally. --> <bean id="shibboleth.JPAStorageService" class="org.opensaml.storage.impl.JPAStorageService" p:cleanupInterval="%{idp.storage.cleanupInterval:PT10M}" c:factory-ref="shibboleth.JPAStorageService.entityManagerFactory" /> <bean id="shibboleth.JPAStorageService.entityManagerFactory" class="org.springframework.orm.jpa.LocalContainerEntityManagerFactoryBean"> <property name="packagesToScan" value="org.opensaml.storage.impl" /> <property name="dataSource" ref="MyDataSource" /> <property name="jpaVendorAdapter" ref="shibboleth.JPAStorageService.JPAVendorAdapter" /> <property name="jpaDialect"> <bean class="org.springframework.orm.jpa.vendor.HibernateJpaDialect" /> </property> </bean> <bean id="shibboleth.JPAStorageService.JPAVendorAdapter" class="org.springframework.orm.jpa.vendor.HibernateJpaVendorAdapter" p:database="MYSQL" /> <bean id="MyDataSource" class="org.apache.tomcat.dbcp.dbcp2.BasicDataSource" p:driverClassName="com.mysql.jdbc.Driver" p:url="jdbc:mysql://localhost:3306/shibboleth" p:username="username" p:password="password" p:maxIdle="5" p:maxTotal="10" p:maxWaitMillis="15000" p:testOnBorrow="true" p:validationQuery="select 1" p:validationQueryTimeout="5" />Tomcat 8付属のDBCP2から、
p:maxActiveはp:maxTotalに、p:maxWaitはp:maxWaitMillisに変更になりました。conf/idp.propertiesconf/idp.properties# Set to "shibboleth.StorageService" or custom bean for alternate storage of consent idp.consent.StorageService = shibboleth.JPAStorageService # Maximum number of consent storage records # Set to -1 for unlimited server-side storage idp.consent.maxStoredRecords = -1
属性毎に同意を得る設定
SPの必須属性にもチェックボックスが表示されるため、利用者がSPの必須属性のチェックを外して属性を送信しなかった場合にSPを利用できない可能性があります。
conf/idp.propertiesidp.consent.allowPerAttributeをtrueに設定することで、属性毎にチェックボックスを付加することができます。ここをクリックすると展開されます...conf/idp.properties# Flags controlling how built-in attribute consent feature operates #idp.consent.allowDoNotRemember = true #idp.consent.allowGlobal = true idp.consent.allowPerAttribute = true
差分# Flags controlling how built-in attribute consent feature operates #idp.consent.allowDoNotRemember = true #idp.consent.allowGlobal = true -#idp.consent.allowPerAttribute = false +idp.consent.allowPerAttribute = true
送信済み属性の属性値が変化した場合に再同意を得る設定
conf/idp.propertiesidp.consent.compareValuesをtrueに設定することで、属性値が変化した場合に再度属性選択画面を表示することができます。ここをクリックすると展開されます...conf/idp.properties# Whether attribute values and terms of use text are compared idp.consent.compareValues = true
差分# Whether attribute values and terms of use text are compared -#idp.consent.compareValues = false +idp.consent.compareValues = true
同意機能の無効化設定
conf/relying-party.xmlbean[@parent="Shibboleth.SSO"](SAML1)とbean[@parent="SAML2.SSO"](SAML2)にあるp:postAuthenticationFlows="attribute-release"を削除します。ここをクリックすると展開されます...conf/relying-party.xml<!-- Default configuration, with default settings applied for all profiles, and enables the attribute-release consent flow. --> <bean id="shibboleth.DefaultRelyingParty" parent="RelyingParty"> <property name="profileConfigurations"> <list> <bean parent="Shibboleth.SSO" /> <ref bean="SAML1.AttributeQuery" /> <ref bean="SAML1.ArtifactResolution" /> <bean parent="SAML2.SSO" /> <ref bean="SAML2.ECP" /> <ref bean="SAML2.Logout" /> <ref bean="SAML2.AttributeQuery" /> <ref bean="SAML2.ArtifactResolution" /> <ref bean="Liberty.SSOS" /> </list> </property> </bean>差分<!-- Default configuration, with default settings applied for all profiles, and enables the attribute-release consent flow. --> <bean id="shibboleth.DefaultRelyingParty" parent="RelyingParty"> <property name="profileConfigurations"> <list> - <bean parent="Shibboleth.SSO" p:postAuthenticationFlows="attribute-release" /> + <bean parent="Shibboleth.SSO" /> <ref bean="SAML1.AttributeQuery" /> <ref bean="SAML1.ArtifactResolution" /> - <bean parent="SAML2.SSO" p:postAuthenticationFlows="attribute-release" /> + <bean parent="SAML2.SSO" /> <ref bean="SAML2.ECP" /> <ref bean="SAML2.Logout" /> <ref bean="SAML2.AttributeQuery" /> <ref bean="SAML2.ArtifactResolution" /> <ref bean="Liberty.SSOS" /> </list> </property> </bean>
ログレベルの変更
Shibboleth IdP 3.2からの新機能です。
Shibboleth IdP 3.2より、ログレベルの変更がconf/idp.propertiesで行えるようになりました。
conf/idp.properties設定できるプロパティ名はconf/logback.confの先頭を参照してください。
ここをクリックすると展開されます...conf/idp.properties# Logging Level idp.loglevel.idp=DEBUG idp.loglevel.messages=DEBUG idp.loglevel.encryption=DEBUG
差分+# Logging Level +idp.loglevel.idp=DEBUG +idp.loglevel.messages=DEBUG +idp.loglevel.encryption=DEBUG
アクセス制限(Shibboleth IdP 2のFPSP機能)
Shibboleth IdP 2におけるFPSPによるアクセス制御を行うには、GakuNinShibInstall > 技術ガイド > 実習セミナー > Shibboleth環境構築セミナー(活用編) > Shibboleth IdPによるアクセス制限を参照してください。
クラスタリング
Shibboleth IdP 3においてクラスタリングを行うには、クラスタリング設定を参照してください。
Full SLO(Single Logout)の設定方法
以下の個別ページを参照してください。
⇒Full SLO(Single Logout)の設定方法
IdPv3アップデートに関する情報
以下の個別ページを参照してください。
⇒IdPv3アップデートに関する情報
個別ページ
参考
- [Shibboleth wiki] Identity Provider 3
- [Shibboleth wiki] IdP 3 / ReleaseNotes
- [SWITCH] Shibboleth Identity Provider (IdP) 3 Installation Guide
- [SWITCH] Shibboleth IdPv3: Considerations in the Context of SWITCHaai
- 3.1 Operating Systems: Linux long-term support (Ubuntu Server 14.04 LTS / Red Hat Enterprise Linux 7 / CentOS 7)
- 3.2 Java & Servlet Container: OpenJDK 7, Apache Tomcat 7 & Apache HTTP Server 2.4
- 3.3 Database for persistentIDs and user consent: PostgreSQL
- 3.4 IdP Session Storage: Client Session Storage with Cookies
- [upki-fed:00880] Re: Shibboleth IdP 3.0 リリース
- シボレス実習活用編
- 学認技術ガイド > 貴学にてIdPv3をインストールする場合の構築手順
- NIIオープンフォーラム2016 学認トラック
- 「Shibboleth IdPバージョン3に向けたNIIの取り組み」西村 健(NII)
- 「Shibboleth IdP ver.3との戦い」細川 達己(慶應義塾大学)
- ラベルがありません