User Manual of uApprove.jp-2.2.1c
Table of contents
1. Introduction
This document explains how to give your consent to the release of attributes to Service Provider via uApprove.jp
The user consent steps are as follows:
- Login with Username/Password authentication.
- Accept the terms of use.
- Select the optional attributes to be released to Service and confirm it.
- Final confirmation of release.
- The attributes are released to a Service.
2. Operation flow
2.1 Login
You are redirected to the IdP login page (figure 1) from Service Provider. IdP requires a pair of username and password for authorization. If authorization is succeeded, you proceed to the terms of use page or the attributes selection page.
If you want to login, enter your Username/Password and press "Continue" button.
If you want to reset attribute release approvals, you have to check the checkbox "Reset my attribute release approvals"(see 3. Reset-approvals).
If you want to reset when the "Reset my attribute release approvals" checkbox is not displayed, you have to access the page of the list of approved SP(see 4. List-approvals).
2.2 Terms of use
You may get the terms of use page (figure 2) after success of login. This page will be shown if:
- the user accesses the system for the first time or
- terms of use have been revised from previously accepted by the user.
You have to check the "I accept the terms of use" checkbox and click the "Confirm" button in order to continue.
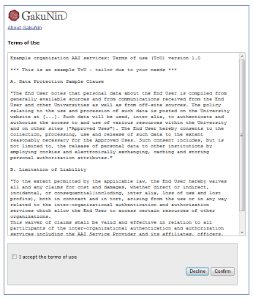
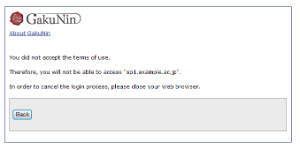
If you clicked the "Decline" button, your web browser should display the page shown in Figure 3. You have to close your web browser in order to cancel the login process.
To return to the terms of use page, click the "Back" button.
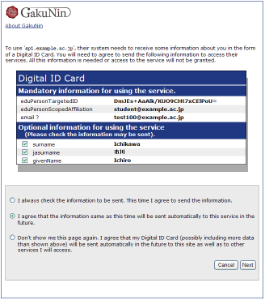
2.3 Optional attribute selection
This page shows information about you that will be released to the SP, in the form of a Digital ID Card (figure 4).
- Mandatory information
- These attributes are sent to SP always after confirmation. You cannot refuse release of them.
- Optional information
- You can select the optional attributes to be released to SP from the list by checking the box.
Point the '?' on side of attribute name by mouse pointer, display a short description.
In addition, it is required to decide the policy of the release of attributes. You must choose a policy with the radio buttons:
- I always check ... (default)
- You can confirm the information that will be released to this SP, on every login session.
- I agree ...
- Allow to send the selected information when you use this SP again, automatically. If next time you use this SP, this page will not display again unless attributes have been changed (see 2.3.1 Review the attributes change).
- Don't show me ...
- Allow to send all attributes to any SP automatically. If you choose this, all the optional attributes will be checked and can not be unchecked. This page will never display again even if the some attributes are changed (and possibly adding the different attributes).
After select attributes and choose a policy, you click the "Next" button for display the final confirmation page.
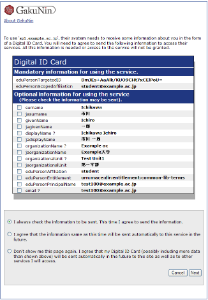
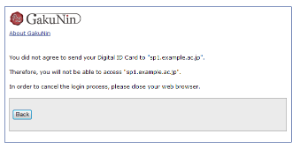
If you clicked the "Cancel" button, your web browser should display the page shown in Figure 5. You have to close your web browser in order to cancel the login process.
To return to the attribute selection page, click the "Back" button.
2.3.1 Review the attributes change
When any of the following conditions is satisfied on the SP where "I agree ..." option is applied, auto attributes sending is stopped and this review page (figure 6) is displayed.
- The value of selected attribute have been modified
- Optional attributes which is not allowed to release before is changed to mandatory
In this page, radio button "I agree ..." is checked as the default value.
Figure 6 shows the case of "email" which was optional attribute is changed to mandatory.
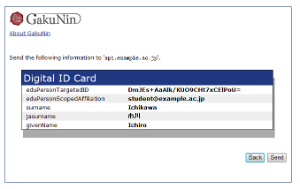
2.4 Final confirmation of release
Attributes which are going to be released to the SP are displayed on the form of Digital ID card in this page (figure 7).
You do the final confirmation before sending attributes to SP.
If you allow to send the attributes to the SP, please click the "Send" button.
If you redo the selection of attributes, click the "Back" button.
2.5 Release of information
Mandatory attributes and selected optional attributes are sent to the SP.
You are redirected to SP, this involves the attributes release, and your web browser should display the page which shows the information received by SP shown in Figure 8.
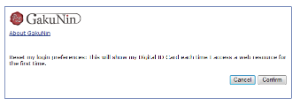
3. Reset-approvals
This page is displayed by checking "Reset my attribute release approvals" on login page (figure 9).
The "Confirm" button performs the following:
- Stop to automatically send the information to any SP
- Redirect to attributes selection page (2.3 Optional attribute selection)
- Make all checkbox for optional attributes be deselected
The "Cancel" button proceed the session without resetting.
4. List-approvals
If you access to the URL of the page of the list of approved SP, and authentication on IdP is succeeded, you can browse that list.
- If you have not approve any SP, displayed like figure 10
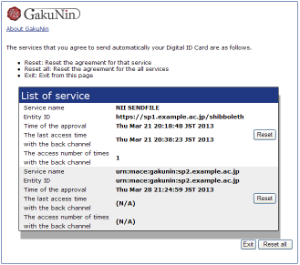
- If you have approved SPs individually, displayed like figure 11
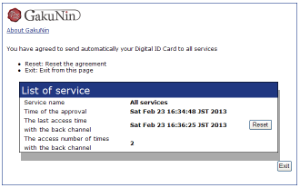
- If you have approved any all SP, displayed like figure 12
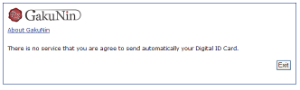
If the page of final is prepared by administrator, the "Exit" button navigates to that page.
4.1 Revocation of consent
You can revoke consent by click the "Reset" or "Reset all" button.
- The "Reset" button reset the agreement for that SP
- The "Reset all" button reset the agreement for the all SPs
When you click one, display the confirmation page for revoke(figure 13).
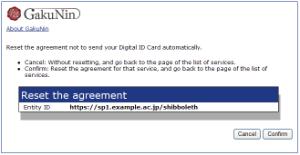
- The "Confirm" button reset the agreement for that SP, and go back to the page of the list of SPs.
- The "Cancel" button do not resetting, and go back to the page of the list of SPs.