Revision History |
Rev. | Date (YYYY/MM/DD) | Description | Editor |
V.1.0 | 2015/4/1 | First revision | NII |
V.1.1 | 2016/12/26 | Amendment with addition of [NII Open Domain S/MIME CA] as a new Certificate Authority | NII |
V.2.2 | 2018/2/26 | Addition of steps to change the language in the certificate retrieval procedure and amendment associated with the operating environment change. | NII |
| V.2.3 | 2021/10/12 | Change of issuance method by web enrollment. | NII |
Table of Content
Table of Content 1. Setting the Browser 1-1. Firefox Settings 2. Retrieving the Certificate 2-1. Prerequisites 2-2. Certificate Retrieval 2-2-1. Notification of URL for the Certificate Retrieval 2-2-2. Retrieving the Certificate Using Firefox 3. Exporting the Certificate (for Backup) 3-1. Exporting the Certificate Using Firefox (for Backup) | アンカー |
|---|
| _1._Setting_the |
|---|
| _1._Setting_the |
|---|
|
...
Process of Issuing the Certificate Using Firefox |
 By specifying the web browser used for this system as the [Default] web browser, failure of the client authentication (including access failures) should be prevented. By specifying the web browser used for this system as the [Default] web browser, failure of the client authentication (including access failures) should be prevented.
In this document, setting up the following prior to retrieving the certificate is recommended.
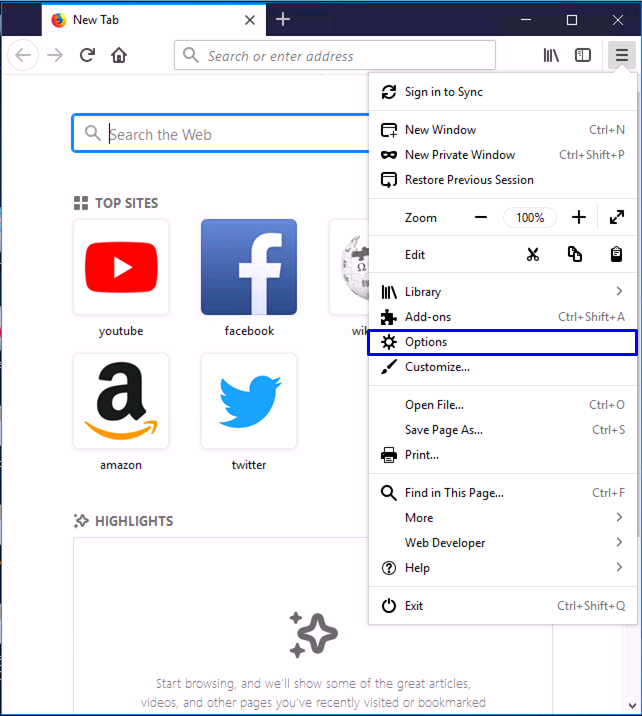
With Firefox, click on the Menu icon and select [Options] to get the Options screen.

IN the [General] screen, click [Make Default...] in the [Startup] field.

- According to the instruction in [2-2-1. Notification of URL for the Certificate Retrieval], access the certificate retrieval URL provided in the e-mail.
In the password prompt, enter the Access PIN you have received.
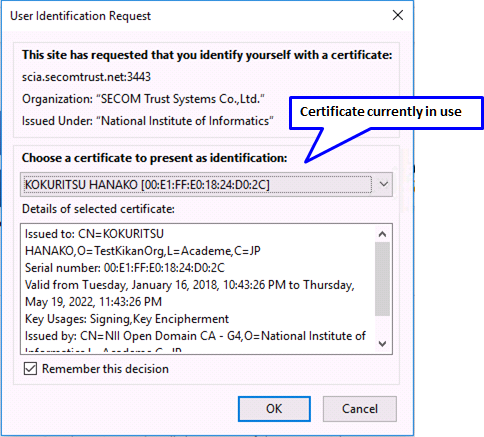
<<Retrieving for a new/lost certificate?>>
If you get the [User Identification Request] dialog box to select the digital certificate, click [Cancel].
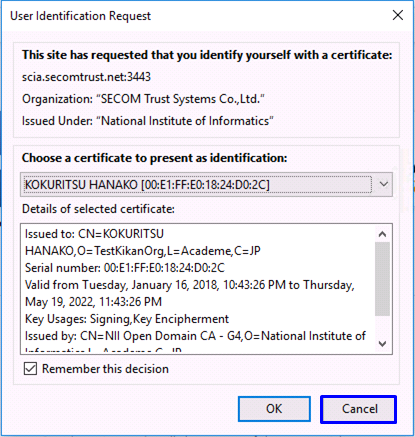
<<Updating for an expiring certificate?>>
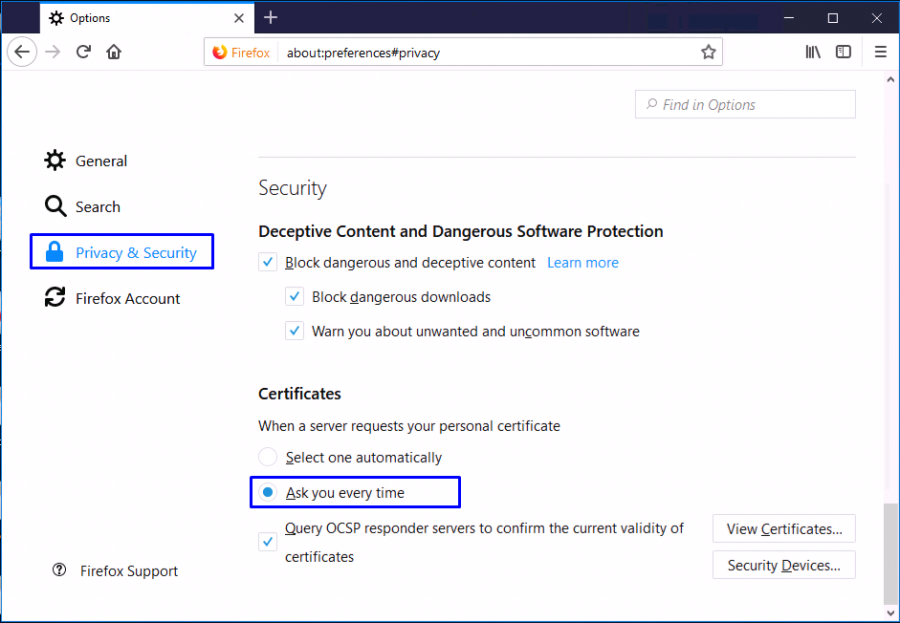
If you already have a certificate and are updating that, select the one in current use in the certificate choice field.
- According to the instruction in [2-2-1. Notification of URL for the Certificate Retrieval], access the certificate retrieval URL provided in the e-mail.
In the password prompt, enter the Access PIN you have received.
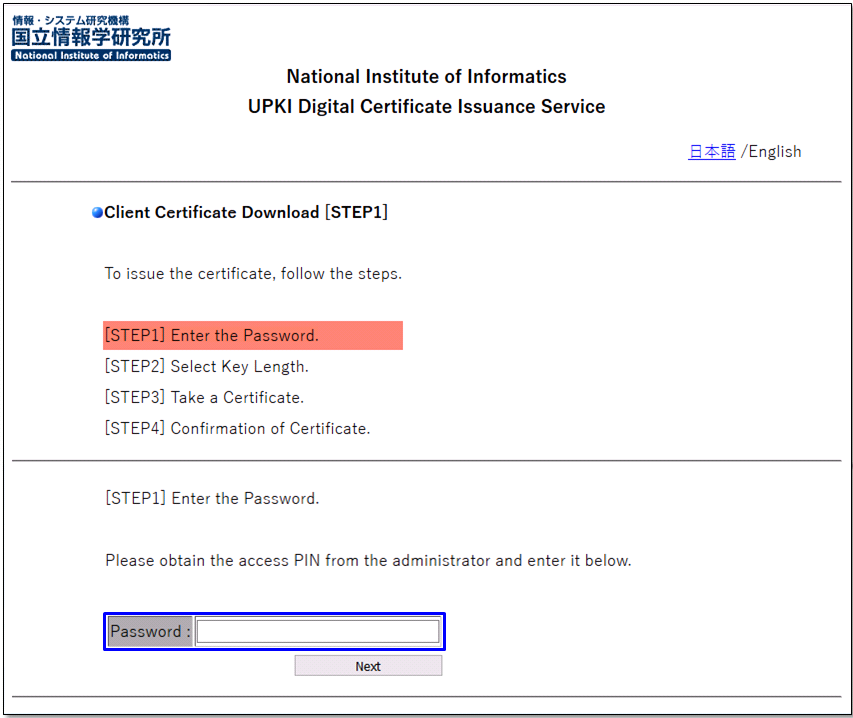 Image Removed Image Removed
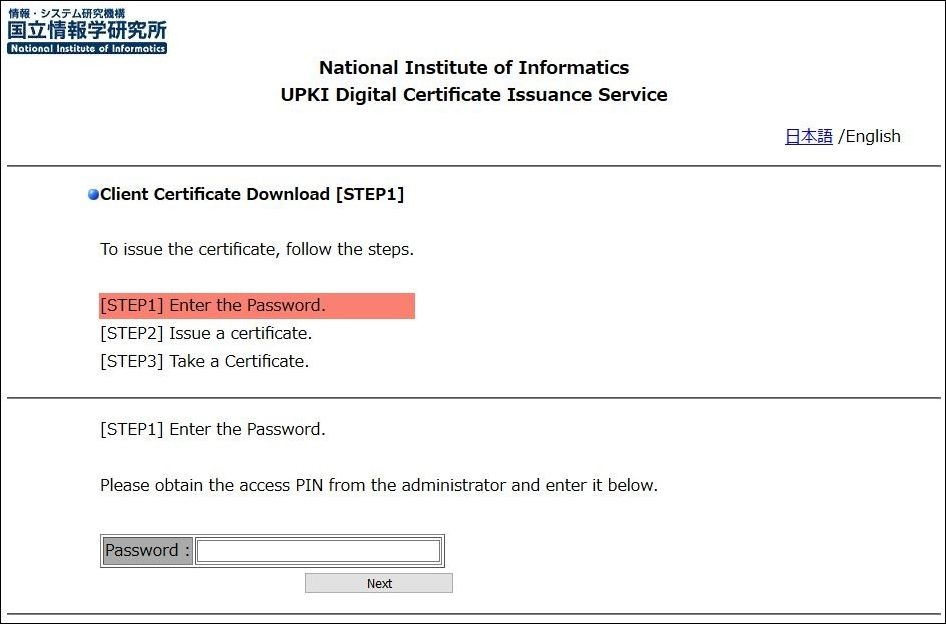 Image Added Image Added
- To change the language, click the link in the upper right corner.
Clicking [日本語 (Japanese)] changes the language to Japanese.
Clicking [English] changes the language to English
.
 Image Removed Image Removed
Once you complete authentication by the Access PIN, the screen will change to the Key Length selection.
Select a Key Length. Select [High Grade] for the Key Length and click [Issue].
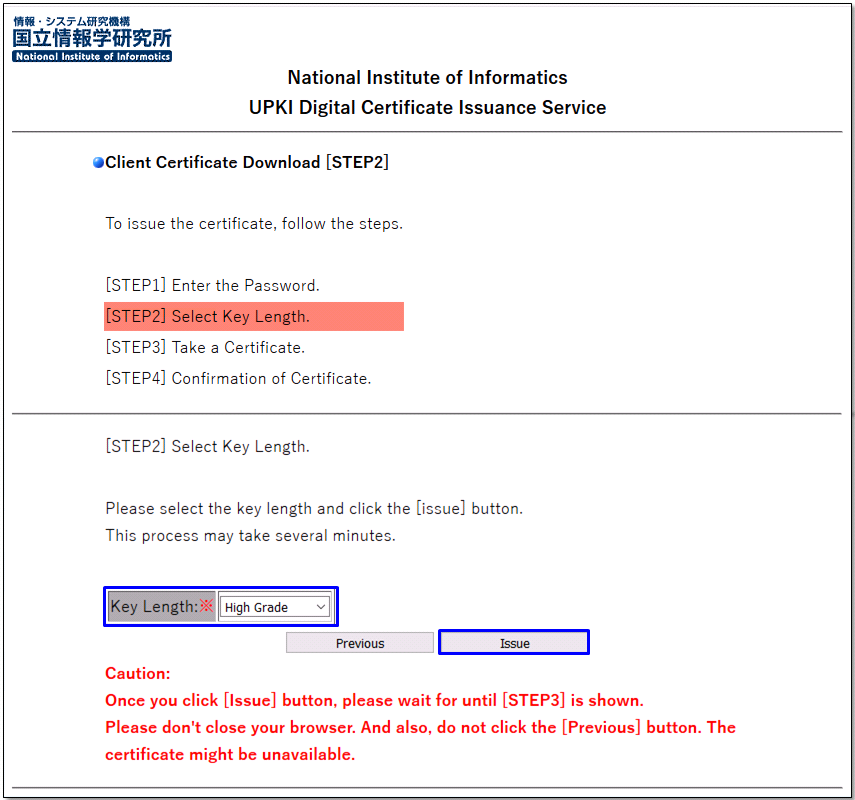 Image Removed Image Removed
When the Key generation completes, the following dialog box will pop up.
Click [OK]. (You can leave all checkboxes unchecked.)
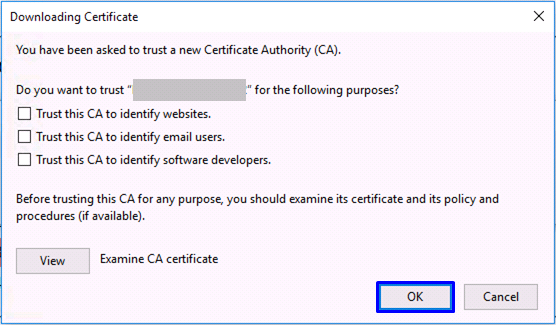 Image Removed Image Removed
Once the certificate issuing is successful, the following dialog box will pop up. Click [OK]
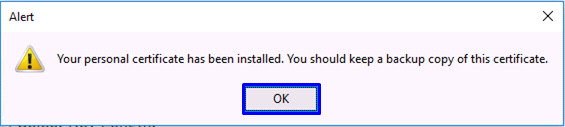 Image Removed Image Removed - Now, the screen changes to the [
Take - Issue a Certificate] screen, make sure that the certificate is actually
installed in the web browser- downloaded.
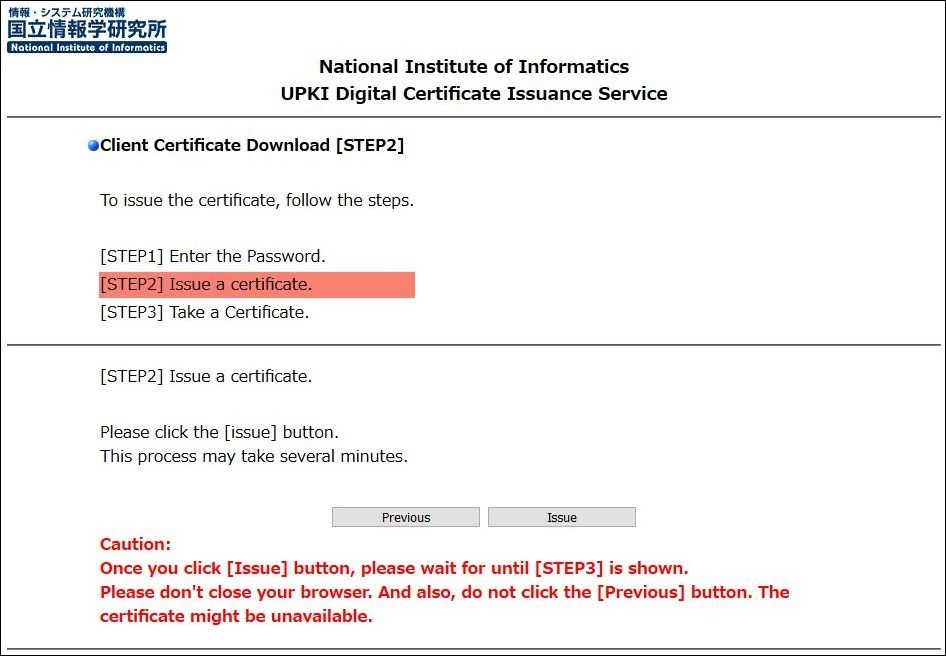 Image Added Image Added
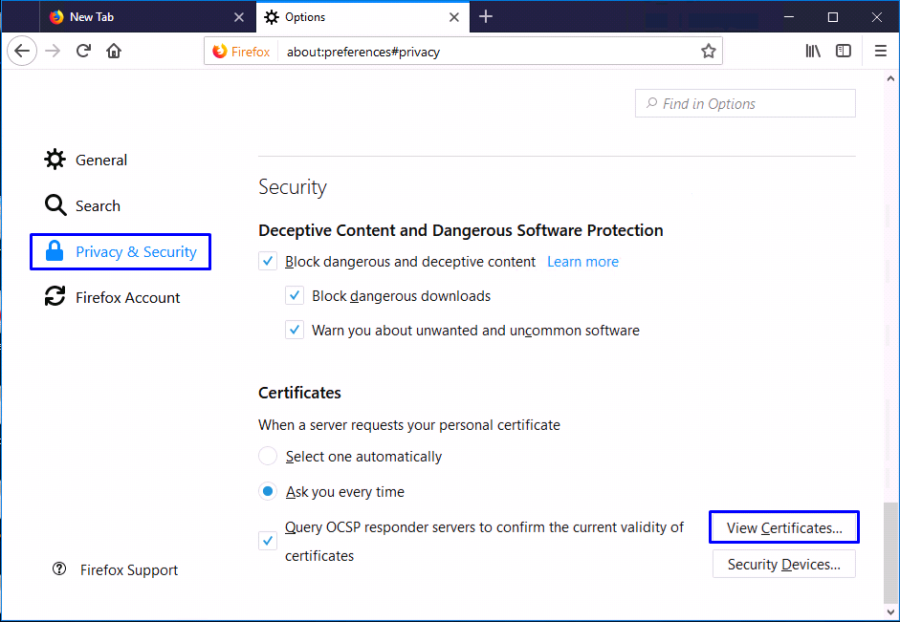
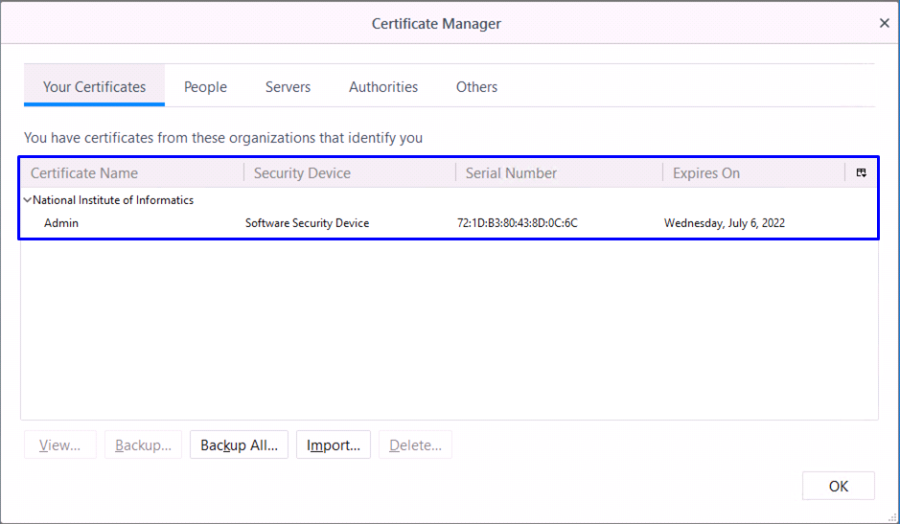
Follow the steps in the [blue box] shown in your browser, open the [Certificates] dialog box,
make sure that [a user name in full] is specified to [Issued To] and [Open Domain CA - G4] or [Open Domain S/MIME CA] is specified to [Issued By], and click [Close].
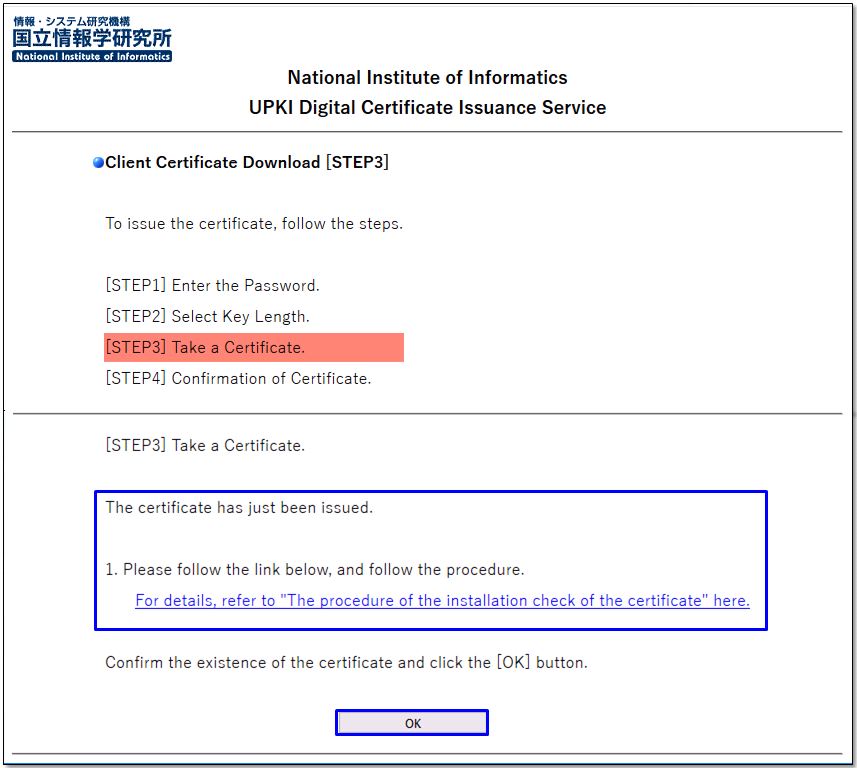 Image Removed Image Removed
- If the certificate is successfully issued, the certificate will start downloading.
When the download is complete, click the "X" button on your browser to close the browser.
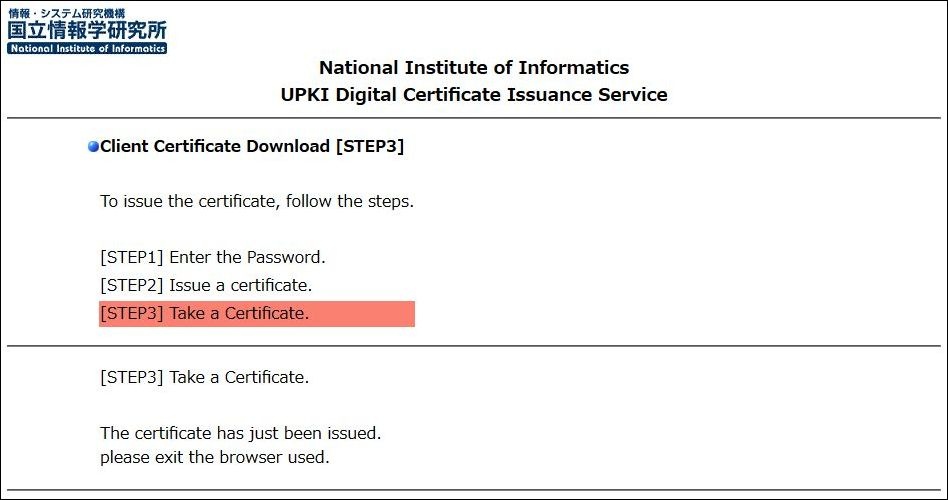 Image Added Image Added
- <The certificate actually downloaded>
Refreshing your Firefox will delete the captured certificate. Be careful and well reminded that you have to redo all relevant steps (from requesting through certificate issuing and install) if the certificate is lost by the deletion.
|
This section describes the procedure to export the certificate using [Firefox].
Process of Issuing the Certificate Using Firefox |
|
...
3. Exporting the Certificate (for Backup)
The procedure to export the certificate (for backup) is described.
...
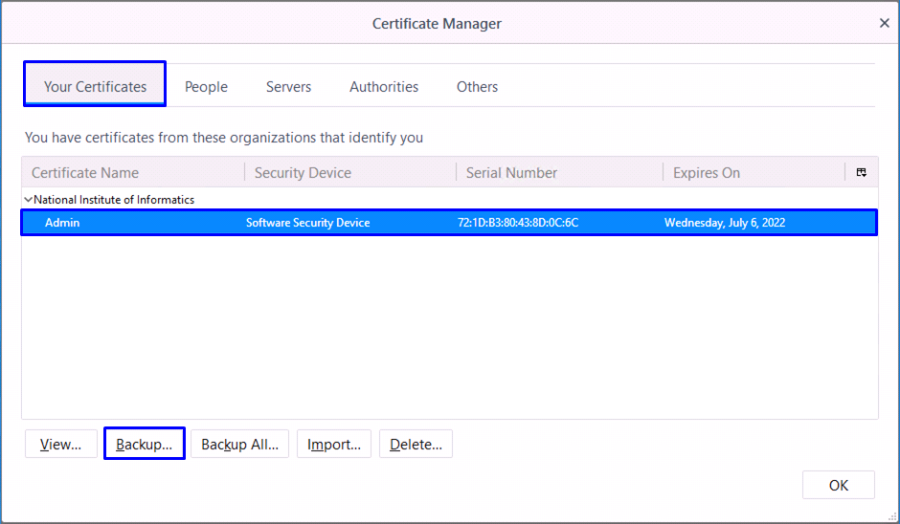 Image RemovedEnter any string in the [Filename: (N)] box as the name for the file to export. Image RemovedEnter any string in the [Filename: (N)] box as the name for the file to export. Then, click [Save (S)]. |
...
...
Refreshing your Firefox will delete the captured certificate.
Be careful and well reminded that you have to redo all relevant steps from requesting through certificate issuing and install if the certificate is lost by the deletion.