このサイトは https://support.rdm.nii.ac.jp/![]() へ移転しました。
へ移転しました。
ページ履歴
...
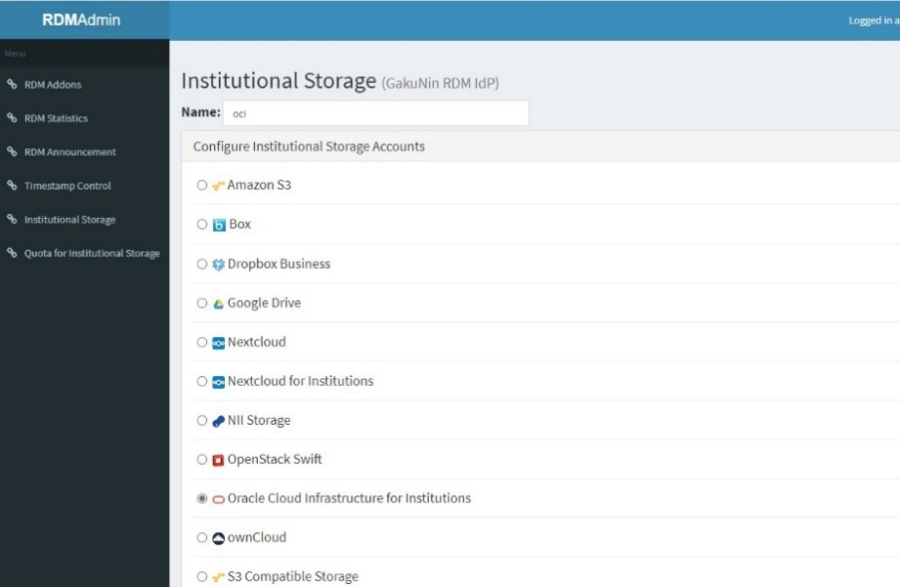
You can enter the required information for each provider in 'Institutional Storage' in the menu. Each user interface is different for each storage service. Please select the storage service from (1) to (7) below and check the operational method.
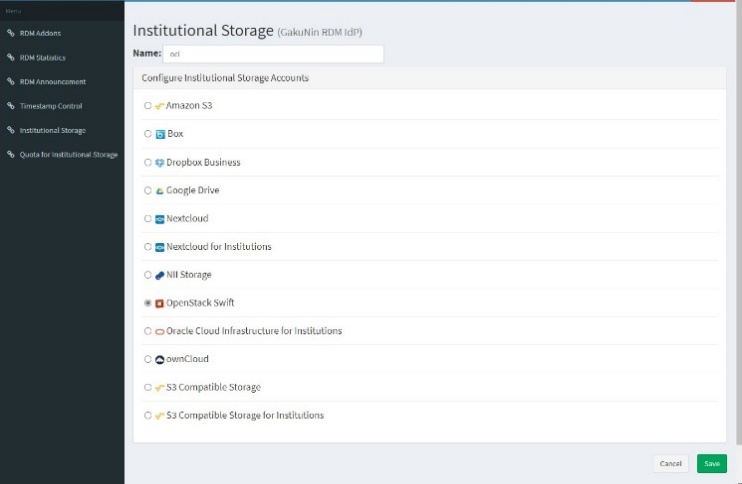
(1)Selecting Swift as institutional storage
| 展開 | |||||||||||||||||||||||||||
|---|---|---|---|---|---|---|---|---|---|---|---|---|---|---|---|---|---|---|---|---|---|---|---|---|---|---|---|
| |||||||||||||||||||||||||||
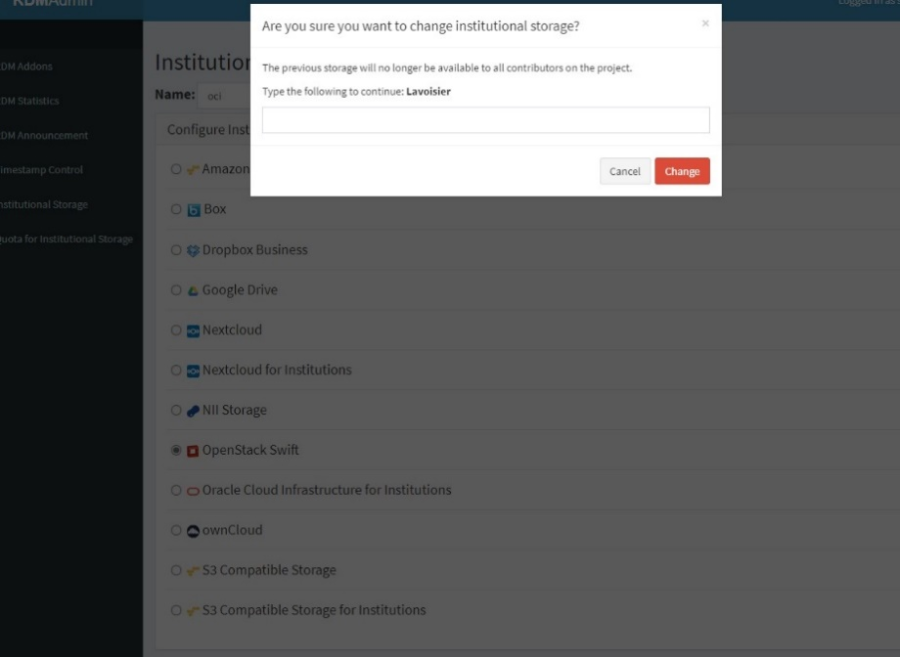
①On the 'Institutional Storage' screen, enter an arbitrary storage name in the 'Name' form, select OpenStack Swift, and click the 'Save' button.
②A confirmation screen will be displayed for changing the institutional storage.
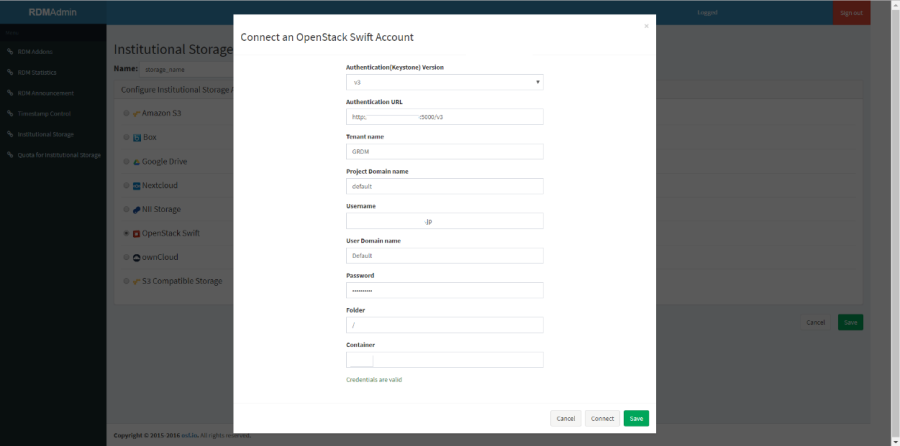
③The input screen for authentication and settings information will be displayed. Fill out each form according to the following and click the 'Connect' button to perform a connection test.
■ Items required for authentication to OpenStack Swift
If the connection test is successful, ‘Credentials are valid’ will be displayed. Then, proceed to step ④. If the connection test fails, ‘Unable to list containers. Listing containers is required permission.’ will be displayed. Please correct the error and click the ‘Connect’ button again. ④Click the 'Save' button to save the institutional storage settings.
|

...
概要
コンテンツ ツール