OS
Following instruction is based on the CentOS6 installation as Minimal package.
Network connection is required in the following procedure.
Edit /etc/sysconfig/network-scripts/ ifcfg-eth0 to be ONBOOT=yes.
DEVICE=eth0
HWADDR=08:........
TYPE=Ethernet
UUID=89.....
ONBOOT=yes
NM_CONTROLLED=yes
BOOTPROTO=dhcp
Then restart network.
sudo service network restart
In order to modify firewall setting for http and https, please install following program for easy to setup.
sudo yum -y install system-config-firewall-tui
Then setup firewall
sudo system-config-firewall-tui
Go to "Customize" then check "Secure WWW (HTTPS)" and "WWW (HTTP)"
If you get the following error when starting the firewall-tui, you need to install dbus.
Traceback (most recent call last):
  File "/usr/bin/system-config-firewall-tui", line 29, in <module>
    import fw_tui
  File "/usr/share/system-config-firewall/fw_tui.py", line 34, in <module>
    import fw_nm
  File "/usr/share/system-config-firewall/fw_nm.py", line 29, in <module>
    import dbus
ImportError: No module named dbus
sudo yum -y install dbus dbus-python
sudo service messagebus start
Middleware Installation
Web Server and PHP
sudo yum install -y httpd
sudo yum install -y php php-mbstring php-gd php-xml
sudo service httpd start
Full Text Search and MySQL
WEKO utilize Groonga for the full text search engine.
Since the MySQL version of the CentOs 6 is old, this installation uses Oracle MySQL.
You can find the official information about groonga and mroonga from...
http://groonga.org/ and http://mroonga.org/
sudo rpm -ivh http://packages.groonga.org/centos/groonga-release-1.1.0-1.noarch.rpm
sudo yum install -y http://repo.mysql.com/mysql-community-release-el6-7.noarch.rpm
sudo yum makecache
sudo yum install -y groonga
sudo yum install -y mysql-community-mroonga
sudo yum install -y php-mysql
Library for extract the text from PDF file.
sudo yum install -y poppler-utils
Other Middleware
Library for making PDF thumbnail
sudo yum install -y ImageMagick
Add package repository
Additional repository RPM is different depending on the server environment.
Please check appropriate RPM from the http://dag.wieers.com/rpm/packages/rpmforge-release/
sudo rpm -ivh [RPM URL for additional repository]
Library for making PDF cover page.
sudo yum install -y pdftk
Library for showing multimedia contents.
sudo yum install -y ffmpeg
Middleware Setup and Configuration
Database
Setup root password
sudo /etc/init.d/mysqld start
/usr/bin/mysqladmin -u root password 'root-no-password'
Delete anonymous user from the initial database.
mysql -u root -proot-no-password
use mysql
delete from user where user='';
Create database for WEKO(NetCommon) installation
create database nc2db default character set UTF8;
Create an database user and assign the privilege to the previously created db.
grant all on nc2db.* to nc2user@localhost identified by 'nc2pass';
PHP
Open /etc/php.ini by editor.
Modify memory related configuration. Each size have to have the relationship as follows.
upload_max_filesize < post_max_size < memory_limit
For example,
memory_limit = 128M;
post_max_size = 64M;
upload_max_filesize = 32M;
Configure for UTF-8 character code .
[mbstring]
mbstring.language = neutral
mbstring.internal_encoding = UTF-8
mbstring.http_input = auto
mbstring.http_output = pass
mbstring.encoding_translation = Off
You also need to specify the timezone in the /etc/php.ini
[Date]
; Defines the default timezone used by the date functions
; http://www.php.net/manual/en/datetime.configuration.php#ini.date.timezone
date.timezone = "Asia/Tokyo"
After modifying the configuration, httpd have to be restarted.
sudo /etc/init.d/httpd restart
NetCommons2
Before Install Preparation
Install wget first.
sudo yum install -y wget
Download the latest NetCommons core package (Following command download version 2.4.2.1).
wget -c "http://www.netcommons.org/%E3%83%80%E3%82%A6%E3%83%B3%E3%83%AD%E3%83%BC%E3%83%89/%E3%82%B3%E3%82%A2%E3%83%91%E3%83%83%E3%82%B1%E3%83%BC%E3%82%B8/?action=cabinet_action_main_download&block_id=93&room_id=1&cabinet_id=1&file_id=2811&upload_id=6210" -O netcommons-2.4.2.1.tar.gz
Uncompress the downloaded file.
tar zxvf netcommons-2.4.2.1.tar.gz
Copy it to the web application directory.
sudo cp -rp NetCommons-2.4.2.1/html /var/www/html/nc2
Change file owner to be able to access by web server
cd /var/www/html/nc2
sudo chown -R apache:apache *
If you would like to access to NetCommons as a top page, you should modify /etc/httpd/conf/httpd.conf as follows.
DocumentRoot "/var/www/html/nc2/htdocs"
This is not a requirement, however, if you add the following expression in the httpd.conf, you can utilize the URL-rewrite option in OAI-PMH Configuration.
Please refer to User Manual (3.2.9.3.3 OAI-PMH Configuration) to know how to utilize this .htaccess configuration.
    <Directory /var/www/html/nc2/htdocs>
        AllowOverride All
    </Directory>
Then restart the httpd
sudo /etc/init.d/httpd restart
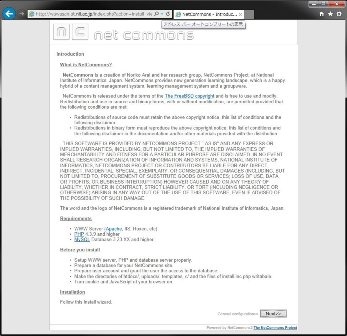
Installation
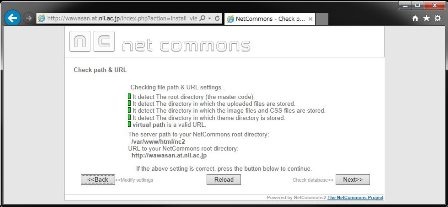
Access to the site you will install the NC2 by browser. You can see the installation page like this.
In this page, select English anyway from the pull-down menu.
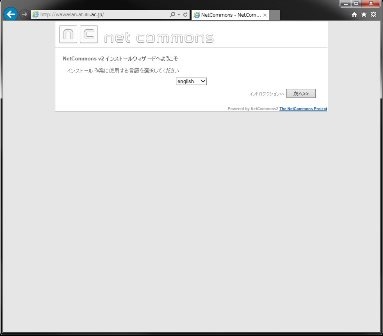
Press Next button.
This step requires to input general configuration parameters like this.
| Paramter | Value |
|---|---|
| Site Name | "as you want" |
| Database | mysqli |
| Database Hostname | localhost |
| Database Username | nc2user |
| Database Password | nc2pass |
| Database Name | nc2db |
| Table Prefix | nc2 |
| No | |
| NetCommons Virtual Path | "your server address" |
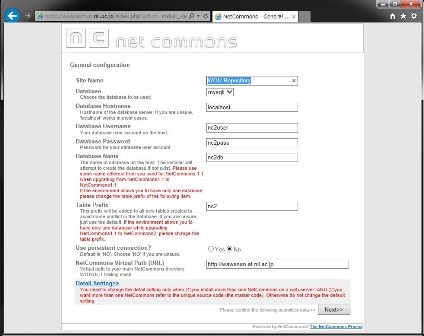
Just need to confirm your parameters. Press Next if it is OK.

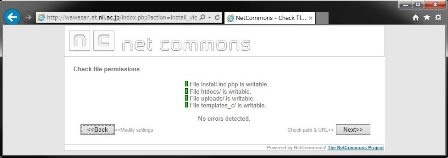
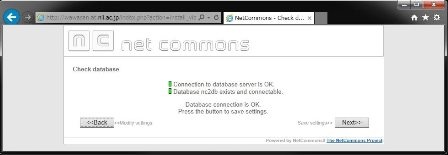
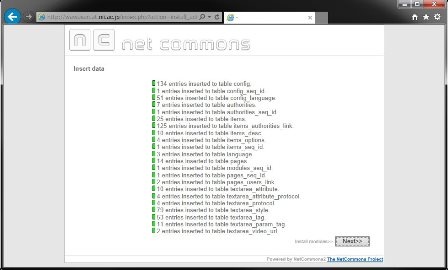
Green signal means there is no problem with your installation process so far, then Next.
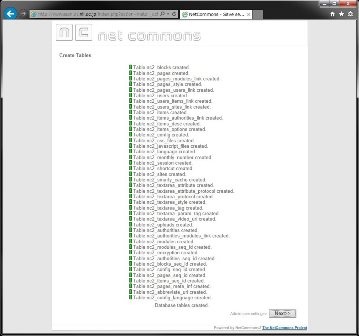
Here is also then press Next.
Here is also then press Next.
Here is also then press Next.
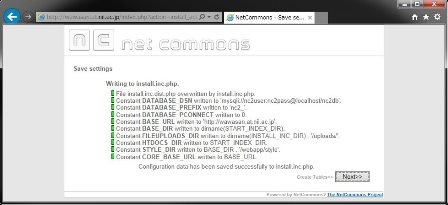
Here is also then press Next.
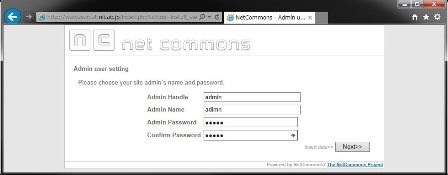
In this page, you will create an administrator account.
Press Next button, if there is no problem.
Press Next button, if there is no problem.
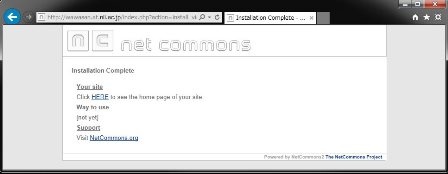
Congratulations! Installation of NetCommons2 has been completed.
If the following warning appear after installing the NetCommons2, please apply the patch as follow.

In order to fix this bug. Please download the patched file from
Then replace it to the /var/www/html/nc2/maple/nccore/db/DbObjectAdodb.class.php
WEKO
Checkout WEKO module
In order to download the latest WEKO module from the source code repository, install the svn first
sudo yum install -y subversion
Checkout multilingual WEKO from the SVN site, then copy it to the NC2 module directory.
The current instruction is to utilize the trunk source code but we will prepare the stable one soon.
svn co http://forge.at.nii.ac.jp/svn/nc/repository/trunk repository
sudo cp -rp repository /var/www/html/nc2/webapp/modules/
Install WEKO module
Login to the NC2 and click Control Panel in the header menu.
Click the "Module Manager" icon, then you can find WEKO in the "Modules not yet installed" tab.
Let's click "Install" link which located right hand side of WEKO module name.
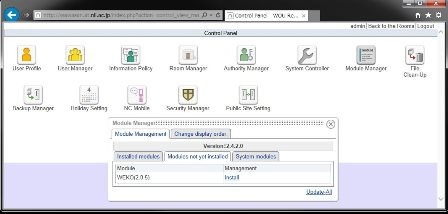
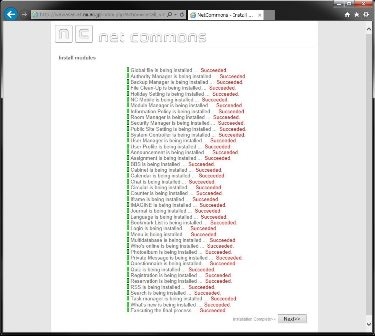
If you can find the word "Succesfully installed." at the end of the install log, congratulations!
Installation WEKO into the NC2 has been completed.

Customization for Multilingual
Only English, Chinese and Japanese are available by the original NC2. Therefore, we need to apply patch for more multilingual function. First you need to checkout the patch and just copy it to the NC2 application directory.
svn co http://forge.at.nii.ac.jp/svn/nc/nc2multilang/trunk nc2multilang
cd nc2multilang
sudo cp -rp webapp /var/www/html/nc2/
MySQL DB also have to be modify for this customization.
In this SQL file database prefix for NC2 is assumed as "nc2" as has been instructed previously.
If you apply different prefix, please modify SQL file appropriately.
mysql -u nc2user -pnc2pass
mysql> use nc2db
mysql> source AddLanguageForNC2SQL.sql
Completed!
Show WEKO Block
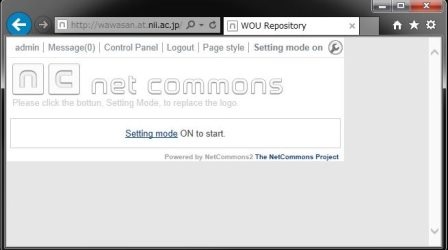
Go to the NC2 top page and click "Setting mode on" link in the header.
After switching to the Setting Mode, you can select WEKO module in the drop down menu.

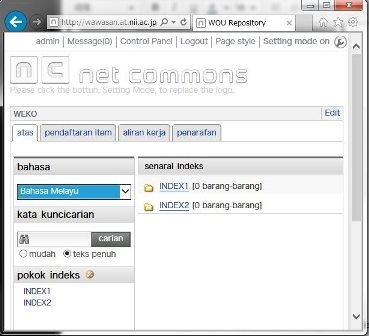
Now you paste WEKO module on the top page. Here is the control panel page of WEKO.
In order to show the language select function, please click the "management" tab.
In the [management] => [display setting] tab, you can find "language setting" menu.
In this menu, that is, [language setting] => [select language setting], please select "Display" (default is "Hide") from the drop down list.
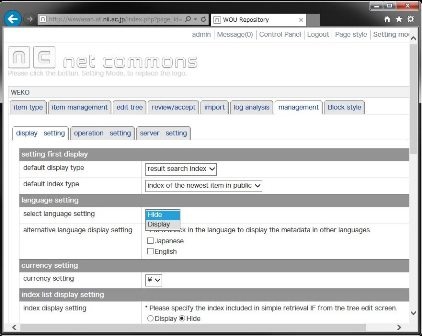
Then click "commit" button at the bottom of the page.
You can exit from the control panel by clicking "Quit" link at the right hand side of the WEKO block header.
For multilingual, web page for each language have to be prepared by the following procedure.
1. As same as showing the WEKO block, go to Setting Mode and show language and menu module.
2. In the language module, select the language which can to be selected in your page.
3. After selecting an language, create a new page under the public space by using the menu module.
4. In the page created in 2, show WEKO block.
5. Same procedure have to be repeated for other language.