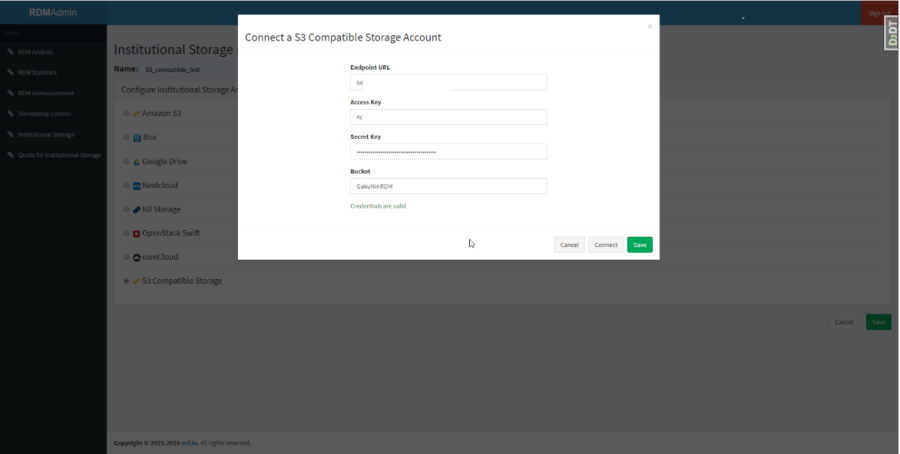
Institutional Storage Function
This function can be operated by the institutional administrator from the admin screen. The storage that is mainly used within an institution is called the institutional storage.
In GakuNin RDM, you will select the storage to be mainly used from the list of storage services and operate it as the institutional storage.
You can enter the required information for each provider in 'Institutional Storage' in the menu. Each user interface is different for each storage service. Please select the storage service from (1) to (7) below and check the operational method.
Selecting Swift as institutional storage
 Display
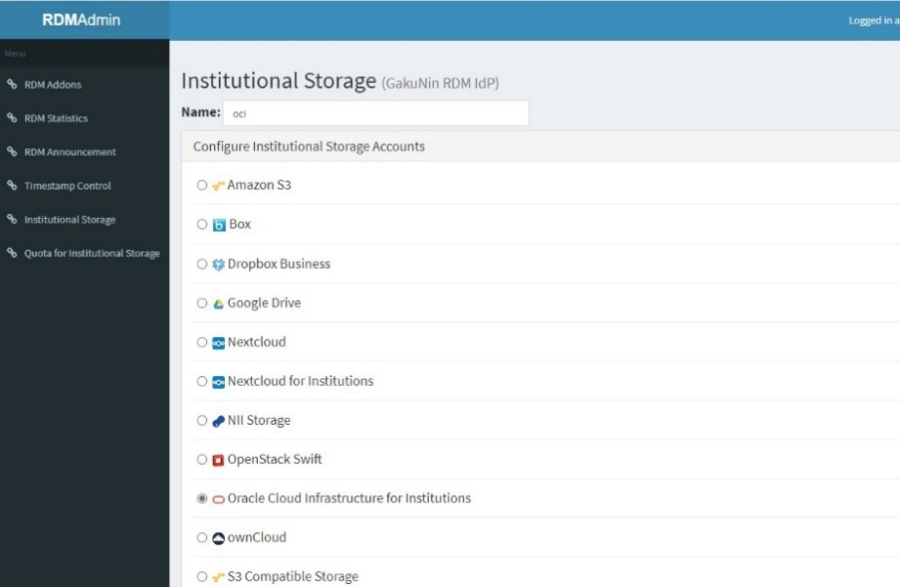
- On the 'Institutional Storage' screen, enter an arbitrary storage name in the 'Name' form, select OpenStack Swift, and click the 'Save' button.
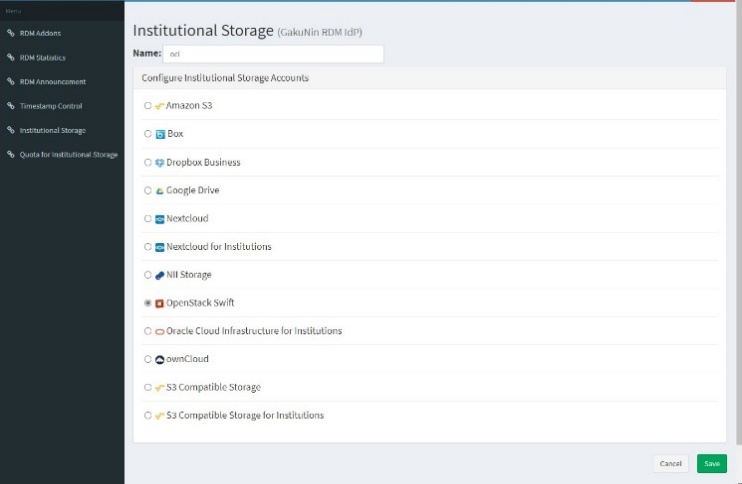
- A confirmation screen will be displayed for changing the institutional storage.
If you agree to the change, enter the character string after 'Type the following to continue:' in the form and click the 'Change' button.
- If you do not agree with the change, you can return to the previous screen by clicking the 'Cancel' button.
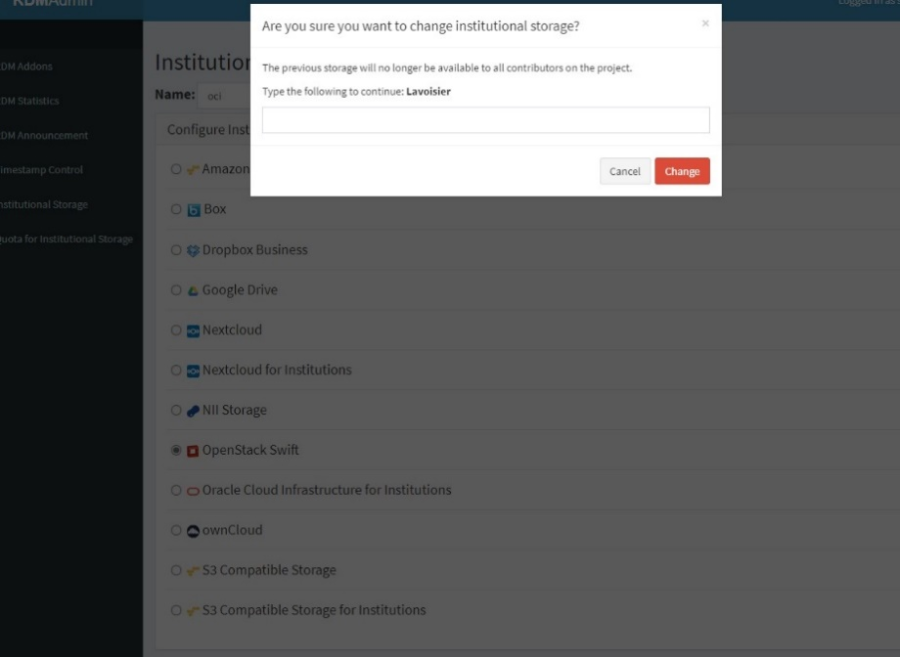
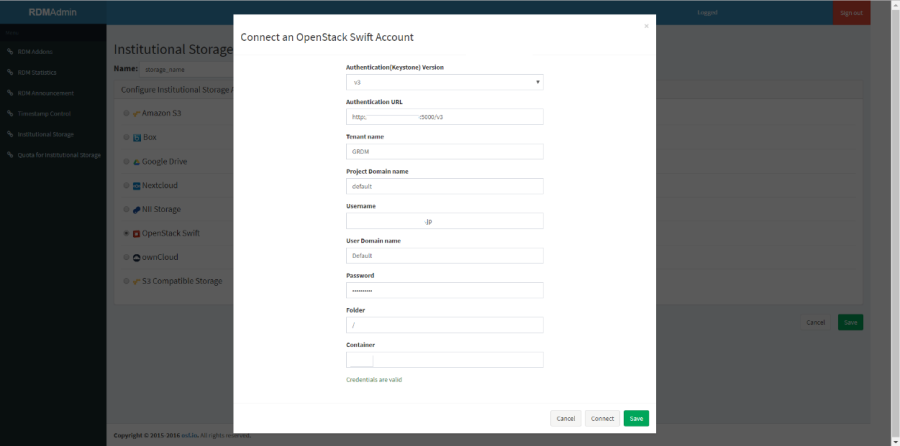
- The input screen for authentication and settings information will be displayed. Fill out each form according to the following and click the 'Connect' button to perform a connection test.
- Please note that the 'Connect' button will be inactive until all the items required for connection are entered.
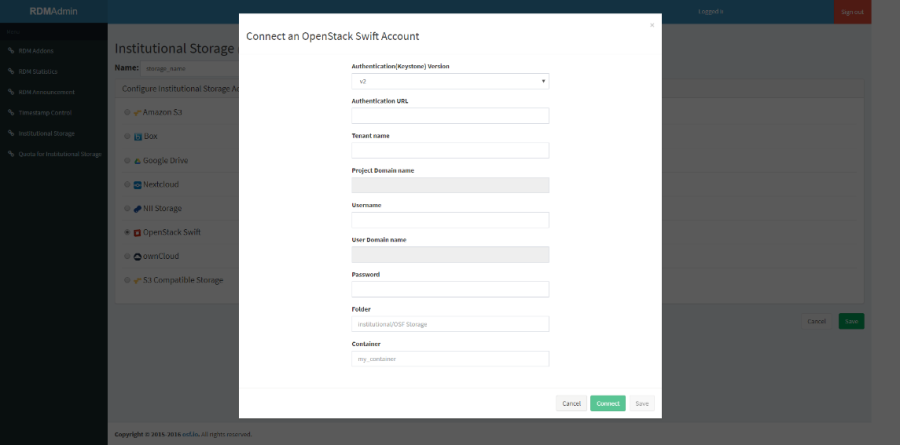
■ Items required for authentication to OpenStack Swift
Item |
Input Type |
Contents |
Authentication (Keystone) Version |
dropdown |
OpenStack Swift version |
Authentication URL |
text input |
OpenStack Swift authentication URL |
Tenant name |
text input |
Target tenant name |
Project Domain name |
text input |
Target project domain name |
Username |
text input |
Target account username (email address) |
User Domain name |
text input |
Target user domain name |
Password |
text input |
Target account password |
Container |
text input |
Target container name |
If the connection test is successful, 'Credentials are valid' will be displayed. Then, proceed to step (4).
If the connection test fails, 'Unable to list containers. Listing containers is required permission.' will be displayed.
Please correct the error and click the 'Connect' button again.
- Click the 'Save' button to save the institutional storage settings.
Selecting Nextcloud as institutional storage
 Display
- On the 'Institutional Storage' screen, enter an arbitrary storage name in the 'Name' form, select Nextcloud, and click the 'Save' button.
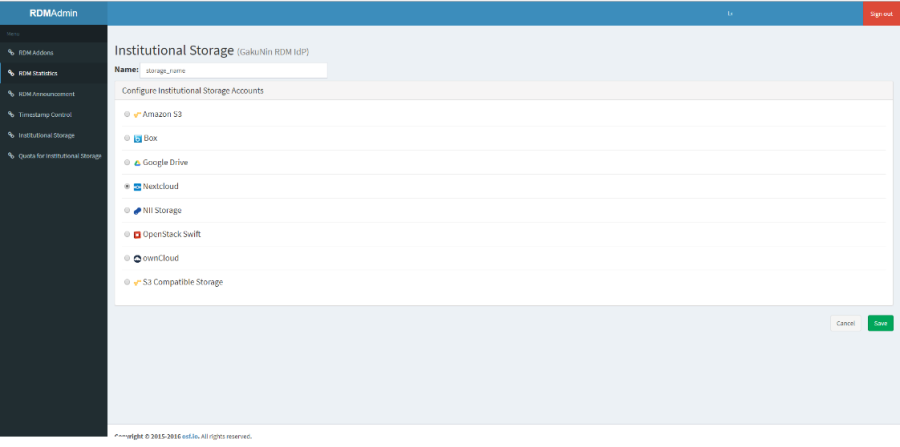
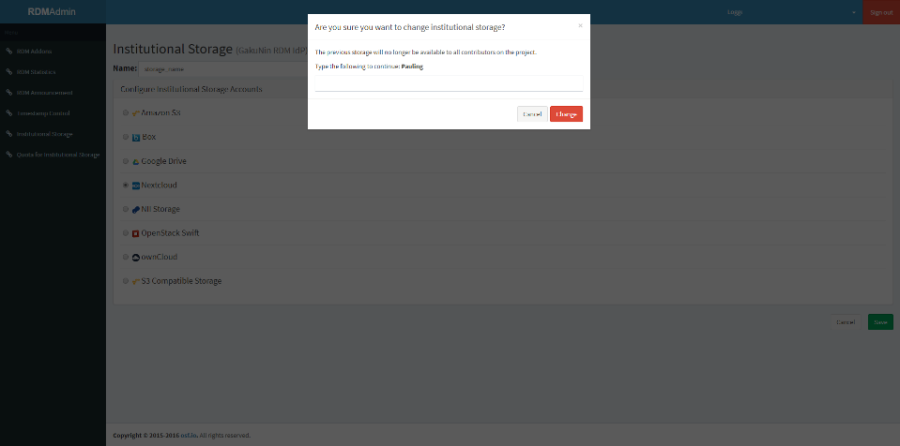
- A confirmation screen will be displayed for changing the institutional storage.
If you agree to the change, enter the character string after 'Type the following to continue:' in the form and click the 'Change' button.
- If you do not agree with the change, you can return to the previous screen by clicking the 'Cancel' button.
- The input screen for authentication and settings information will be displayed. Fill out each form according to the following and click the 'Connect' button to perform a connection test.
- Please note that the 'Connect' button will be inactive until all the items required for connection are entered.
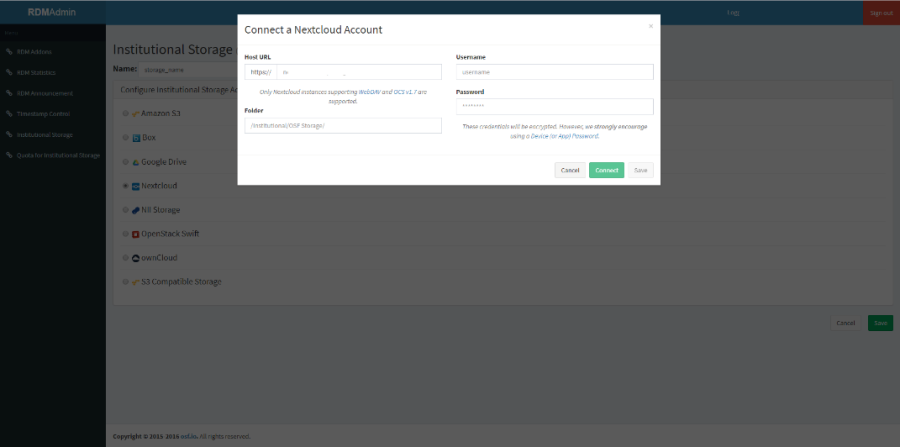
■ Items required for authentication to Nextcloud
Item |
Input Type |
Contents |
Host URL |
text input |
URL to connect to (including schema) |
Username |
text input |
Target account username |
Password |
text input |
Target account password |
Folder |
text input |
Path to the folder to be used |
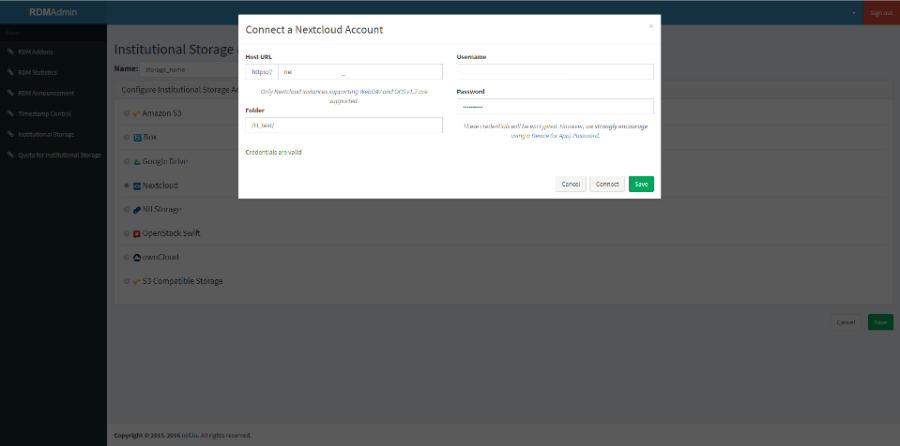
If the connection test is successful, 'Credentials are valid' will be displayed. Then, proceed to step (4).
If the connection test fails, the error content will be displayed. Correct the error and click the 'Connect' button again.
- Click the 'Save' button to save the institutional storage settings.
Selecting ownCloud as institutional storage
 Display
- On the 'Institutional Storage' screen, enter an arbitrary storage name in the 'Name' form, select ownCloud, and click the 'Save' button.
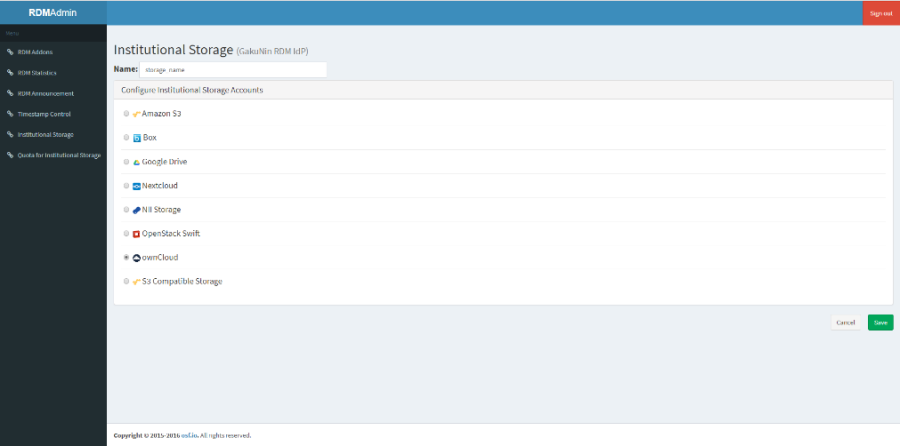
- A confirmation screen will be displayed for changing the institutional storage.
If you agree to the change, enter the character string after 'Type the following to continue:' in the form and click the 'Change' button.
- If you do not agree with the change, you can return to the previous screen by clicking the 'Cancel' button.
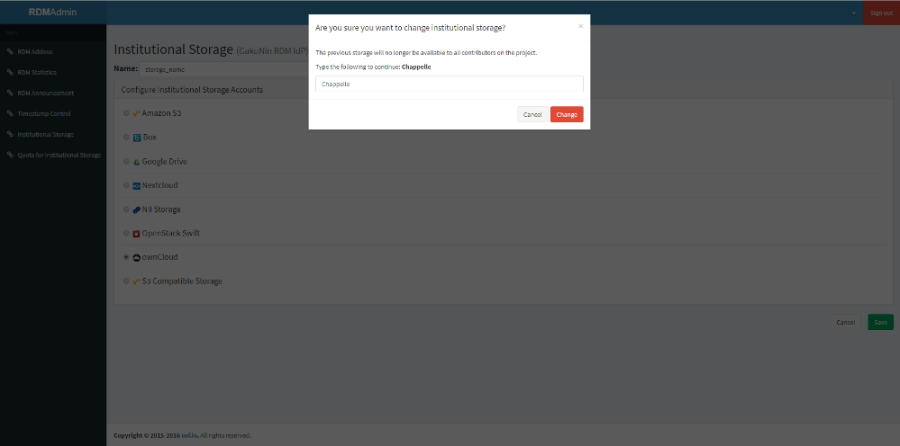
- The input screen for authentication and settings information will be displayed. Fill out each form according to the following and click the 'Connect' button to perform a connection test.
- Please note that the 'Connect' button will be inactive until all the items required for connection are entered.
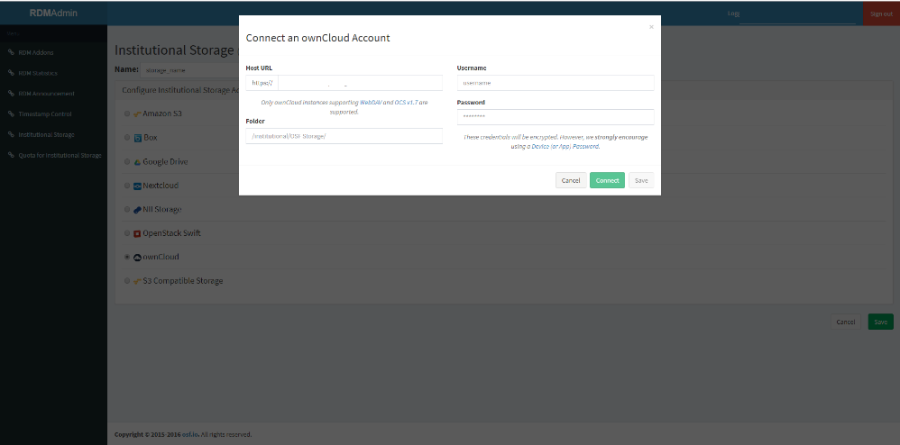
■ Items required for authentication to ownCloud
Item |
Input Type |
Contents |
Host URL |
text input |
URL to connect to (including schema) |
Username |
text input |
Target account username |
Password |
text input |
Target account password |
Folder |
text input |
Path to the folder to be used |
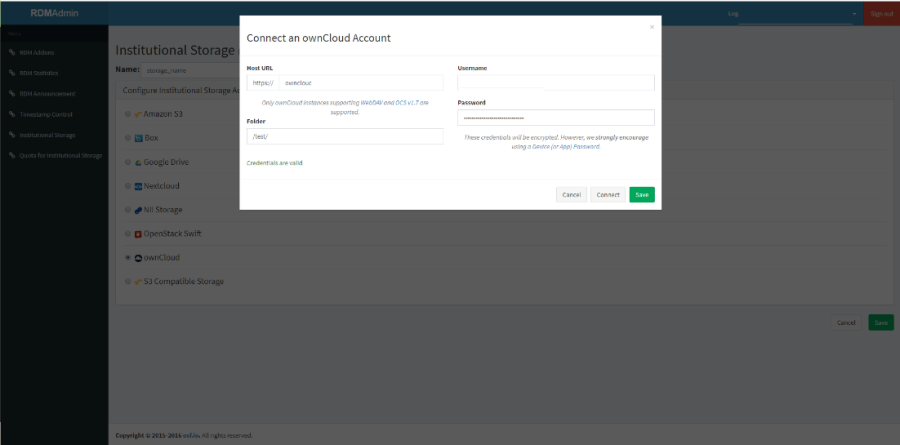
If the connection test is successful, 'Credentials are valid' will be displayed. Then, proceed to step (4).
If the connection test fails, the error content will be displayed. Correct the error and click the 'Connect' button again.
- Click the 'Save' button to save the institutional storage settings.

Selecting Google Drive as institutional storage
 Display
- On the 'Institutional Storage' screen, enter an arbitrary storage name in the 'Name' form, select Google Drive, and click the 'Save' button.
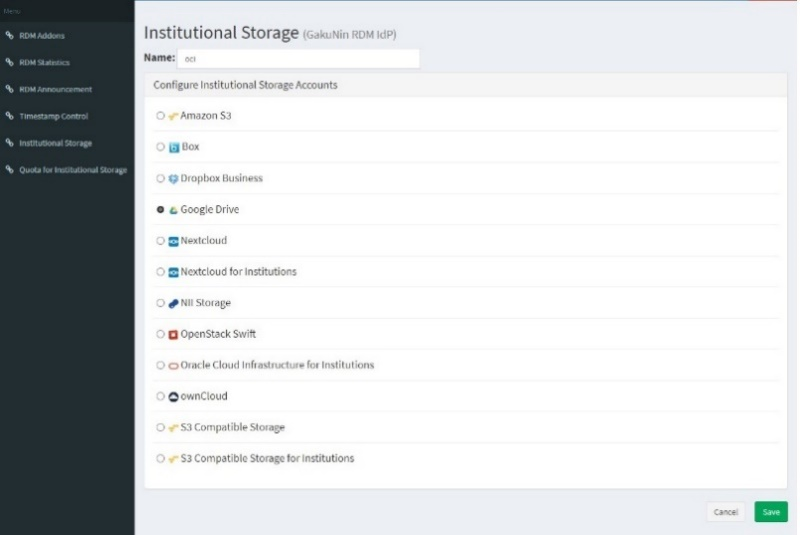
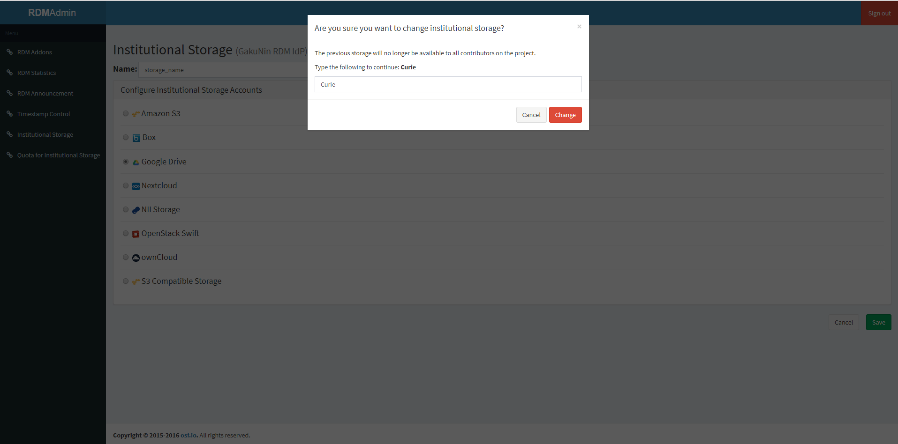
- A confirmation screen will be displayed for changing the institutional storage.
If you agree to the change, enter the character string after 'Type the following to continue:' in the form and click the 'Change' button.
- If you do not agree with the change, you can return to the previous screen by clicking the 'Cancel' button.
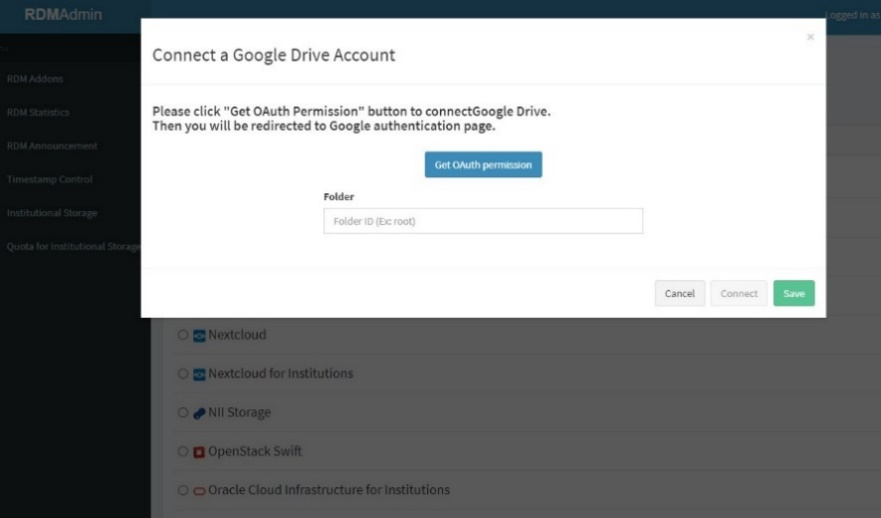
- The input screen for authentication and settings information will be displayed.
To get the authentication information, click the 'Get OAuth permission' button.
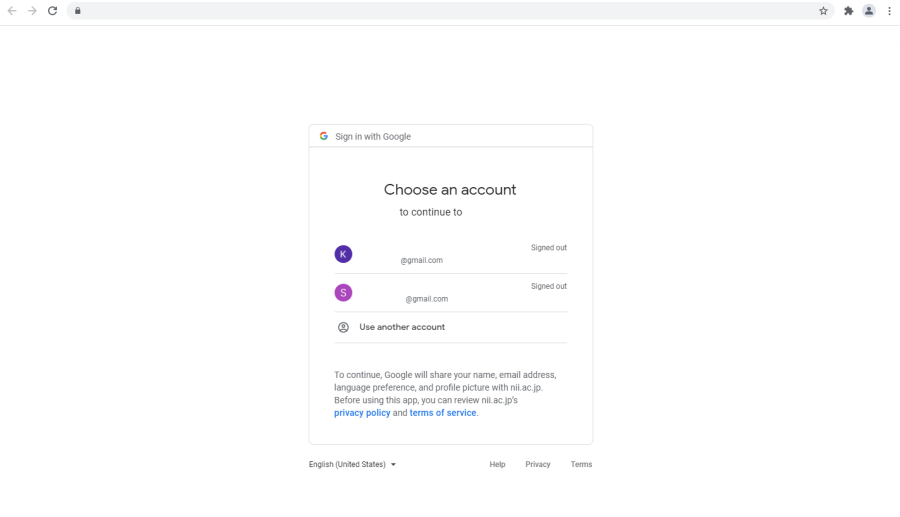
- Select the target Google account on the account selection screen.
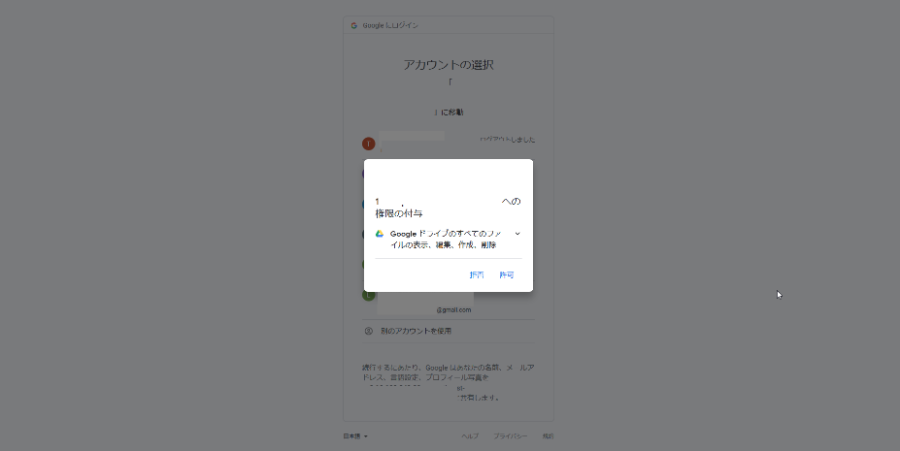
- Click 'Allow' on the access granting screen.
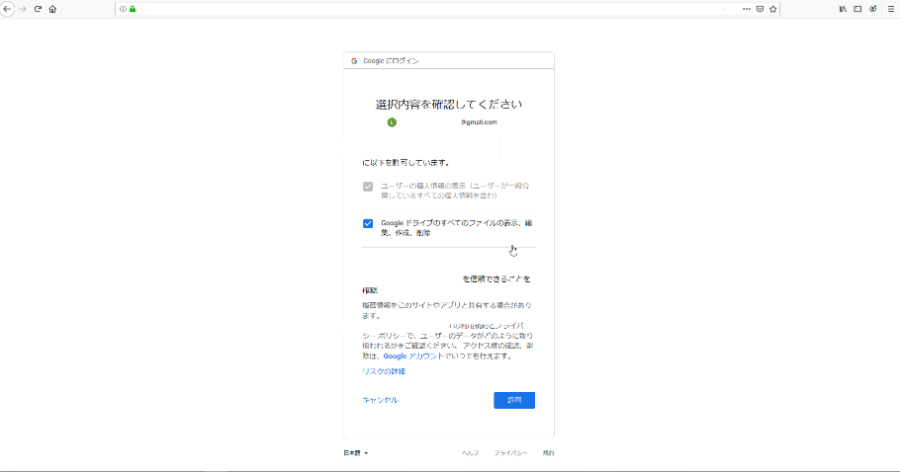
- A confirmation screen for your selection will be displayed. Check if 'View, edit, create, and delete all files in Google Drive' is selected, and then click 'Allow'.
- If the following page is displayed, the authentication is successful. (Authentication is completed at this point. Click the 'Close' button to close this page.)

- Return to the 'Institutional Storage' tab. Check that OAuth authentication is successful and that the authenticated username and authentication token are displayed.
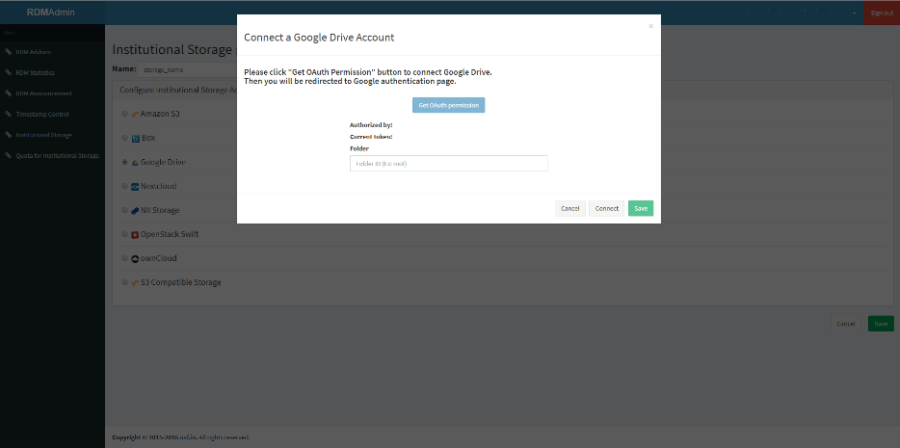
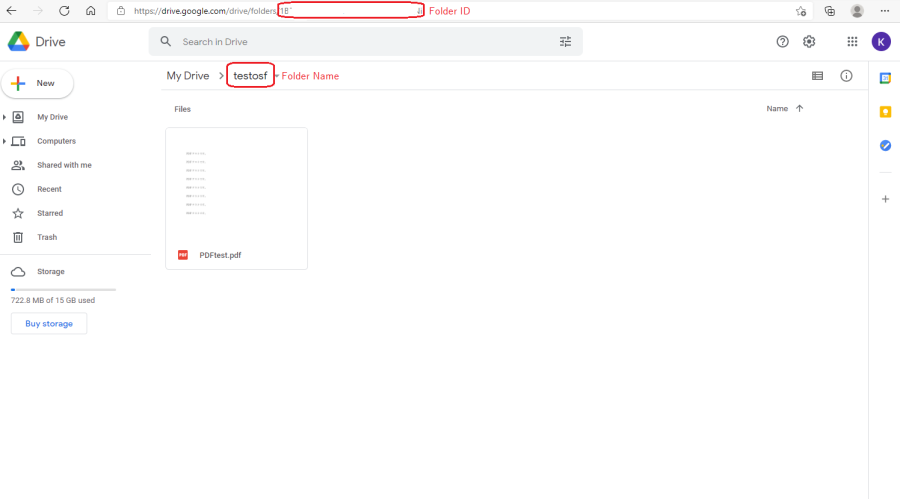
- Enter the target folder ID in the 'Folder' input form.
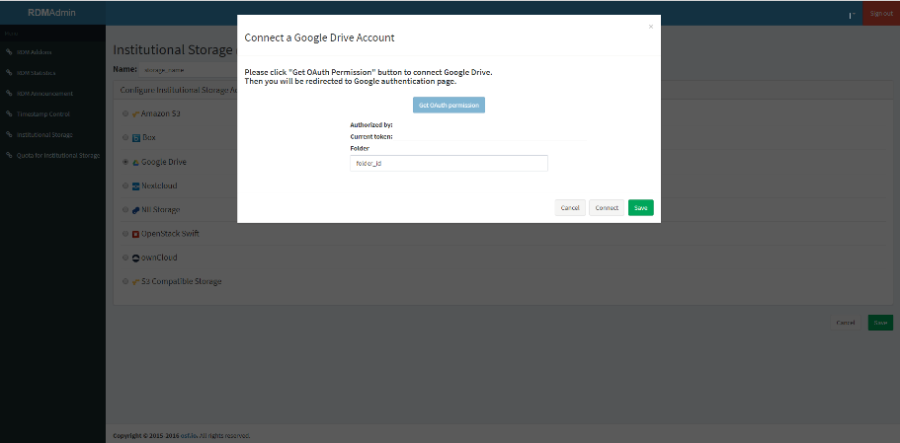
- Please note that the folder ID is a character string included in the URL of the folder, not the folder name.
- Click the 'Save' button to save the institutional storage settings.
Selecting Box as institutional storage
 Display
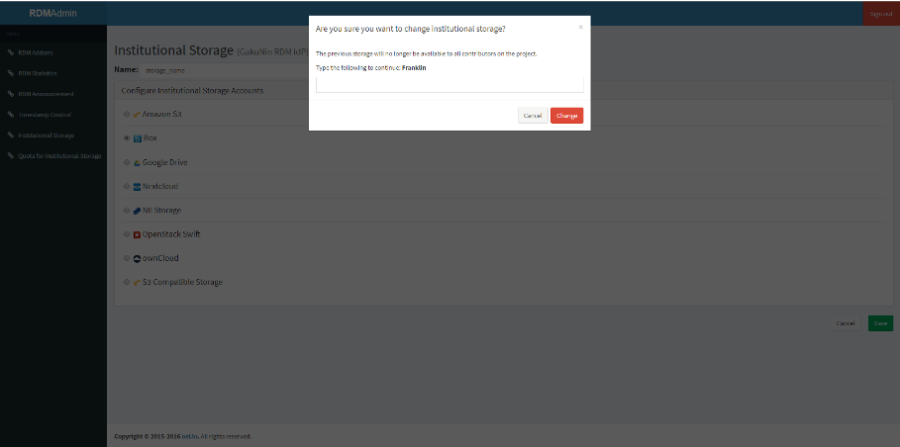
- On the 'Institutional Storage' screen, enter an arbitrary storage name in the 'Name' form, select Box, and click the 'Save' button.
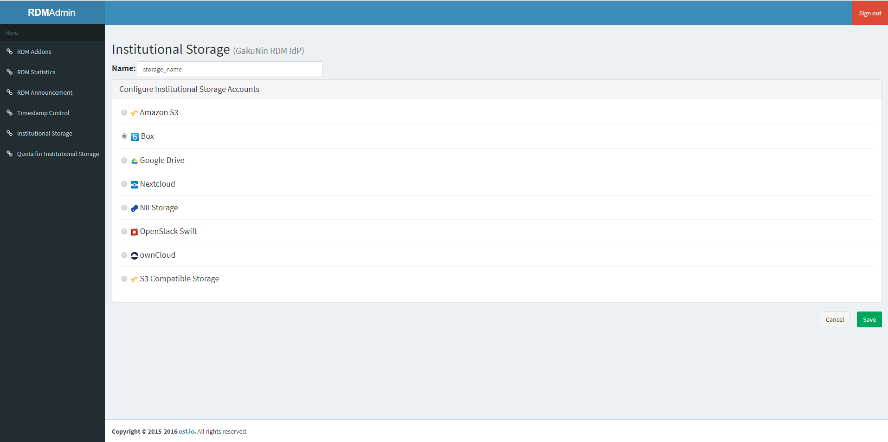
- A confirmation screen will be displayed for changing the institutional storage.
If you agree to the change, enter the character string after 'Type the following to continue:' in the form and click the 'Change' button.
- If you do not agree with the change, you can return to the previous screen by clicking the 'Cancel' button.
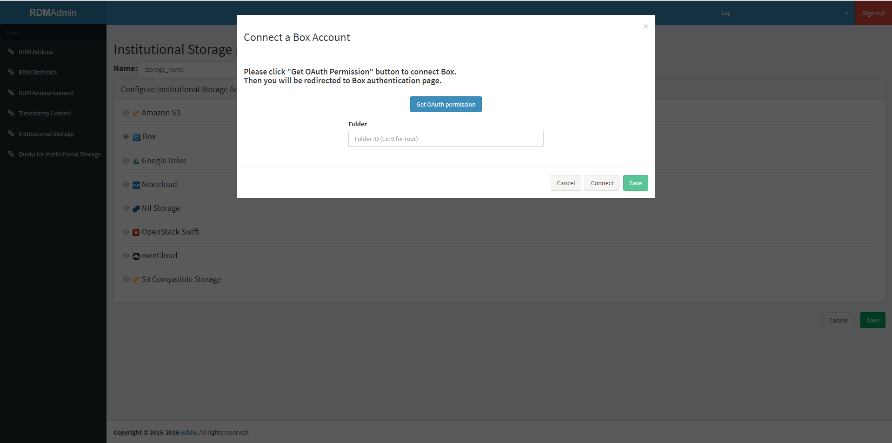
- The input screen for authentication and settings information will be displayed.
To get the authentication information, click the 'Get OAuth permission' button.
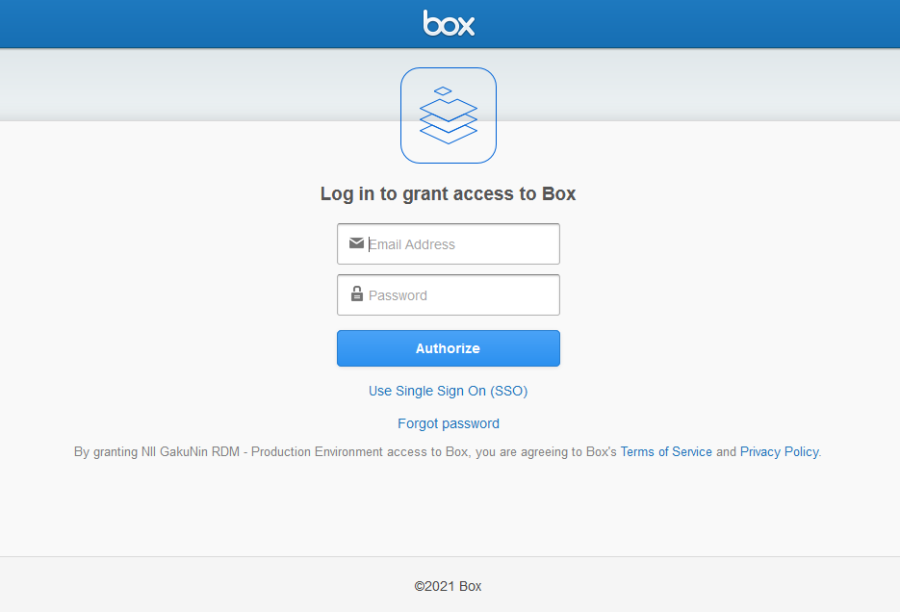
- On the login screen, enter the email address and password of the target account and press 'ApproveAuthorize'.
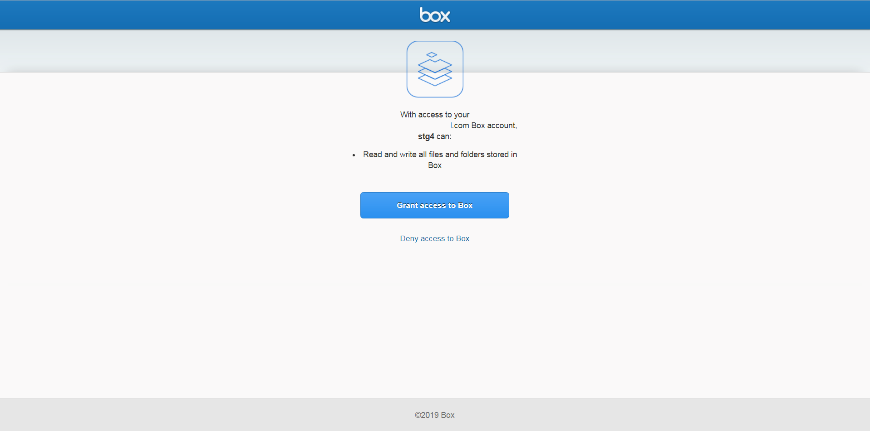
- Click 'Grant access to Box' on the access granting screen.
- If the following page is displayed, the authentication is successful. (Authentication is completed at this point. Click the 'Close' button to close this page.)

- Return to the 'Institutional Storage' tab. Check that OAuth authentication is successful and that the authenticated username and authentication token are displayed.
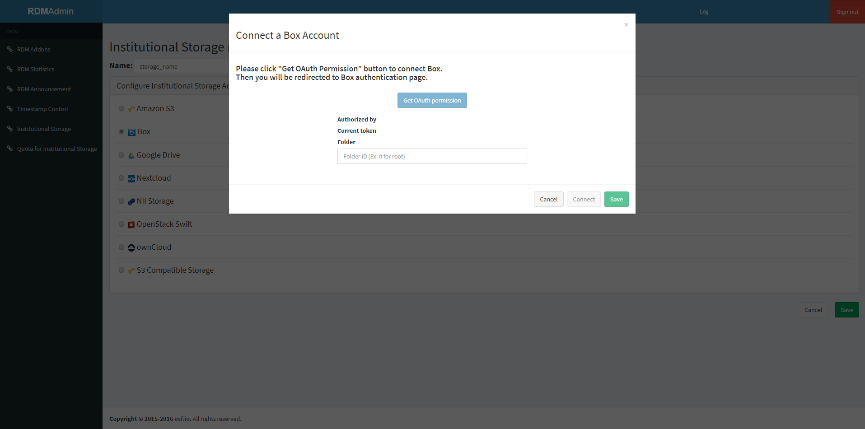
- Enter the target folder ID in the 'Folder' input form.
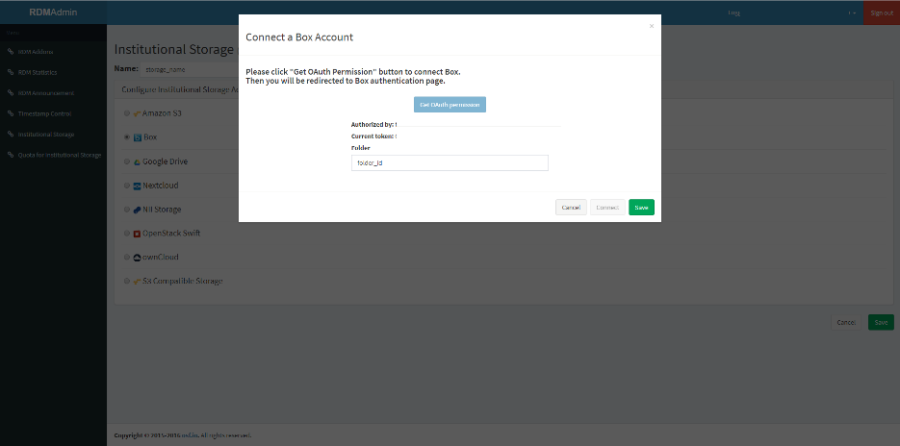
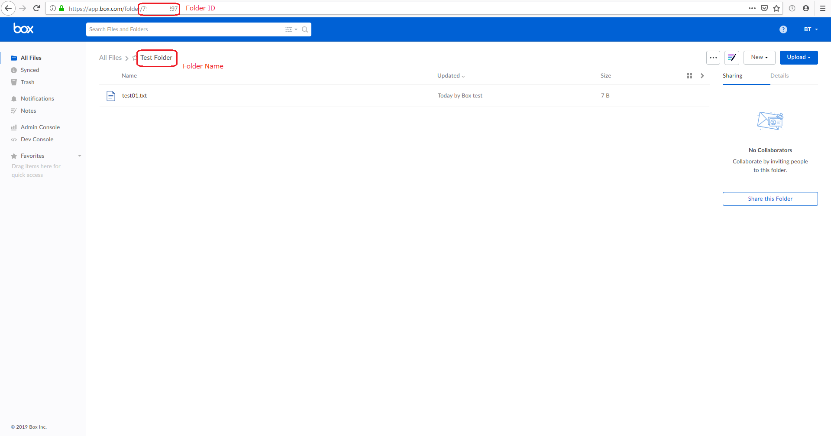
- Please note that the folder ID is a character string included in the URL of the folder, not the folder name.
- Click the 'Save' button to save the institutional storage settings.
Selecting Amazon S3 as institutional storage
 Display
- On the 'Institutional Storage' screen, enter an arbitrary storage name in the 'Name' form, select Amazon S3, and click the 'Save' button.
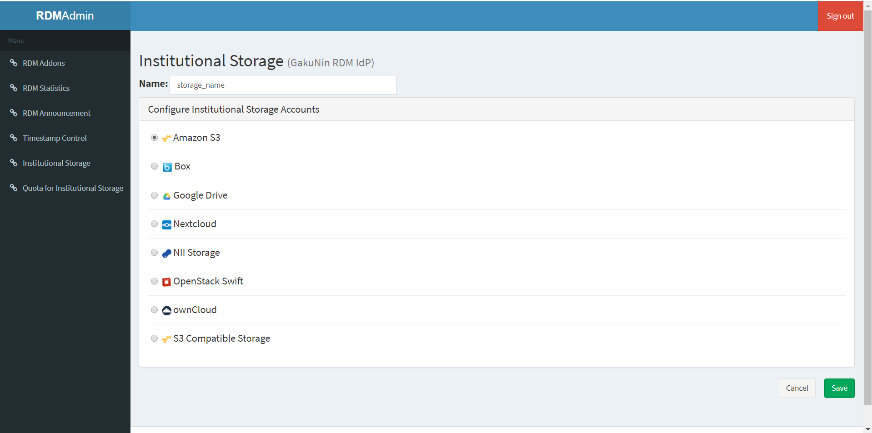
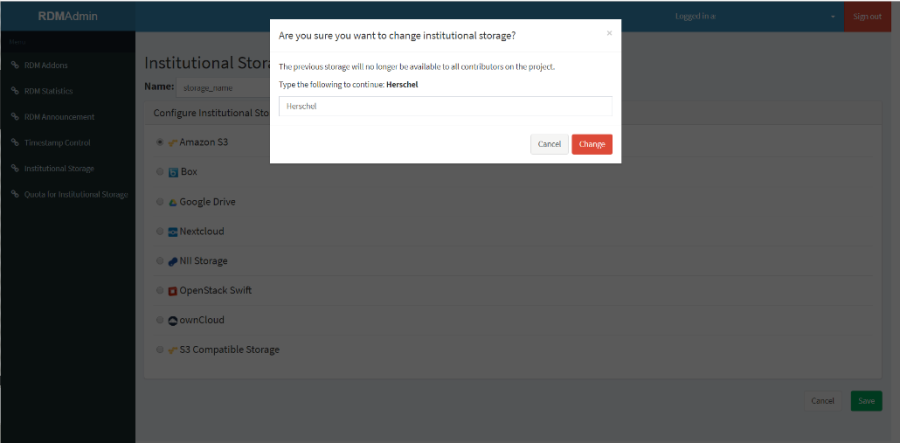
- A confirmation screen will be displayed for changing the institutional storage.
If you agree to the change, enter the character string after 'Type the following to continue:' in the form and click the 'Change' button.
- If you do not agree with the change, you can return to the previous screen by clicking the 'Cancel' button.
- The input screen for authentication and settings information will be displayed. Fill out each form according to the following and click the 'Connect' button to perform a connection test.
- Please note that the 'Connect' button will be inactive until all the items required for connection are entered.
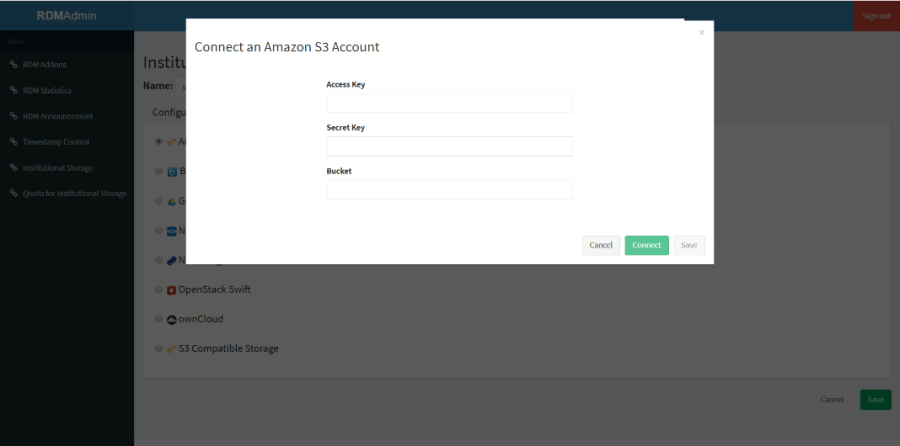
■ Items required for authentication to Amazon S3
Item |
Input Type |
Contents |
Access Key |
text input |
S3 Access Key |
Secret Key |
text input |
S3 Secret Key |
Bucket |
text input |
Target Bucket Name |
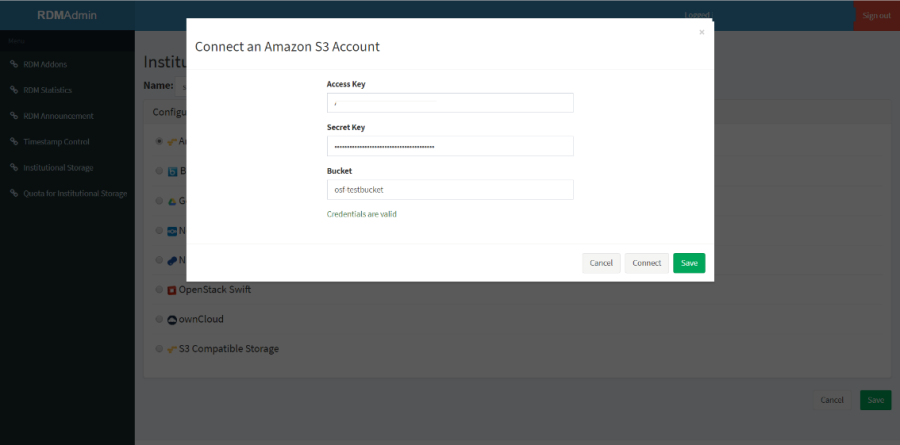
If the connection test is successful, 'Credentials are valid' will be displayed. Then, proceed to step (4).
If the connection test fails, the error content will be displayed. Correct the error and click the 'Connect' button again.
- Click the 'Save' button to save the institutional storage settings.
Selecting S3 Compatible Storage as institutional storage
 Display
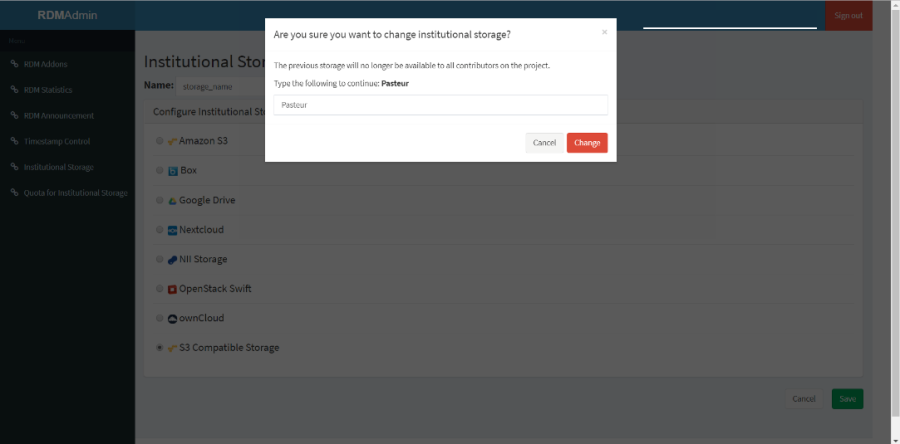
- On the 'Institutional Storage' screen, enter an arbitrary storage name in the 'Name' form, select S3 Compatible Storage, and click the 'Save' button.
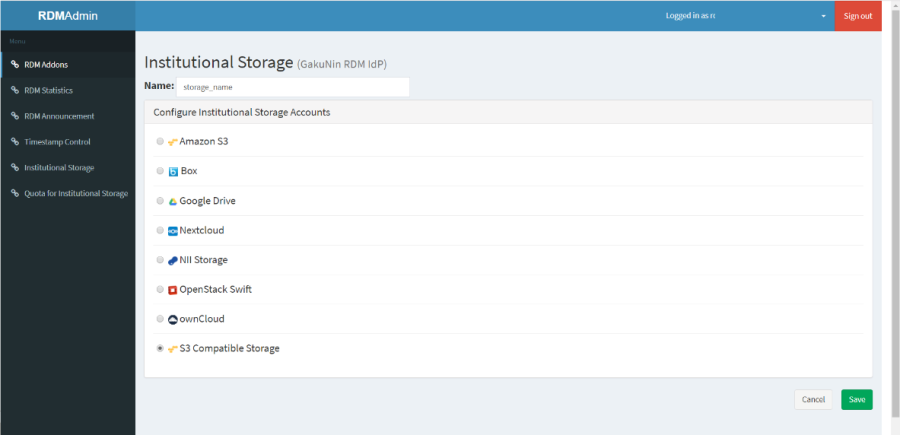
- A confirmation screen will be displayed for changing the institutional storage.
If you agree to the change, enter the character string after 'Type the following to continue:' in the form and click the 'Change' button.
- If you do not agree with the change, you can return to the previous screen by clicking the 'Cancel' button.
- The input screen for authentication and settings information will be displayed. Fill out each form according to the following and click the 'Connect' button to perform a connection test.
- Please note that the 'Connect' button will be inactive until all the items required for connection are entered.
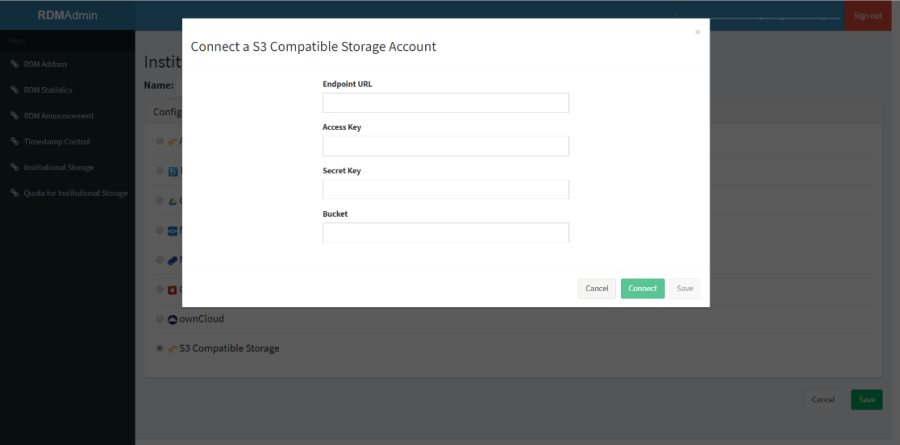
■ Items required for authentication to S3 Compatible Storage
Item |
Input Type |
Contents |
Endpoint URL |
text input |
Endpoint URL (Host Name) |
Access Key |
text input |
S3 Compatible Storage Access key |
Secret Key |
text input |
S3 Compatible Storage Secret key |
Bucket |
text input |
Target Bucket Name |
If the connection test is successful, 'Credentials are valid' will be displayed. Then, proceed to step (4).
If the connection test fails, the error content will be displayed. Correct the error and click the 'Connect' button again.
- Click the 'Save' button to save the institutional storage settings.
