このサイトは https://support.rdm.nii.ac.jp/![]() へ移転しました。
へ移転しました。
ページ履歴
...
| 展開 | |||||||||||||||||||||||||||
|---|---|---|---|---|---|---|---|---|---|---|---|---|---|---|---|---|---|---|---|---|---|---|---|---|---|---|---|
| |||||||||||||||||||||||||||
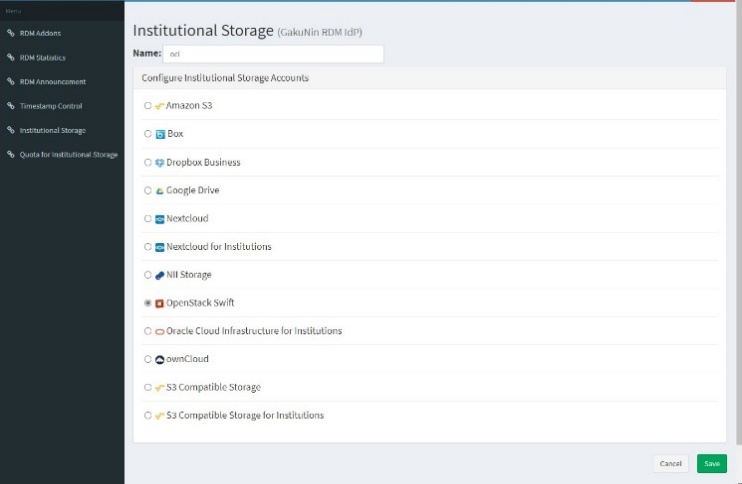
①On the 'Institutional Storage' screen, enter an arbitrary storage name in the 'Name' form, select OpenStack Swift, and click the 'Save' button.
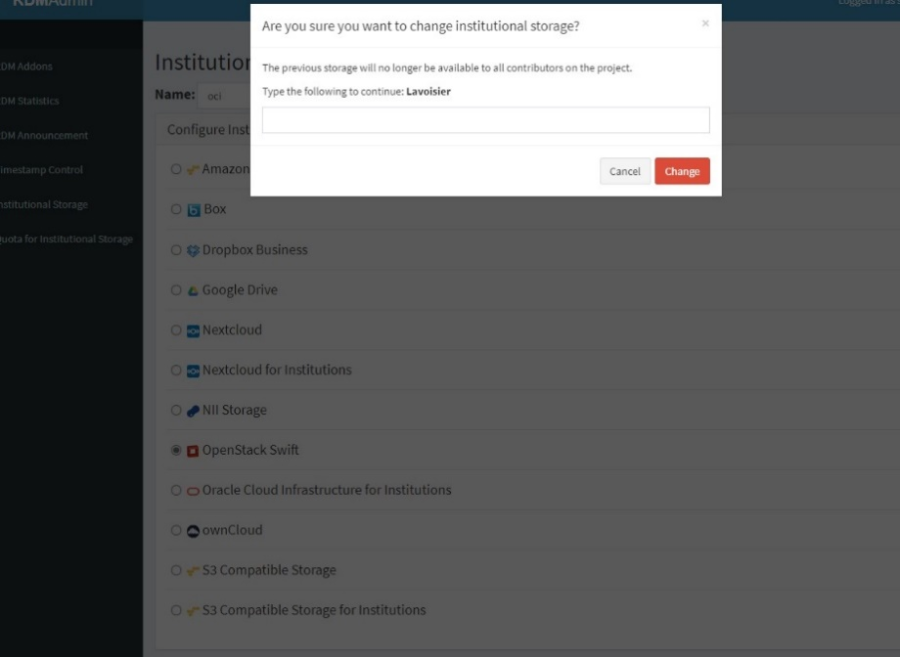
②A confirmation screen will be displayed for changing the institutional storage.
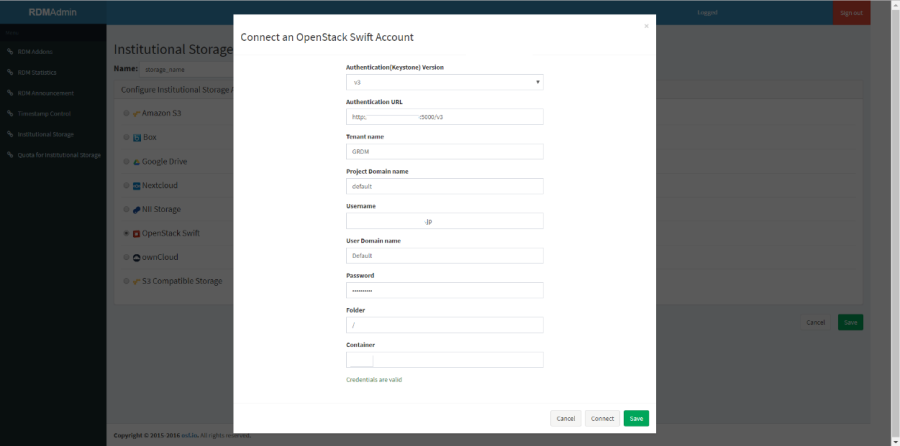
③The input screen for authentication and settings information will be displayed. Fill out each form according to the following and click the 'Connect' button to perform a connection test.
■ Items required for authentication to OpenStack Swift
If the connection test is successful, ‘Credentials are valid’ will be displayed. Then, proceed to step ④. If the connection test fails, ‘Unable to list containers. Listing containers is required permission.’ will be displayed. Please correct the error and click the ‘Connect’ button again. ④Click the 'Save' button to save the institutional storage settings.
|

...
| 展開 | |||||||||||||||
|---|---|---|---|---|---|---|---|---|---|---|---|---|---|---|---|
| |||||||||||||||
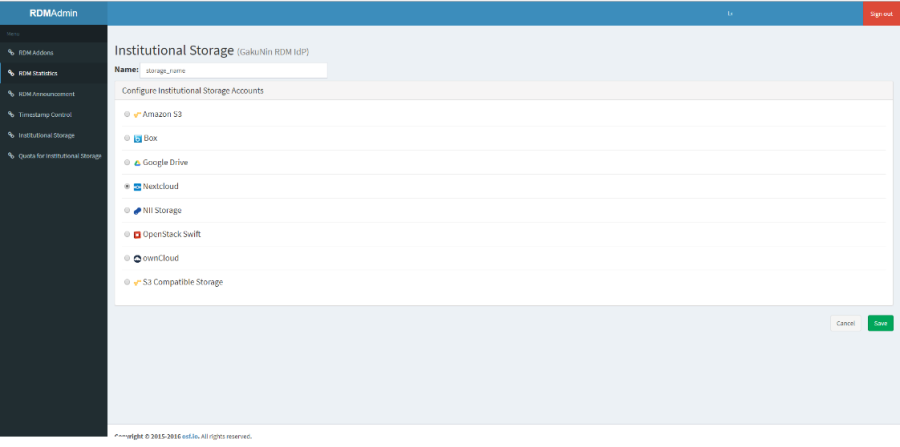
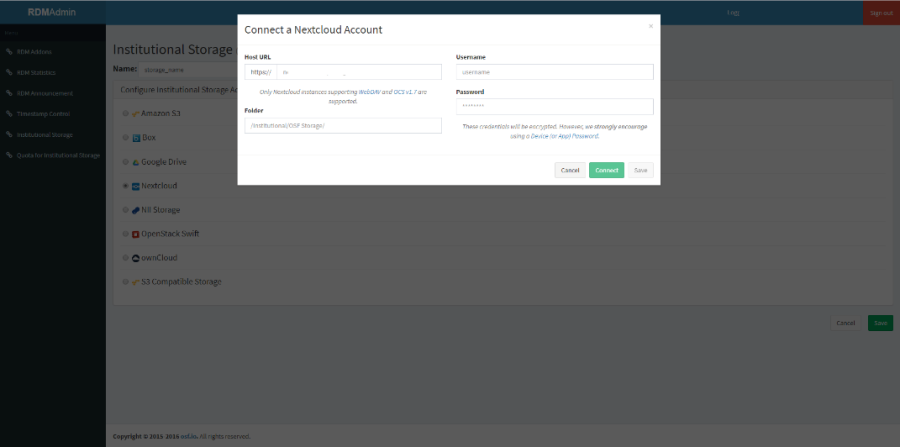
①On the 'Institutional Storage' screen, enter an arbitrary storage name in the 'Name' form, select Nextcloud, and click the 'Save' button.
②A confirmation screen will be displayed for changing the institutional storage.
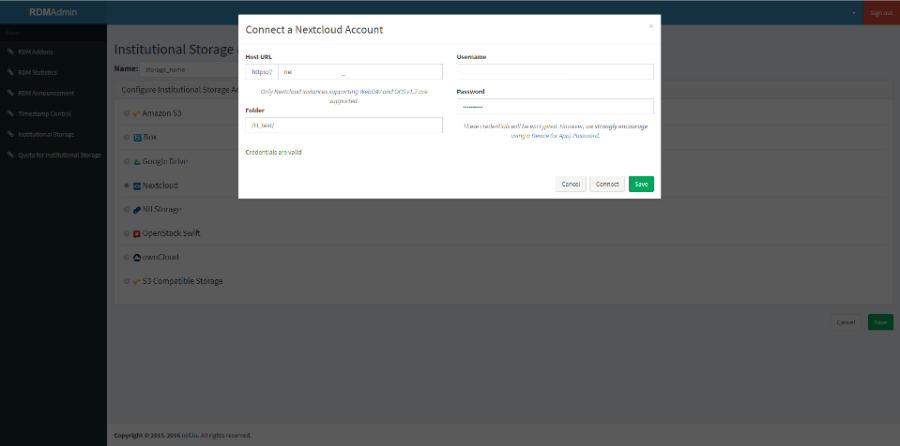
③The input screen for authentication and settings information will be displayed. Fill out each form according to the following and click the 'Connect' button to perform a connection test.
■ Items required for authentication to Nextcloud
If the connection test fails, the error content will be displayed. Correct the error and click the 'Connect' button again. ④Click the 'Save' button to save the institutional storage settings.
|
...
| 展開 | |||||||||||||||
|---|---|---|---|---|---|---|---|---|---|---|---|---|---|---|---|
| |||||||||||||||
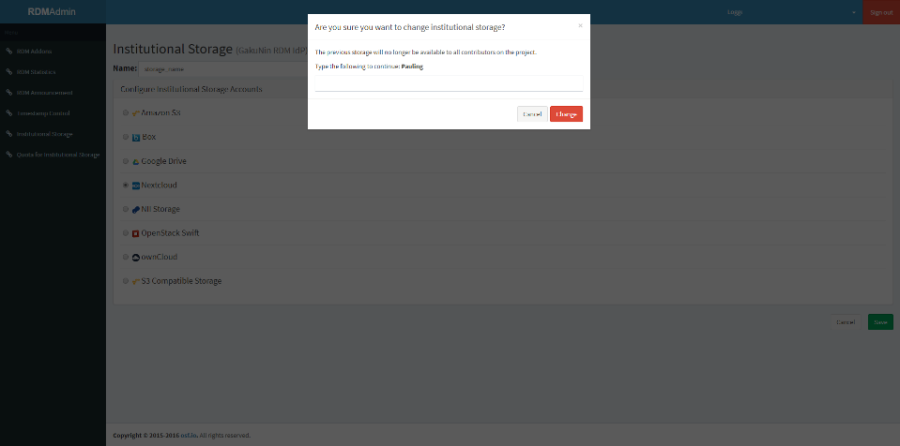
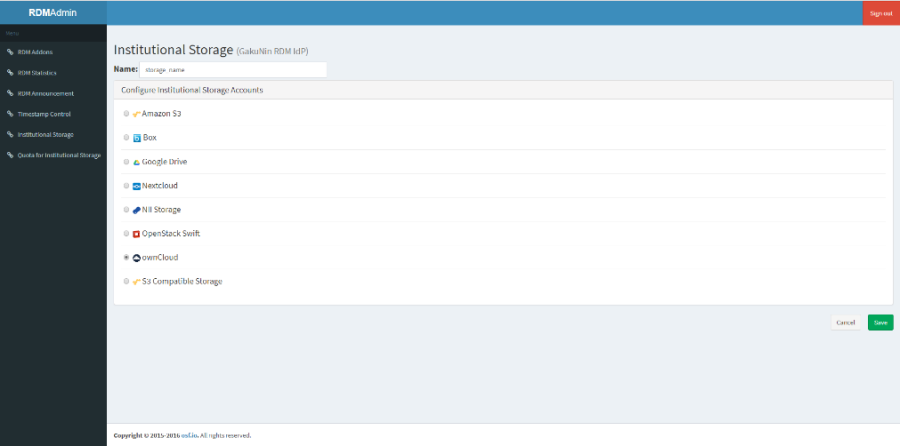
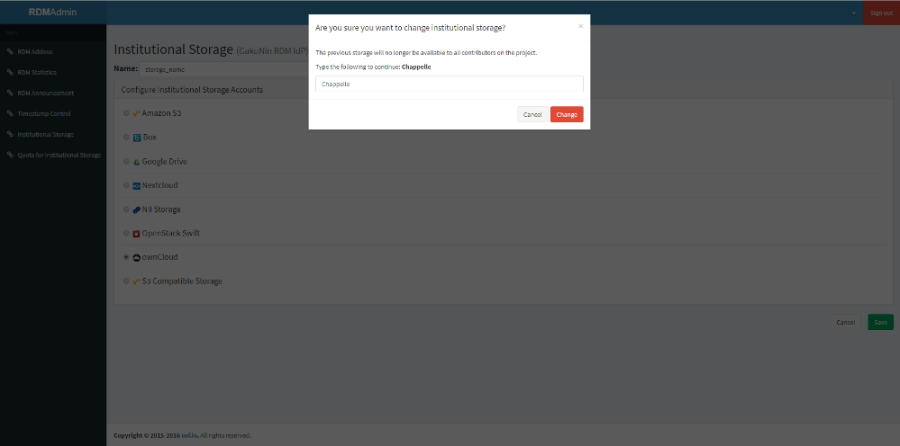
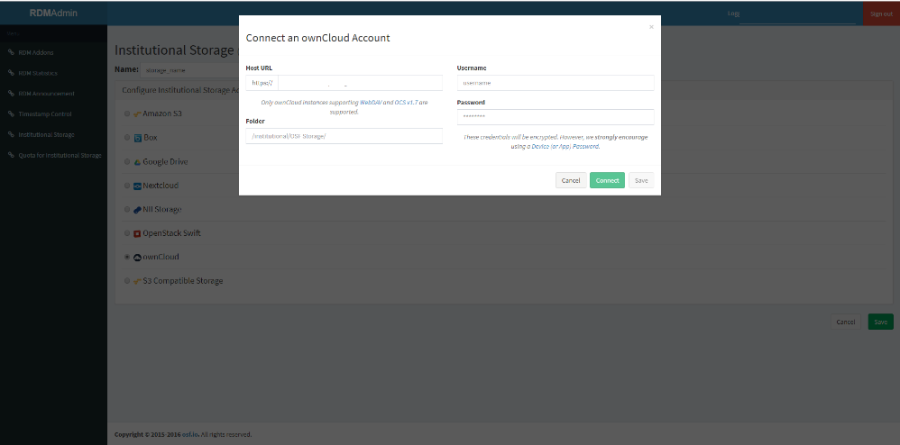
①On the 'Institutional Storage' screen, enter an arbitrary storage name in the 'Name' form, select ownCloud, and click the 'Save' button.
②A confirmation screen will be displayed for changing the institutional storage. If you agree to the change, enter the character string after 'Type the following to continue:' in the form and click the 'Change' button.
③The input screen for authentication and settings information will be displayed. Fill out each form according to the following and click the 'Connect' button to perform a connection test.
■ Items required for authentication to ownCloud
|
...
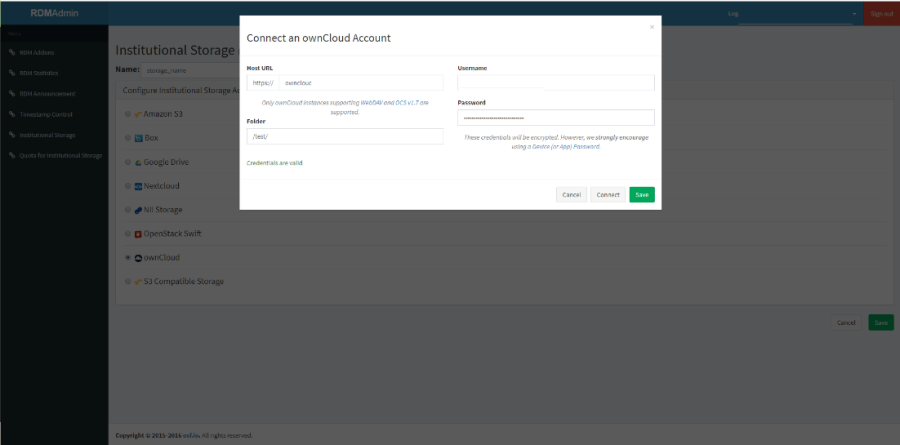
If the connection test is successful, |
...
‘Credentials are |
...
valid’ will be displayed. Then, proceed to step |
...
④. |
...
‘Connect’ button again. Click the 'Save' button to save the institutional storage settings.
|
...
...
(4)Selecting Google Drive as institutional storage
...
- On the 'Institutional Storage' screen, enter an arbitrary storage name in the 'Name' form, select Google Drive, and click the 'Save' button.
...
概要
コンテンツ ツール