このサイトは https://support.rdm.nii.ac.jp/![]() へ移転しました。
へ移転しました。
You can use a wiki as a description space of any research projects or products. You can include lab notes, contact information, or a project’s detailed information on a wiki. Our wiki supports Markdown and MathJax syntaxes.
On a wiki, all members of a team can edit collaboratively. You can also make a wiki publicly open and allow visitors to edit it. Our wiki saves all the edited versions; therefore, you can always go back to the previous versions and compare the contents with the current version.
Opening an Editor
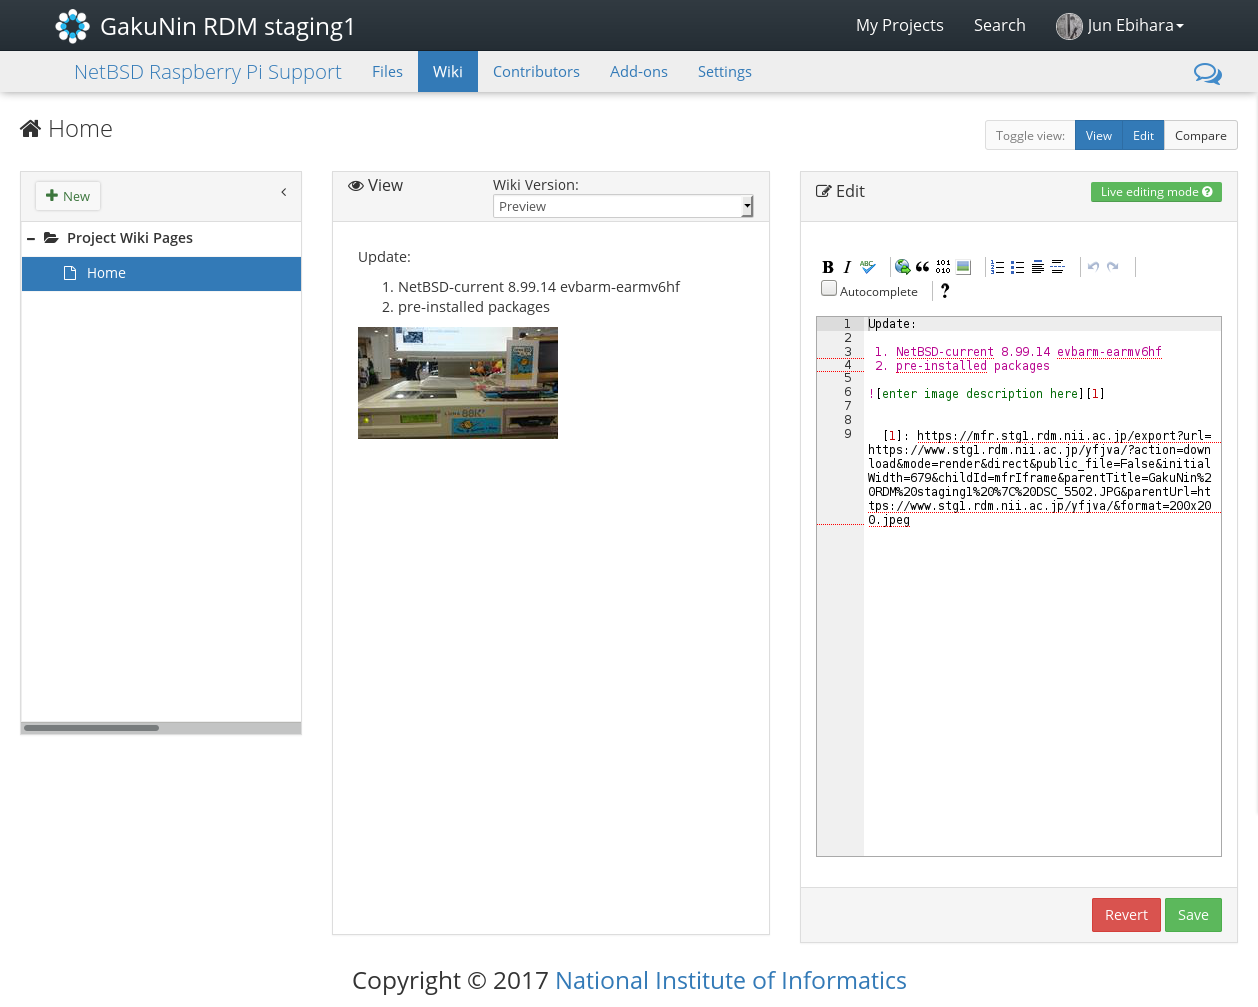
Click ‘Wiki’ in the navigation bar on a project’s main screen, and move to the wiki editing screen.
If the ‘Edit’ button in the upper right corner of the screen is not turned on, turn it on by clicking it; then, the ‘Edit’ pane will appear.
Enter the contents in the ‘Edit’ panel.
By turning on the ‘View’ button in the toolbar, the ‘View’ pane will appear in the centre and the preview version of the entered contents will be displayed.
Formatting Text
Even if you do not understand the Markdown syntax, you can still format a wiki using the toolbar on the ‘Edit’ pane. The available formats are (starting from the left) as follows:
- Bold text
- Italic text
- Inserting a hyperlink
- Inserting a block quote
- Inserting a code sample
- Inserting an image
- Inserting a numbered list
- Inserting a bulleted list
- Inserting a heading
- Inserting a horizontal line
Although the following two buttons are not formatting buttons, they allow you to undo and redo entries. Besides, the third button from the left is not, but you can toggle spellcheck on and off.
By ticking the last box, the auto-complete will be enabled. It calculates the wiki syntax from the entered texts.
Embedding a File
Embedding a File from the NII Storage
Please upload the file to be embedded to the NII Storage in advance.
Open the file to be embedded, and copy the Globally Unique Identifier (GUID) from the file’s URL.
Paste the following GUID syntax on the wiki editor, and embed the file using the following syntax.
@ [osf](GUID)
After embedding the file, click the green ‘Save’ button at the bottom of the ‘Edit’ pane; the change will be saved.
Uploading an Image File from a Local Folder
You can drag-and-drop an image file (or multiple image files) from a local folder to the ‘Edit’ pane.
By clicking the green ‘Save’ button at the bottom of the ‘Edit’ pane, the change will be saved.
Embedding an Image
You need to upload the image to be embedded in a wiki to a project in advance.
For the method of uploading and displaying a file, please refer to ‘Registering a File’ in the user manual.
Click the file name of an image and open the ‘File Detail’ page; right-click on the displayed image and select ‘Copy Image Address’, and copy the image’s URL.
By clicking the ‘Insert Image’ icon in the toolbar on the wiki editor, a modal window will appear.
Paste the copied URL of the image’s address, and click ‘Add’; the image will be embedded in the wiki page.
Click the green ‘Save’ button at the bottom of the ‘Edit’ pane, and save the change.
Adjusting the Size of an Image
When you embed an image in a wiki, a footnote will be added to the Markdown syntax.
In order to change the size of an image, you need to delete the footnote and footnote number at the end of the image description.
Then, add the image’s URL in half-width parentheses at the end of the image description.

In order to specify the size of an image in pixels, add the following syntax after the image’s URL (i.e. ‘n’ is a random pixel size).

In order to fix the size of an image to the page width, add the following syntax after the URL.

In order to set the size of an image to the relative size, use a percentage sign (i.e. ‘n’ is a random percent figure)

Inserting a Link
In order to insert a link in a wiki, click the ‘Insert Hyperlink’ button in the toolbar.
Enter the URL of the site to be linked in the modal window displayed.
Inserting an Anchor
First, add the table of contents using the following syntax.
@[toc](optional_label)
If there is no ‘optional_label’, it will display ‘Table of Contents’ in the text.
Then, use the following syntax and insert an anchor anywhere you wish within a wiki.
## linked text ##
## linked text ##
Embedding a Video from an External Site (e.g. Youtube)
You can embed a video from Youtube, Vimeo, Vine and Prezi in a wiki using a simple Markdown syntax.
For Youtube videos:
@[youtube](https://www.youtube.com/watch?v=NqC2uagJZpw)
For Vimeo videos:
@[vimeo](https://vimeo.com/127891298)
For Vine videos:
@[vine](https://vine.co/v/hApxwH3Uax2/embed)
For Prezi videos:
@[prezi](https://prezi.com/9jcaq4arxj22/communicating-science-to-the-public/#)
Please replace the address with the URL of the video/presentation you wish to embed.
Inserting a Table
Using the Markdown syntax, you can insert a table in a wiki page.
Insert a line feed to each line, and separate cells using a vertical pipe. Please refer to the examples below.
| header cell 1 | header cell 2 |
| ----------- | ----------- |
| row 1 cell 1 | row 1 cell 2 |
| row 2 cell 1 | row 2 cell 2 |
| row 3 cell 1 | row 3 cell 2 |
概要
コンテンツ ツール